A Beginner’s Guide to Building their first Android Application – TUTORIAL

Since the launch of the Android platform in 2008, a lot of developments have made it one of the most actively used operating systems in the world. This has also made a lot more people interested in the world of Android Development. Today will mark the beginning of your journey to build awesome, feature-rich, and easy-to-use android applications. In this tutorial, we’ll be learning the Basics Of Building Android Apps. The best part about this is that it assumes no prior knowledge of Java whatsoever and we will be starting from the ground up.
Table of Contents
What will we build in the Tutorial?
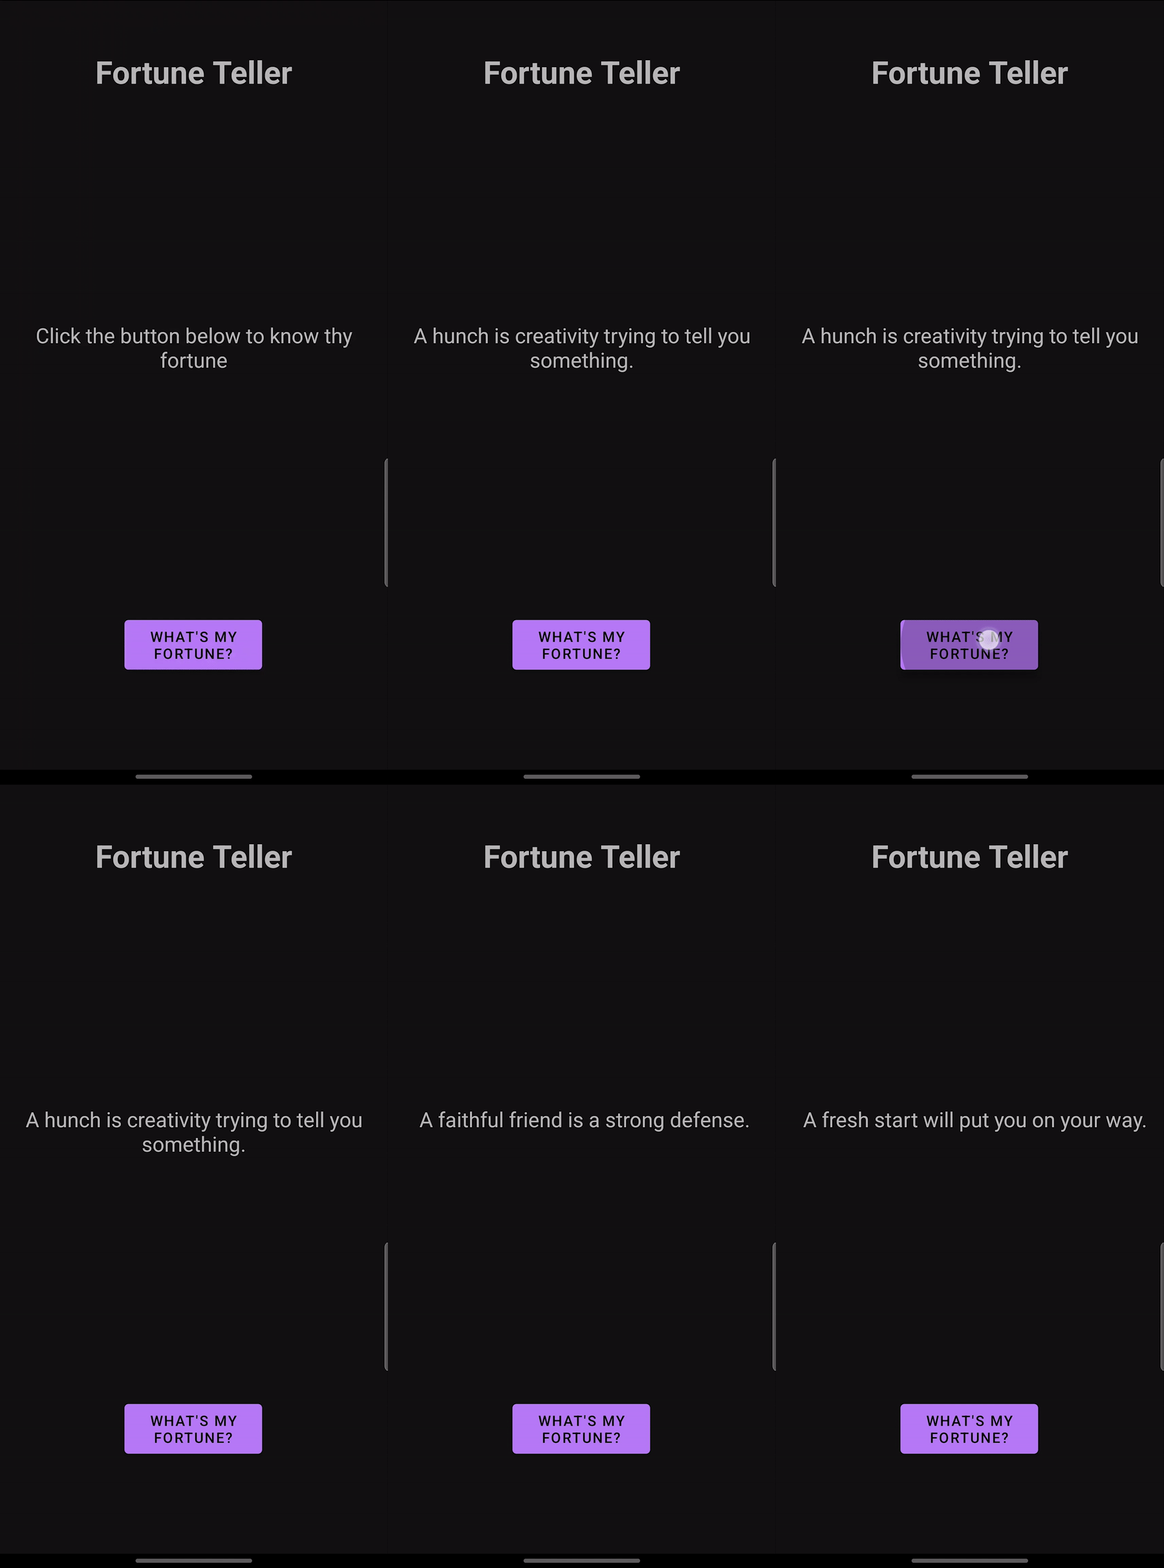
Since this is a tutorial, to grasp the various concepts of Android Development, we’ll be building a simple application as we go on.
The app we’ll be building is called Fortune Teller, it has a button Tell My Fortune that – on clicking, shows a random “fortune” to the user. Here’s a little demo of the application so you can understand the final product better
Part 1: Installing the Required tools for Android Application
Before we get started on the application we will need to install some additional tools
Android Studio

To build android apps, the most used & the “standard” tool according to a lot of people is Android Studio.
Android Studio is the most complete development platform for Android Apps. It has an integrated IDE (with intellisense), Android SDK Manager, the ability to manage/create Virtual Devices ( or Android Emulators ), and a lot more advanced features that make android app development a piece of cake.
- To install Android Studio, visit their official website, https://developer.android.com/studio
- Click on the Download Android Studio button and wait for the installer to finish downloading
- Once the installer is downloaded, open it and choose all the default options that Android Studio provides
Part 2: Setting up the Android Virtual Device
To test the Android Application, even if you can transfer the app and install it on your phone every single time. You will sooner or later realize that it is a tedious process and takes away valuable time that could have been spent working on the actual application. Do not worry as there is a solution for it, and it’s called Emulators.
An emulator is software that is designed to run Another Operating System on our device. Android Studio by default provides us with the required tools to create and run an Android Virtual Device / Android Emulator
To Create an Android Virtual Device ( AVD ), simply go to the home of Android Studio and select Virtual Device Manager
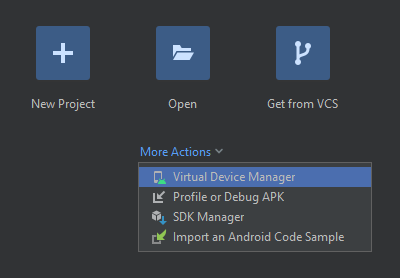
Then, click on Create Device and you should see a bunch of options as shown below
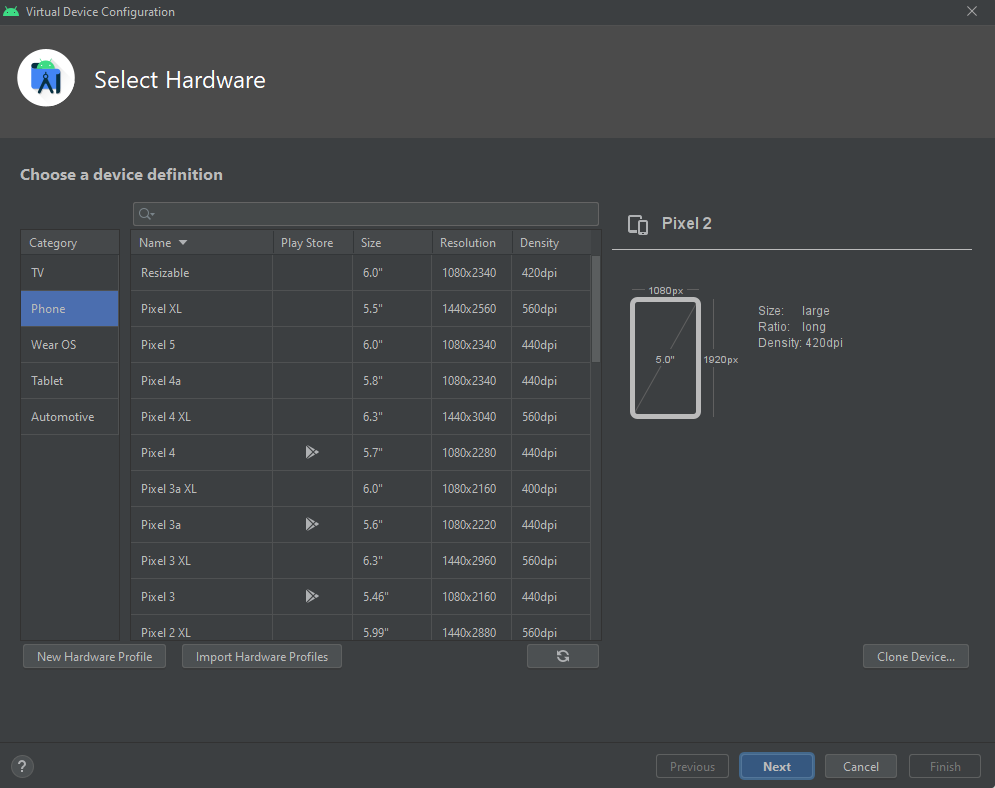

Select the type of Device ( Phone, Tablet, Android TV, Android Watch ) you want to emulate and after selecting the configuration your Virtual Device should be created. To test it simply click on Run and wait for the device to boot
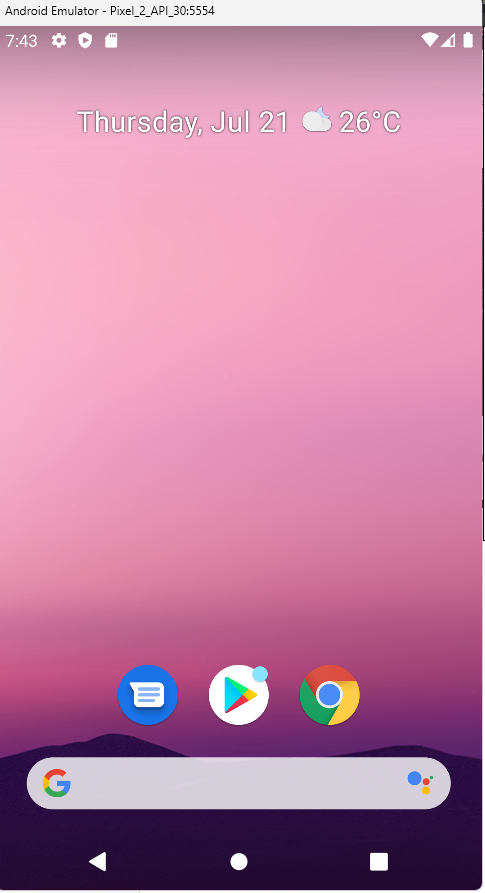
Congrats! Your android emulator is now installed and working!
Part 3: Understanding Android “Views” & “Activity”
Before going on and writing the code for the Android Application, we must take a little step back and try to understand what makes up an android application.
To answer that, any Native Android Application consists of 2 basic parts:
- The Layout/Views
- The Activity
Layout/Views in Android Applications
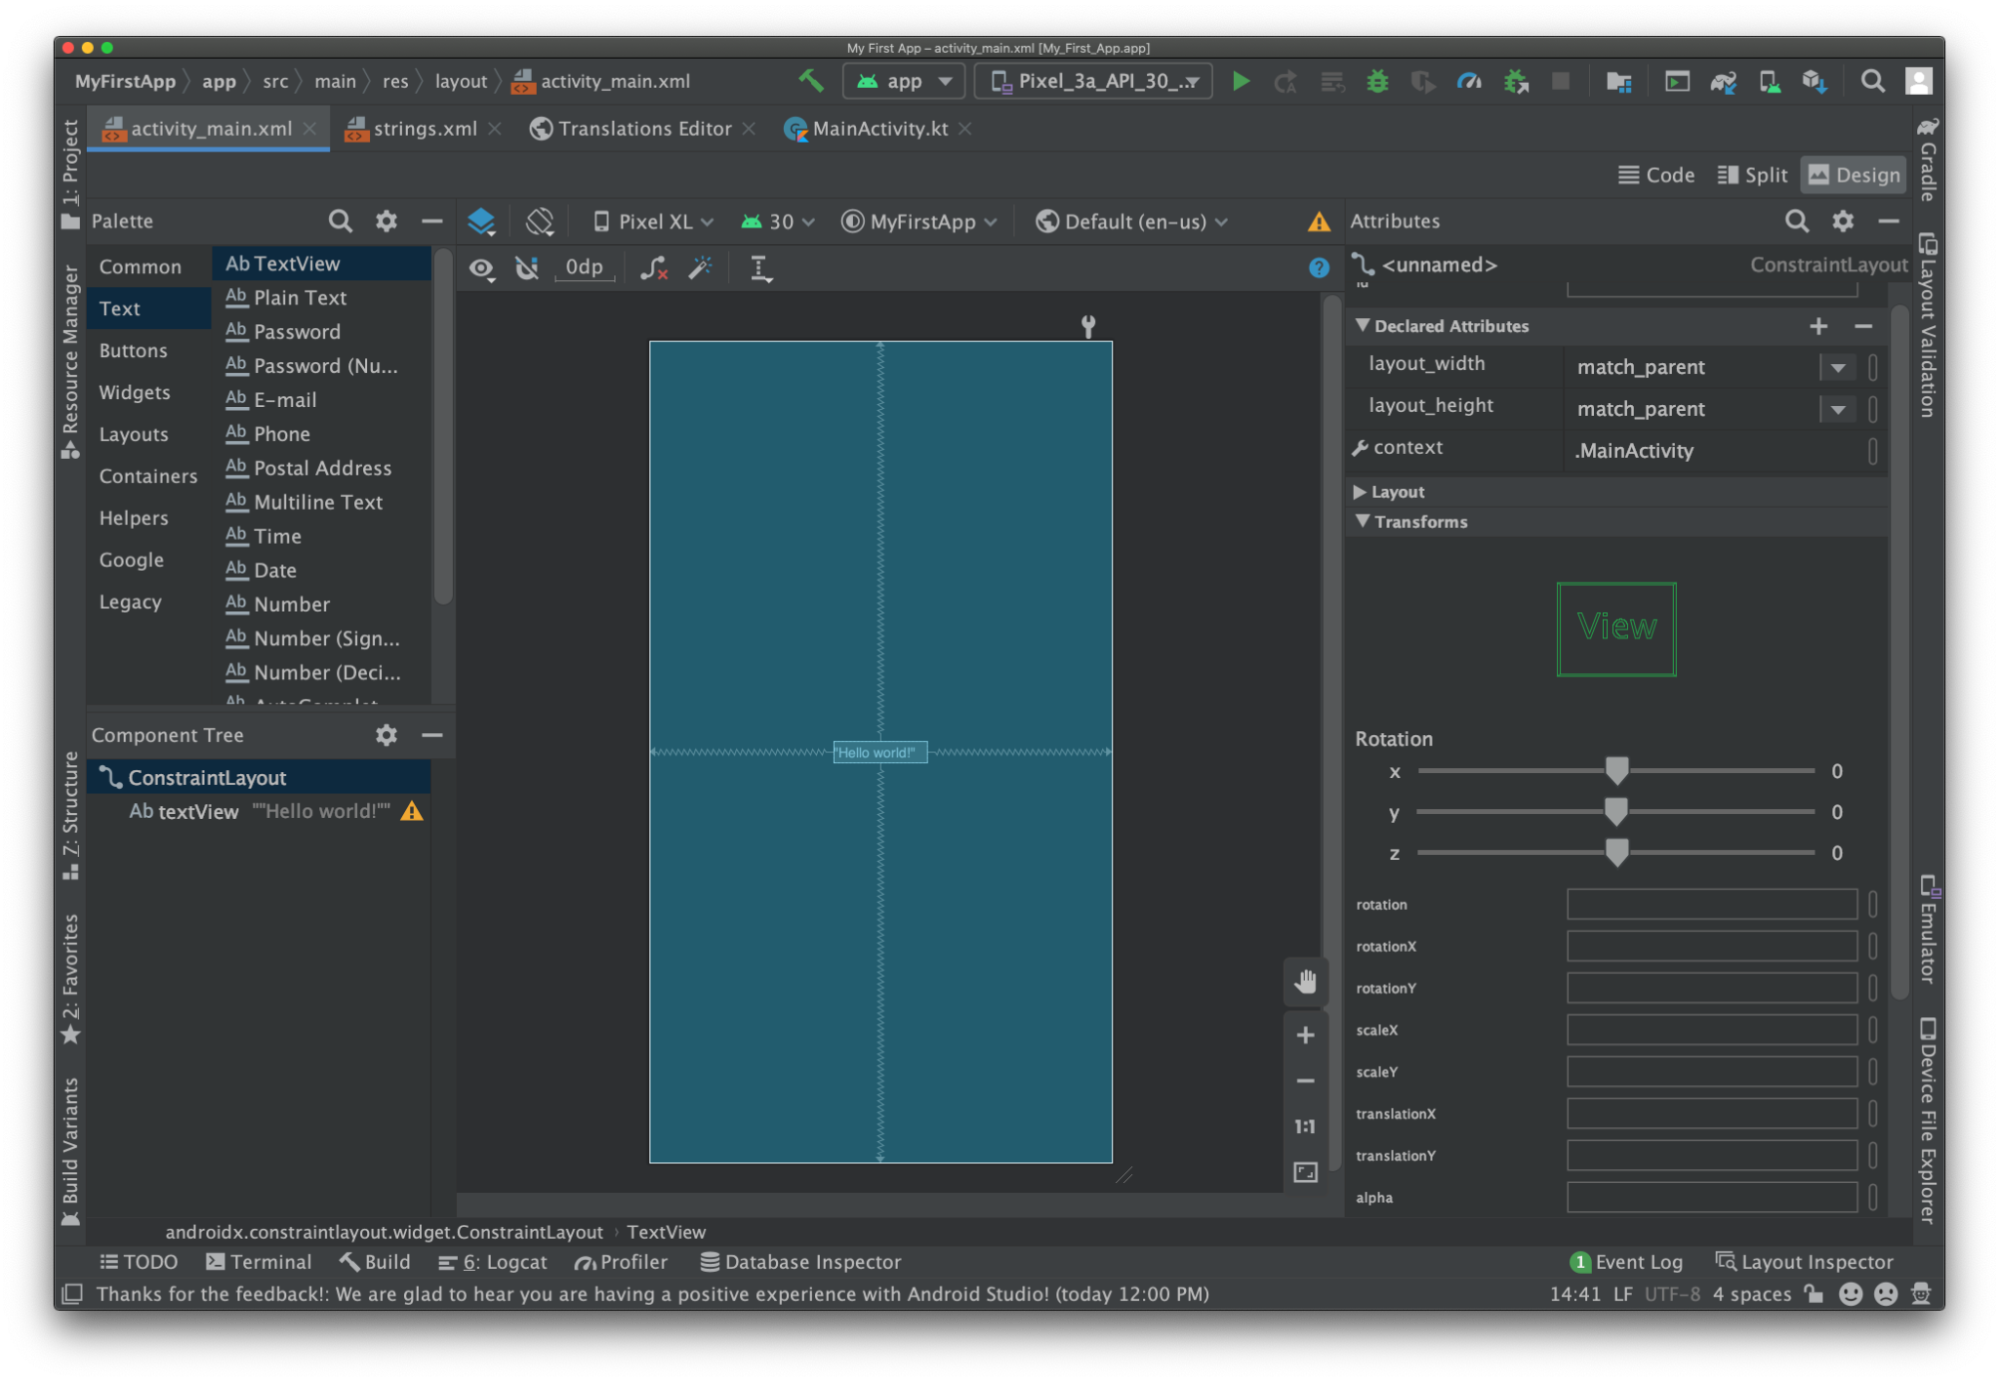
In an Android Application, the Layout is what makes up the User Interface ( UI ) of the app.
A layout consists of multiple Components called Views, which when combined make a Layout of the android application.
To put it simply, Views are the elements that are displayed on the screen ( for instance, Text, Image, Button, etc ) and Layouts help in aligning these elements in order or Laying Them Out.
Here are a few examples of different Views that android supports
- TextView: A small block of Text
- ImageView: As the name suggests, it is a block of an image, that can be resized as per your requirement
- Button: A normal button with some Text on it
And a lot more…hopefully this gives you an idea of what exactly are Android Views. Let’s now have a look at various examples of Android Layouts
- Constraint Layout: This is the default layout of any android app, it allows you to place the views anywhere with the drag-and-drop functionality provided by Android Studio
- Linear Layout: As the name suggests, this layout will neatly arrange all of the views in a Linear Fashion ( whether it be a Row or a Column )
- Table Layout: This should be pretty easy to guess, it arranges all of the Views in a customizable Table-like structure
In Android Studio, layouts are mostly coded in XML Format. But do not worry since we’ll be learning to use the default Design Tool that Android Studio provides for drag&drop designing of the UI
Bonus Tip:
Layouts are also known as ViewGroups in the Android Development world
Activities in an Android Application
We discussed that Views/Layouts make up the User Interface ( UI ) part of the application. To make the App interactive ( for eg. responding to button clicks, showing animations, and a lot more ) we require some additional functionality.
This is where Activities come in. In an Android Application, the Activity is constantly being run in the background and is responsible for responding to User Interactions, and has the power to Update The UI anytime. By default, every android application has only one activity called the MainActivity
Activity is usually written in Java or Kotlin but in this tutorial, we’ll be focusing on writing the Activity using Java.
Comparison of Android App with Web Application
If you’ve worked on Web Apps before, a good way to understand Layout/Views and Activities would be to compare them with HTML/CSS and JavaScript
In the web development world
- Layout/View is just a combination of HTML + CSS
- Activity is just like JavaScript, as it helps to make the page interactive and has the power to Change the UI
Part 4: Setting up the Project in Android Studio
Now that we have understood what Views & Activities are, it’s time for us to set up the project on Android Studio.
To do that,
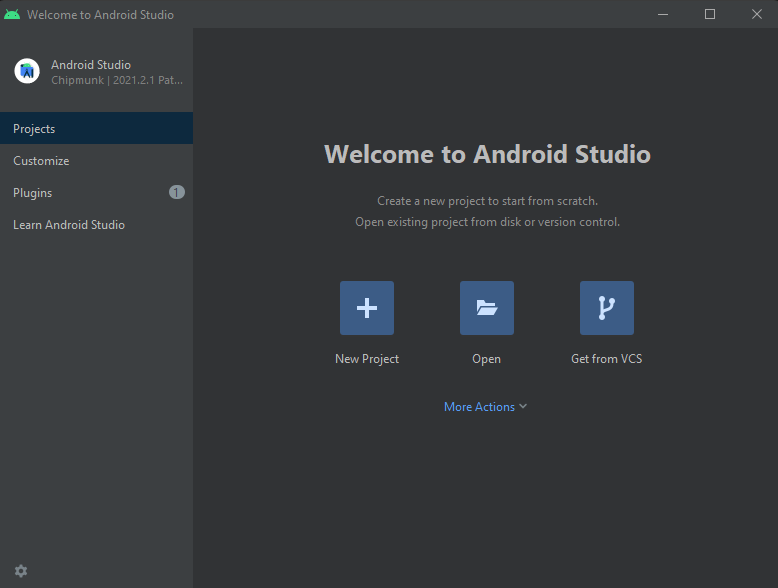
- Open Android Studio and click on the New Project button as shown below
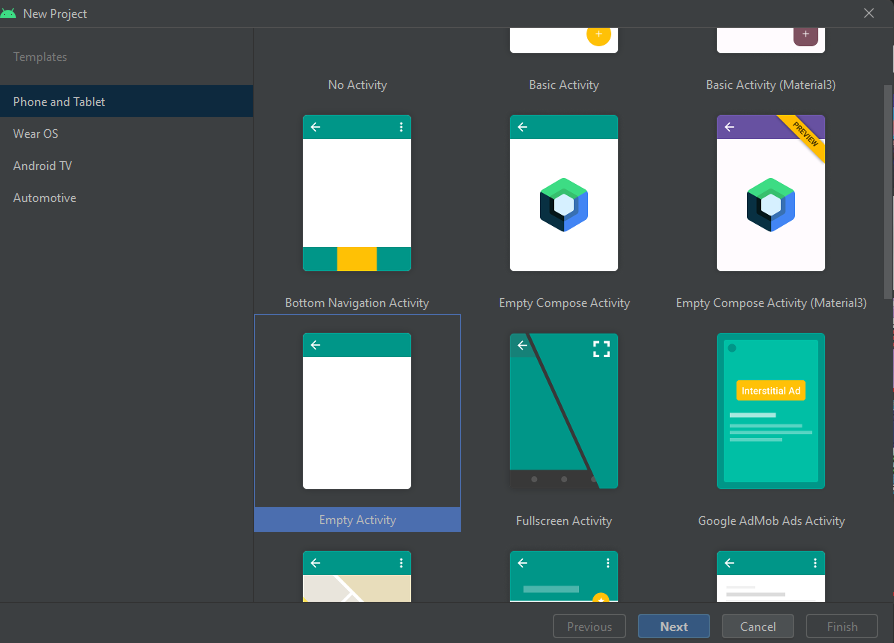
- It will then prompt you to choose a pre-built Activity for the app, since the goal is to learn more, we will be choosing Empty Activity to build the app entirely from scratch
- You will then be prompted with another form that will ask you to fill in the app details such as App Name, Package Name, Project Location, Language, etc.
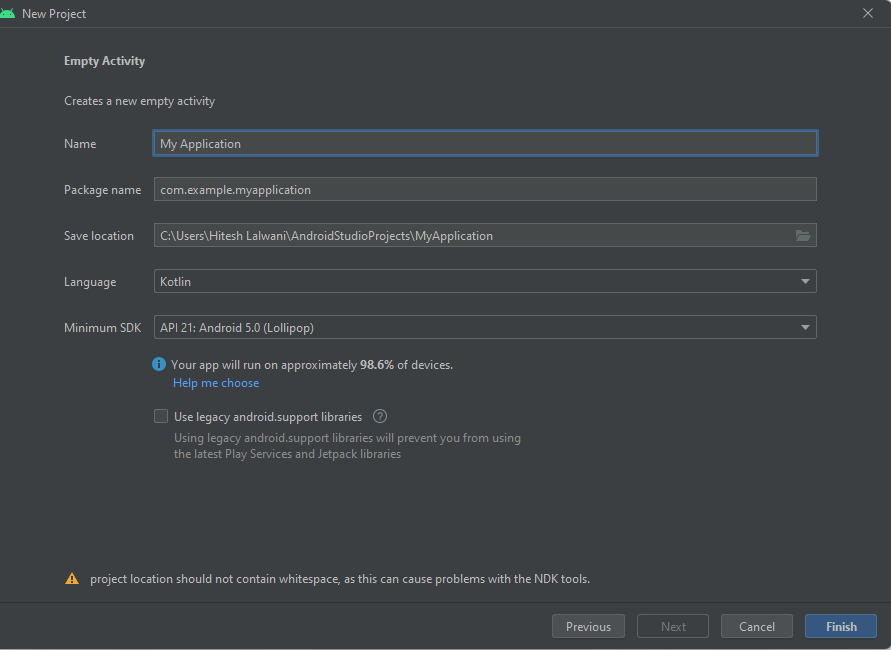
- The only thing we need to change in the above form is the Name, Package Name, and Language.
- Choose the name & project name fields according to your preference, but for Language, make sure to select Java since we already discussed that the application will be built in Java
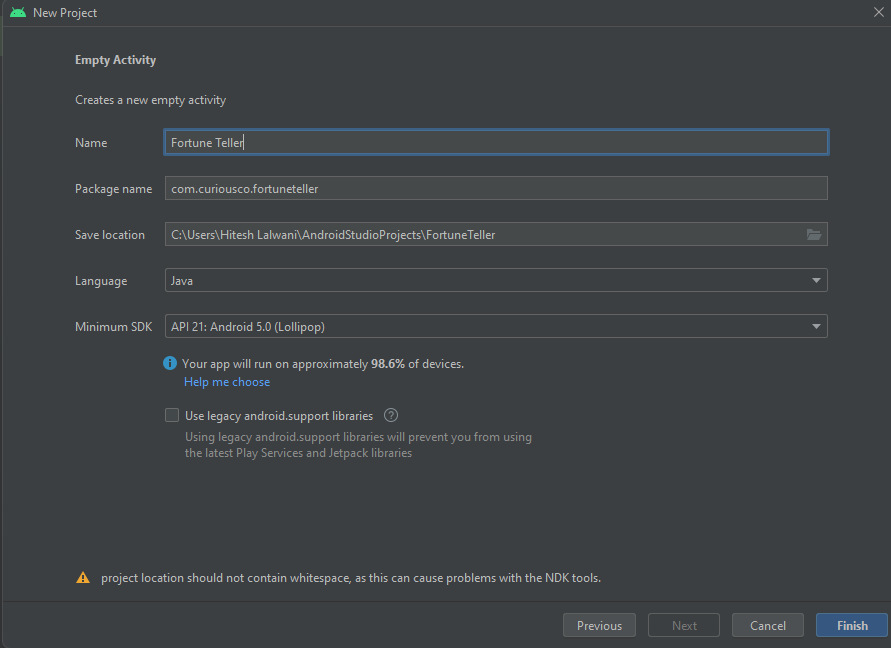
- Click on Finish to finish creating the Android Studio project
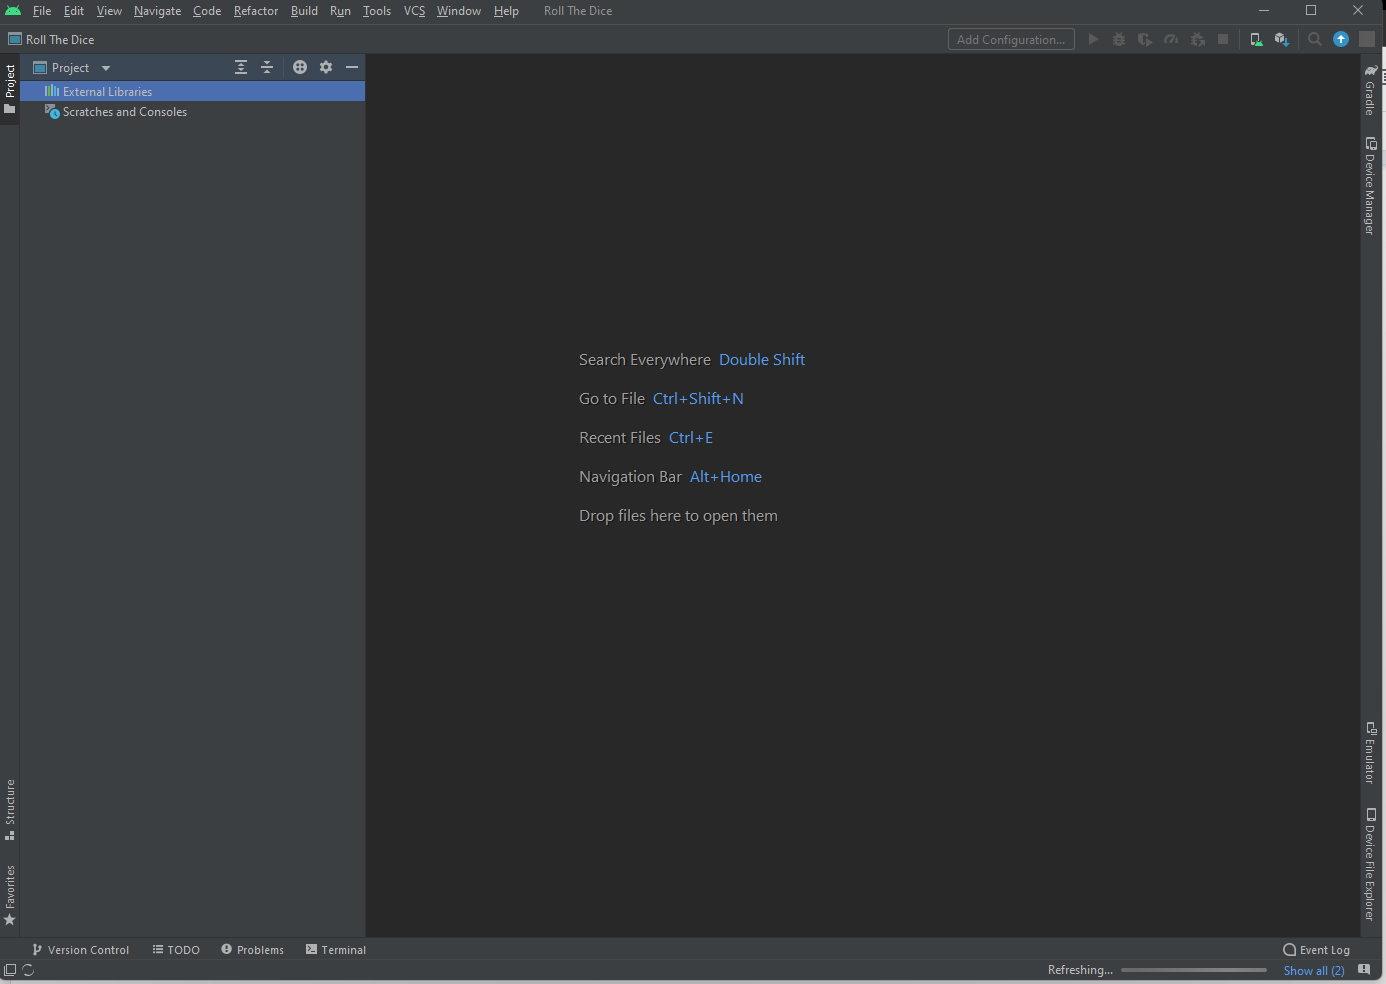
- Wait for a few minutes until the Project is done creating. You will then see all of the project files and the two main files activity_main.xml ( The layout ) and MainActivtiy.java ( The activity ) files should already be opened for you

Part 5: Working on the Layout of the Android Application
Understanding the Android Studio Layout Editor
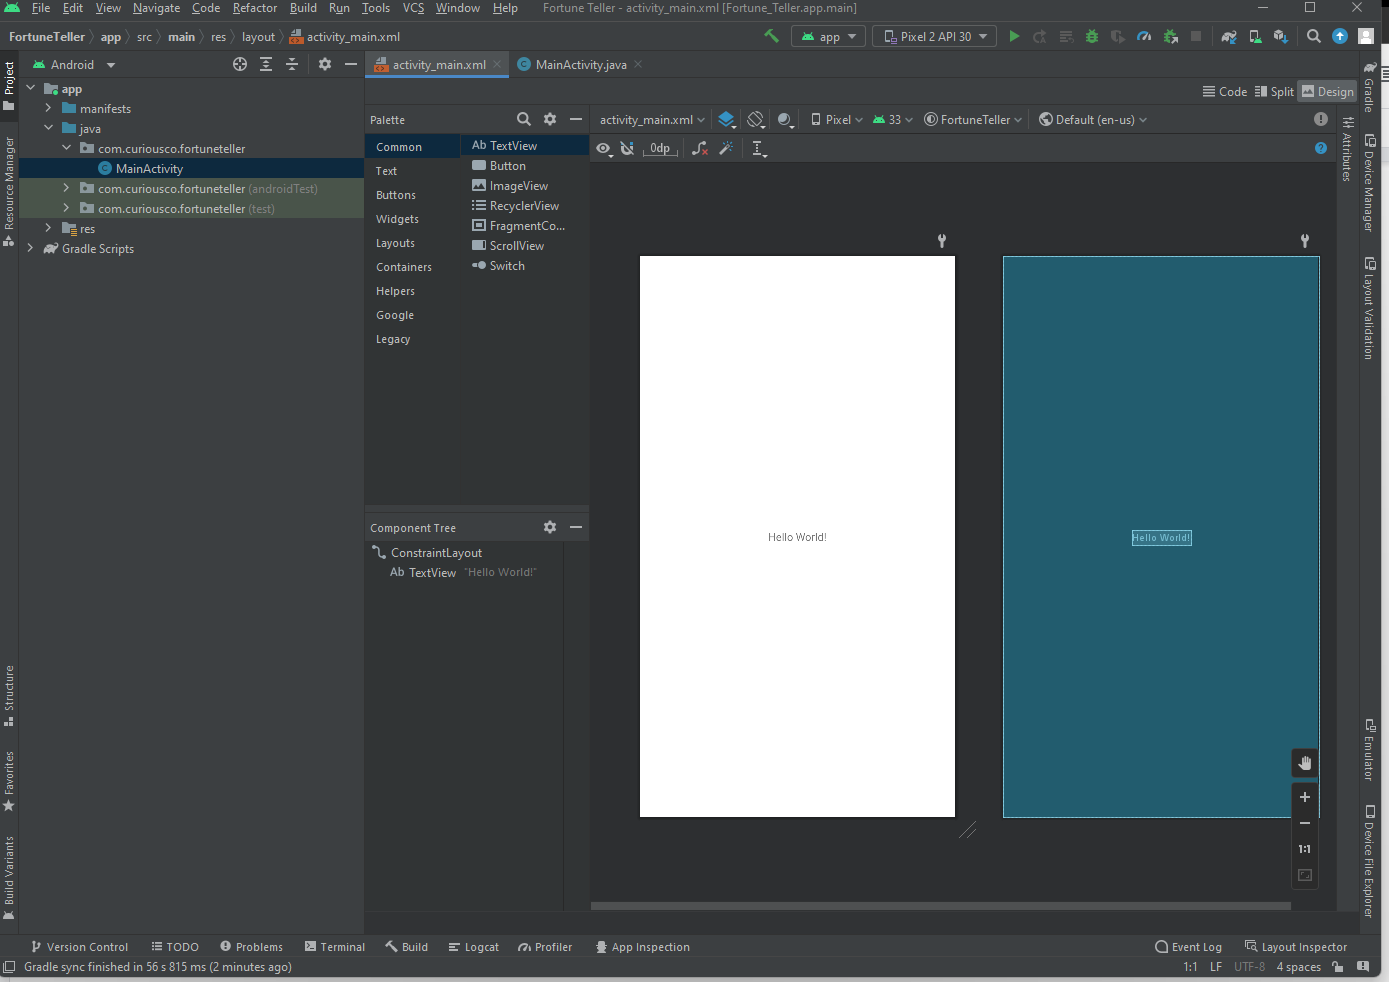
After creating the Android Studio project, the next step is to Create the Layout, to do so open the design tab under the activity_main.xml file and you should see the following screen
Let us try to understand the process of Using the Android Studio Design Tool.
On the left pane, you should see two sections
- Palette: This lets you choose the Views ( text, image, button, etc ) to add to the screen. To add an item from the palette to the screen, simply drag the icon from the palette to the screen
- Component Tree: This is an additional feature that represents all of the Views in a neatly organized tree format for better understanding & debugging
- To add a view to the screen, select it from the palette and drag it onto the screen
- To remove a view from the screen, click on it and then press backspace
- To align a view concerning the parent view, use the 6 circles/dots visible while clicking on the view
Building the Layout for Android App
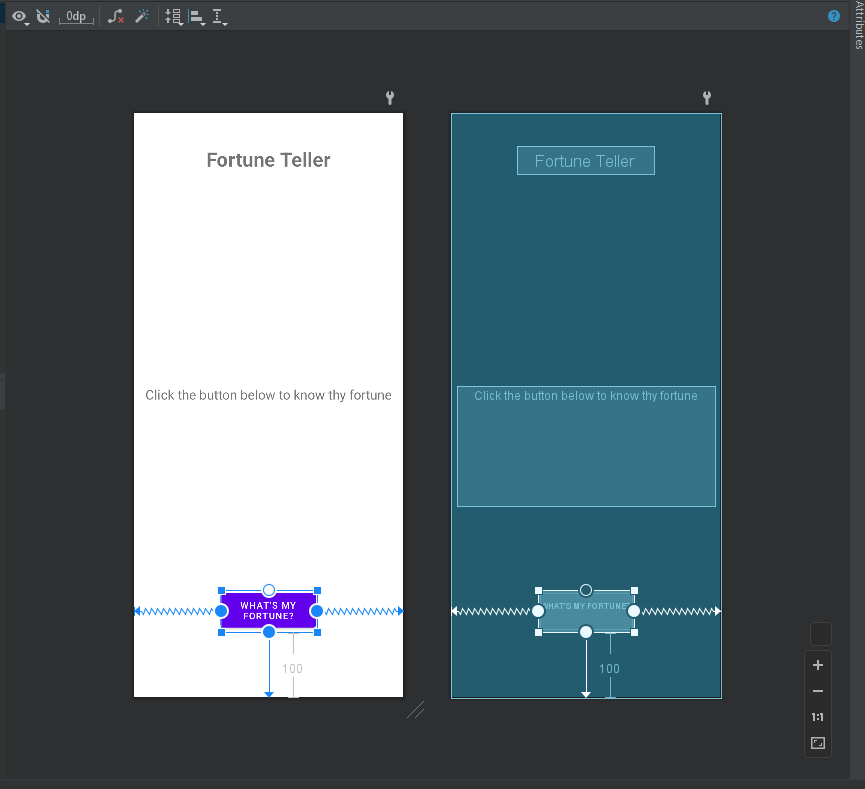
Now, have a look at the final application above, and try to guess exactly how many views we need for this app. And you would be right, the answer is – 3 views.
- Fortune Teller Heading
- A small Text Box that displays the current fortune
- A button for displaying the fortune
We’ll be guiding you through making the first view – Fortune Teller Heading and you’ll have to ( for the sake of better understanding & retention ) try the remaining 2 views on your own. ( Solutions will be provided )
To create the Fortune Teller heading,
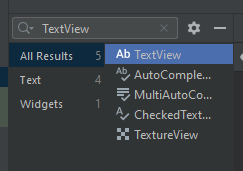
- Search for TextView in the palette and drag it onto the screen
- Click on the TextView that you just dragged and on the right side you should see a section called Common Attributes, this contains all of the Preferences/Attributes for the dragged TextView
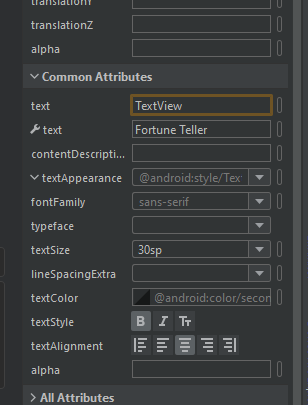
- In this section, properties such as Text Content, Text Size, Style, Alignment, appearance, and a lot more can be changed
- Choose the options according to your preference and you should now see the customized Fortune Teller heading being displayed on the screen.
Similarly, you can create a Button and the Fortune Text sections using the following preferences
Button
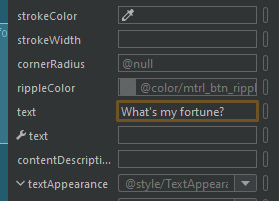
Fortune Text
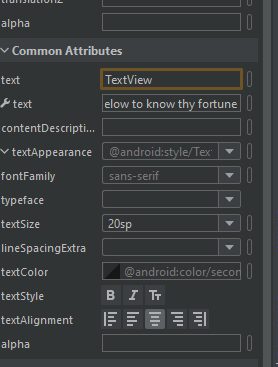
After adding the above Views and arranging them properly, it should result in a layout similar to the one shown below
Adding IDs to the Views of Layout
For the Activity to be able to access the Views in the app, we have to assign unique IDs to them, ( they can be any English word that represents the view )
To add an ID to the view,
- Click on it and open the Attributes Page as shown below
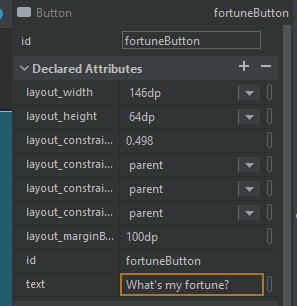
- There you will find an entry for id, simply fill this field for all 3 views and remember the IDs as we’ll be needing them later on while working on the Activity
Part 6: Working on the MainActivity of the Android App
Now that the Layout part is done, it is finally time for us to make the app more interactive using Activities or to be more precise – the MainActivity
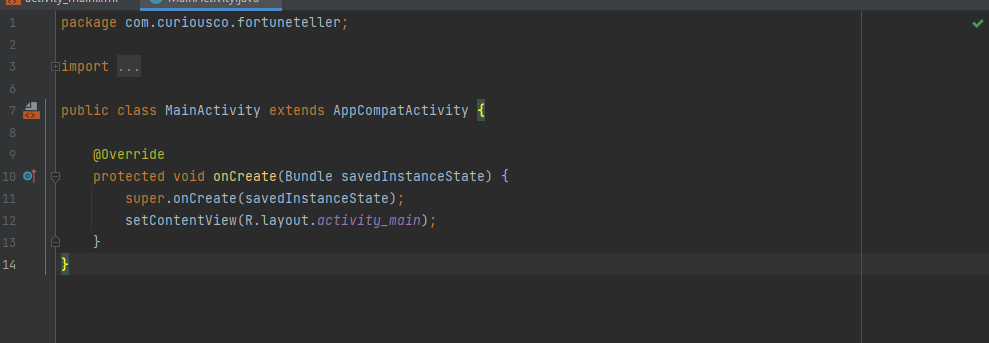
For now, if you open the MainActivity.java you will find the following code placed in there by default
package com.curiousco.fortuneteller;

import androidx.appcompat.app.AppCompatActivity;

import android.os.Bundle;

public class MainActivity extends AppCompatActivity {

    @Override
    protected void onCreate(Bundle savedInstanceState) {
        super.onCreate(savedInstanceState);
        setContentView(R.layout.activity_main);
    }
}
Let’s try to understand the above code step-by-step
- Firstly we define the package name of the android application using package <package name>;
- In the next few lines, we make necessary imports of external files for the MainActivity
- If you know anything about Java, you’ll know that everything in Java is a Class. That’s why in the next line we create a MainActivity class and define a method onCreate() inside it
- The function onCreate() is run only once and that too, only when the Activity is Started for the first time
- Inside onCreate() the first thing we do is to set the content on the screen as activity_main.xml and to do that we use the setContentView() function and pass activity_main as a parameter to it so that the XML file is displayed onto the screen
Before moving ahead and writing some more code, let’s discuss how the logic of MainActivity will work.
- We first create an Array of Strings that consists of All Possible Fortunes
- Then, the button is set up in such a way that as soon as it is clicked, a random element is selected from the Array and the TextView is updated accordingly
To get a few ideas for fortunes you can visit the following website
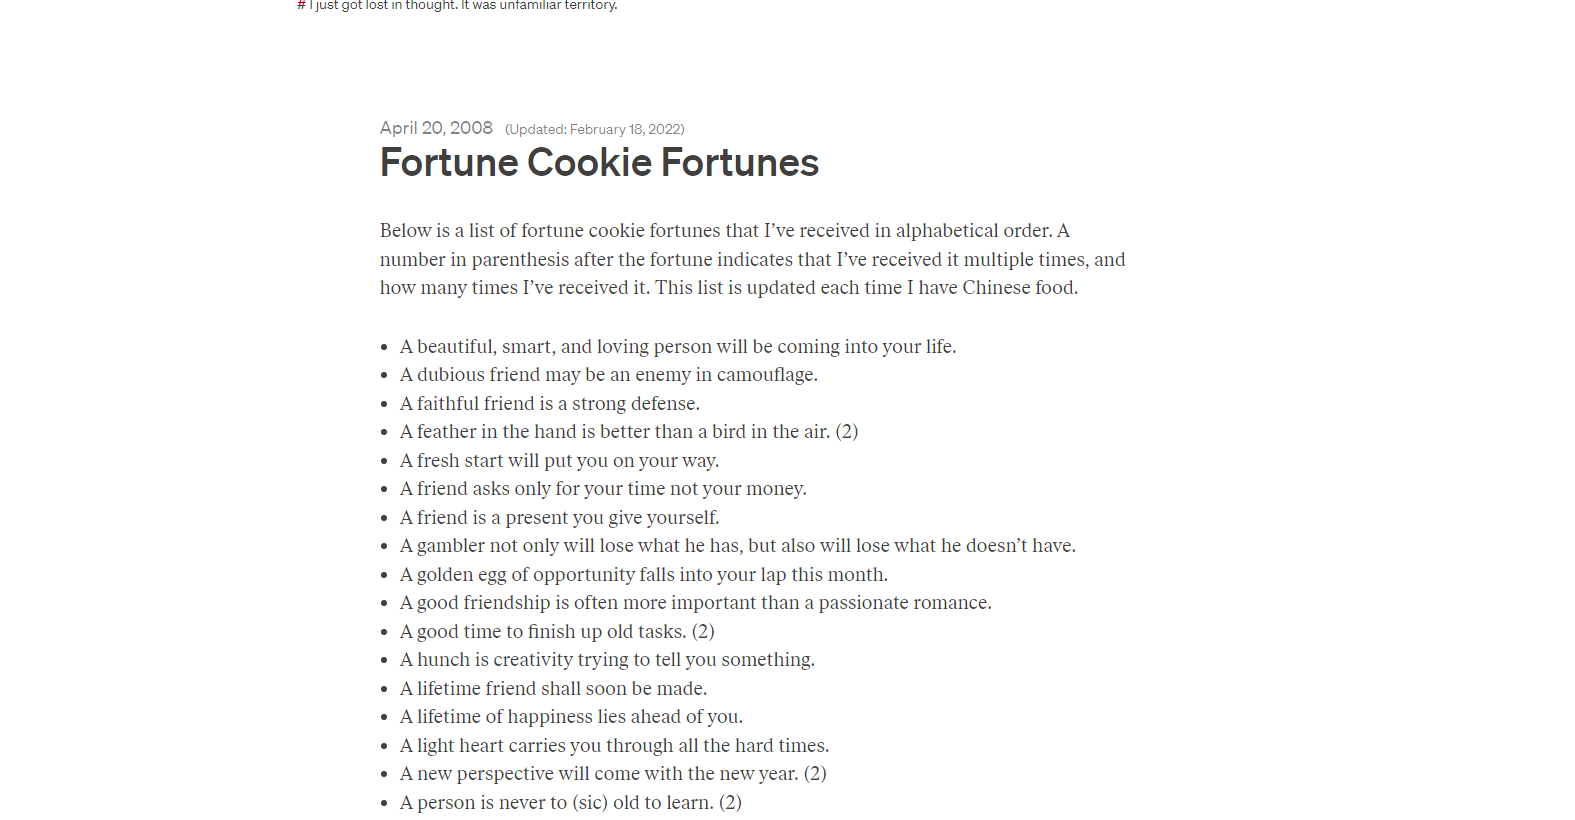
Select the fortunes you like and make a String Array out of them as shown below
String[] possibleFortunes = new String[]{"A beautiful, smart, and loving person will be coming into your life.",
              "  A dubious friend may be an enemy in camouflage.",
               " A faithful friend is a strong defense.",
            "    A feather in the hand is better than a bird in the air.",
              "  A fresh start will put you on your way.",
               " A friend asks only for your time not your money.",
               " A friend is a present you give yourself.",
            "    A gambler not only will lose what he has, but also will lose what he does not have.",
     "   A golden egg of opportunity falls into your lap this month.",
         "       A good friendship is often more important than a passionate romance.",
        "A good time to finish up old tasks",
        "A hunch is creativity trying to tell you something."};
Then, to perform the second step we first need to Get The Views( Button, TextView) from Layout and store them in Variables so that it is easier to perform operations on them
TextView fortuneText = findViewById(R.id.fortuneTextView);
Button fortuneButton = findViewById(R.id.fortuneButton);
Here, to get the Views from the Layout we use the findViewById() method provided, and inside it, we pass in the ID of the View ( Recall that in the previous section, we created ids for all of the views )
Now that we have fortuneText and fortuneButton views as Java Variables, we can implement the logic discussed above.
To do that, we add the following code
   fortuneButton.setOnClickListener(new View.OnClickListener() {
            @Override
            public void onClick(View view) {
                Random r=new Random();
                int randomIndex =r.nextInt(possibleFortunes.length);
            String randomlyChosenText = possibleFortunes[randomIndex];
            fortuneText.setText(randomlyChosenText);
            }
        });
Let us again, try to understand the code by breaking it down Step-by-step
- Firstly, we add an onClickListener to the fortuneButton by using the .setOnClickListener() method that takes in a View.OnClickListener() as a parameter
- This View.onClickListener() is a Class which in-turn has another method called onClick()
- To keep things simple, the only thing we need to know is – As soon as the button is clicked, the code inside onClick() function is executed
Now, let’s have a look inside the onClick() function:
- The first thing that we do is generate a randomIndex between 0 – length of the array using the Random() function provided by Java
- Then, using the Random Index, we get the Random Element from the array and store it inside another variable randomlyChosenText
- Now we edit the fortuneText view using the .setText() method that takes in only one parameter, the New Text that should be shown on the screen.
Save the file and your app should now be completely working!
To check whether everything is working correctly, we will Run The App on Emulator using the Green Play button present in the top-right corner.

Part 7: Building and Exporting the APK
After checking the app on the emulator and making sure that everything is working as intended, it’s now time to Build the App and export it as an APK file to publish it on platforms such as Google Play Store
To build an Android Studio Project click on Build -> Build Bundles/APK -> Build APK as shown below
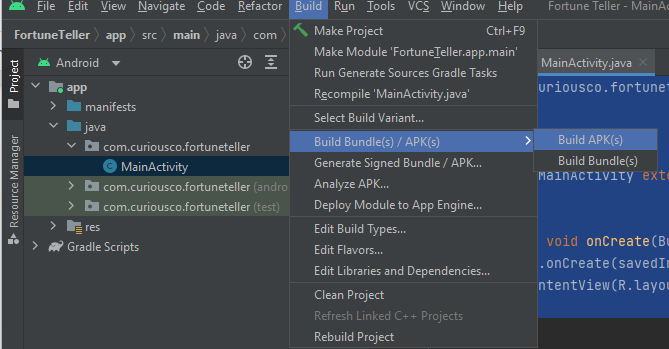
Depending on your computer, this process can take anywhere from 5-10mins after which the APK File should be generated.

Conclusion
Congrats on coming this far and completing your first android application! Now that you are equipped with basic skills on how to build an application, it is time to take it to the next level by adding much more functionality to your app. A good way to do that would be to build clones of popular apps such as Whatsapp, Instagram, etc. That way you will be able to learn about a HUGE variety of Views that can be used. You can always learn more and expand your knowledge by reading the awesome documentation of Android at https://developer.android.com/docs. If you liked this article and learned something new today, do share it with your friends!
