Building PWA (Progressive Web Apps) for Mobile Using HTML, CSS, JavaScript and local database – TUTORIAL
Building a Mobile Application using only HTML, CSS and JavaScript might sound weird at the start. You might be expecting me to introduce some kind of “framework” or technology that we’ll be using to build this app. But the truth is – There aren’t any. We won’t be using any frameworks/libraries to build this Progressive Web App.
Using just plain HTML/CSS/Javascript the app should be able to run anywhere – including Chrome OS, iOS, Android, Windows, Linux, and any platform that supports Modern web browsers.
And the best part about these Progressive Web Apps is that they can access almost all of the hardware features ( such as Camera, Geo Location, etc ) that a native application would be able to, and also store the app data using localStorage API provided by the browser. Sounds exciting? Let’s dive in!
Table of Contents
What are “Progressive Web Applications”?
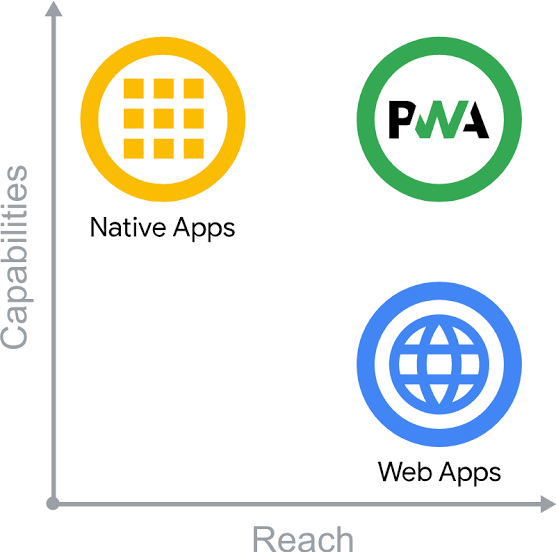
Progressive Web Applications or PWAs are simply an extension of normal websites with additional features that make them more suitable for running as a “native” application
For example, let’s assume hypothetically that your phone does not have a Calculator application and you go to your browser and visit a Calculator Website almost all the time when you need to perform a calculation
Now since it is so common for you to visit this website, you decide to add a Shortcut For The Website to your home screen so that it behaves like an actual app
Google Chrome soon realized the popularity of websites being run as normal mobile apps among users and made something called Progressive Web Applications
Now the Progressive Web App is exactly that – A Shortcut to A Website, but with some additional features
- Can Run Offline
- Access Device Features ( Camera, Location, Storage )
- Can Run in Background Even if the Browser is Closed
- Very less compromise in performance & speed
Progressive Web Apps vs Hybrid Apps vs Native Applications
Usually, to build a mobile application, the methods can be classified into 3 major categories
- Complete Native Development – Using Java, Kotin, Swift, etc for the relevant platforms
- Hybrid App Development – Using Frameworks such as Ionic, React Native, Cordova, Flutter
- Progressive Web Apps – Using only pure HTML/CSS/JavaScript to build the application
Let’s have a quick comparison between them in the following categories
Performance ( Native Apps Win – But only by a slight margin )
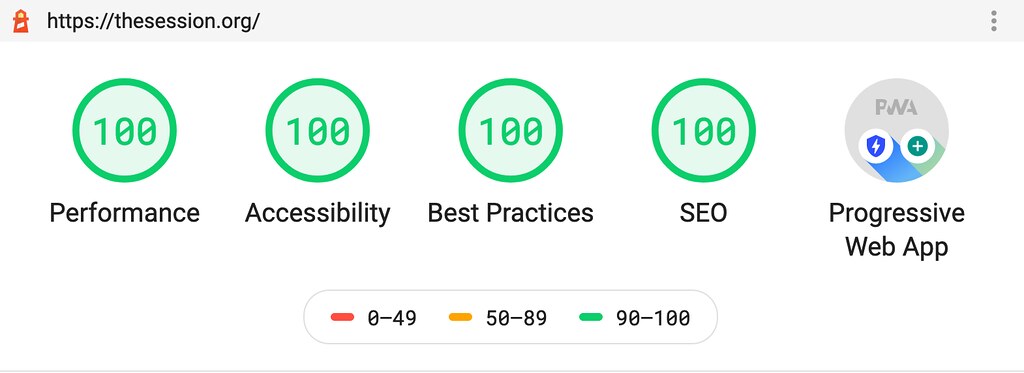
Coming to performance, it’s clear that Hybrid App Frameworks are the ones that come in last place.
This is due to the additional tooling and thousands of lines of code that these frameworks provide and add to our app, this makes the application considerably larger and may also reduce performance.
But this is only while Comparing Numbers, in reality, most people won’t notice the difference if the code is optimized enough
Between Progressive Web Apps and Native Apps, the Native Applications have a slight edge in performance because technically PWAs are still tied to the browser in one way or another and this causes a Slight Overhead in performance
Cost to Develop & Maintain ( PWA’s and Hybrid Apps win by a HUGE margin )
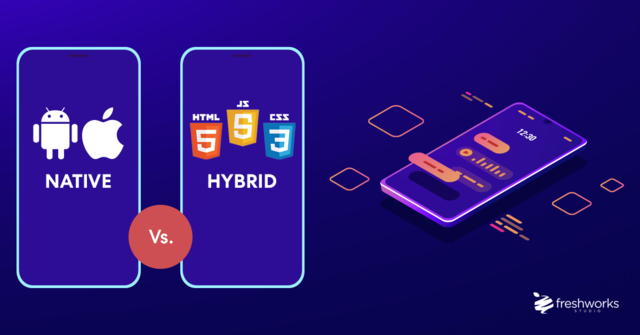
Considering the development cost and maintenance, Native Apps certainly take the last place here. To develop Native Apps you need to hire separate developers for each platform and make sure the teams are communicating well and new changes are being made equally on all platforms and a lot more little caveats.
This can cost you heavily in both money, time, and additional resources that could very well be spent working on the main functionality that your application aims to achieve
Here PWA’s and Hybrid Apps win because in most of the scenarios there is only one codebase and multiple platforms, this increases the reach of your app while also reducing the cost and maintenance
App Distribution ( Clear Winner – PWAs )

When it comes to App Distribution on platforms such as Google Play Store and App Store, the clear winner is PWA
PWA apps can be simply installed by a browser popup whereas apps on Google Play Store and App Store need to go through a strict review process and the application procedure is also time-consuming and not free of cost
PWAs also increase the likelihood that a user will install your app as installing a Progressive Web Application is almost instant whereas native & hybrid apps take time to download and install
What will we build in the Tutorial?
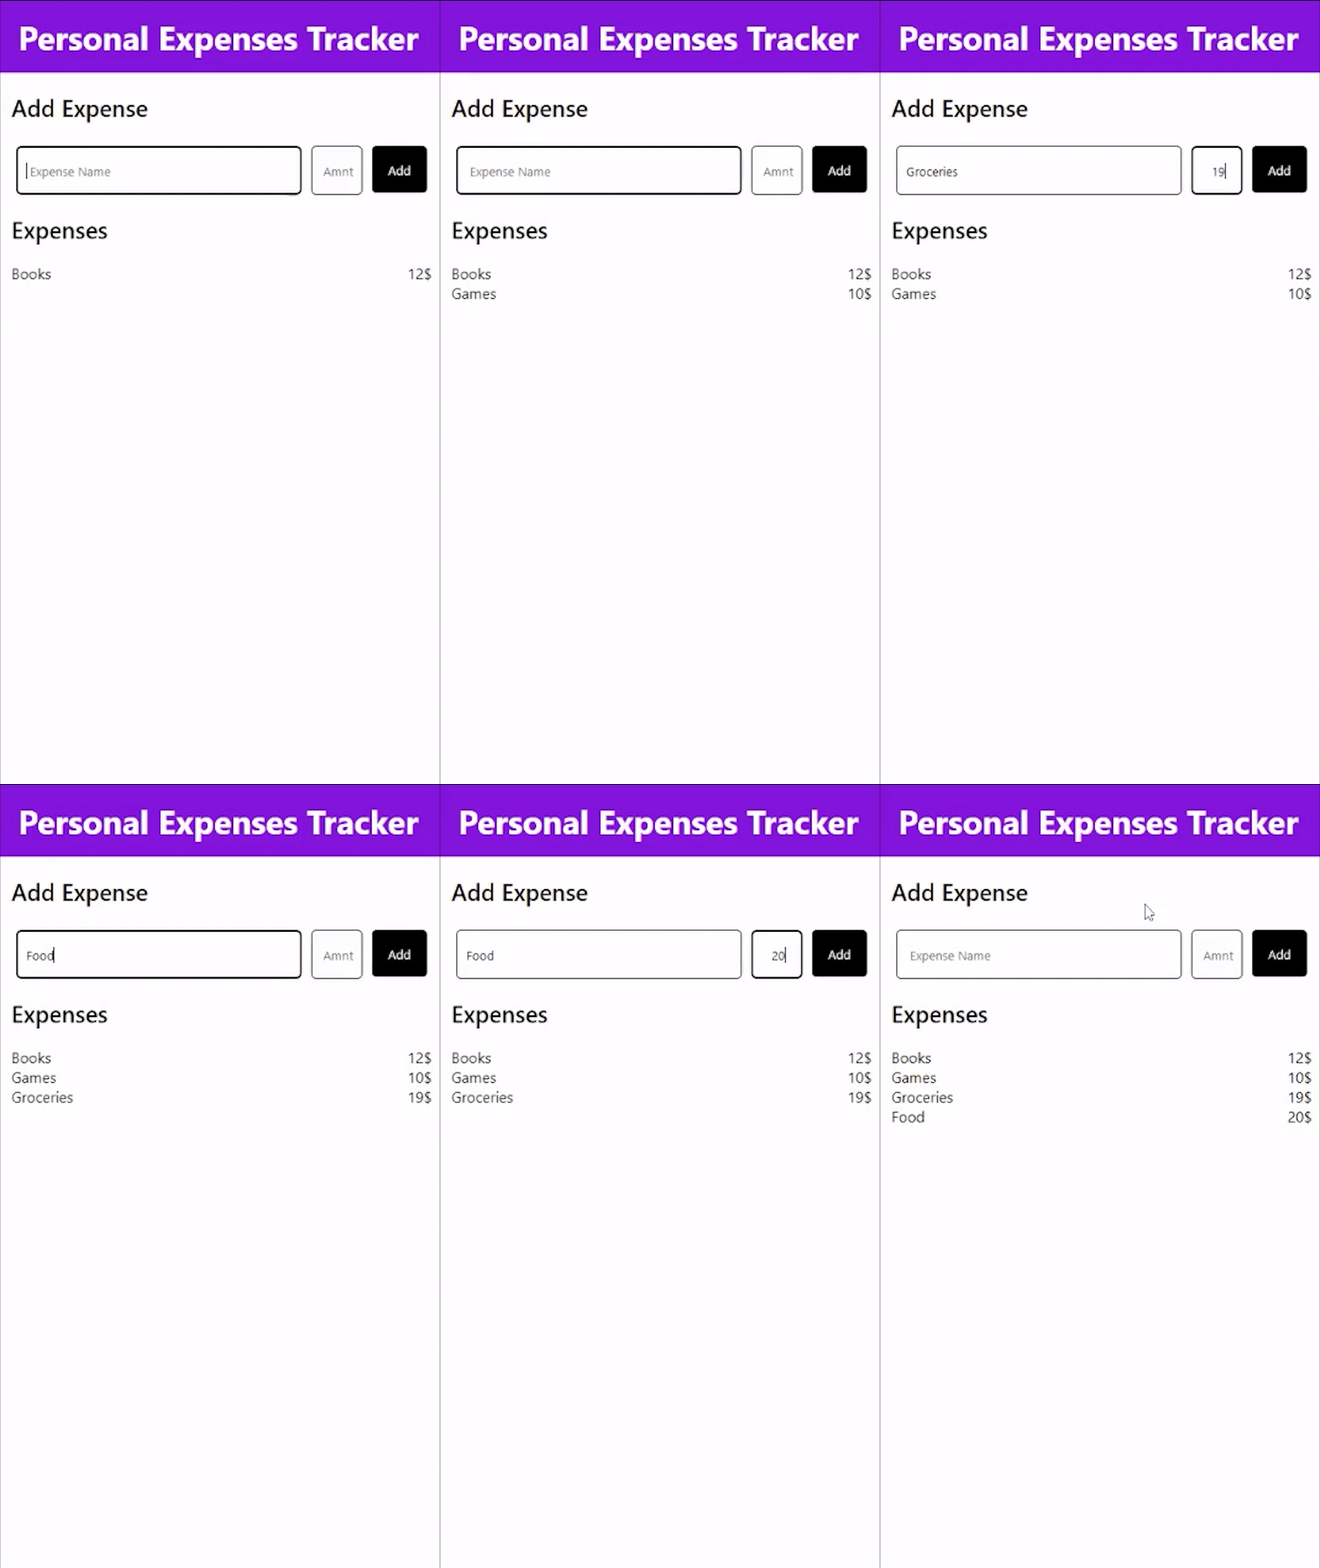
Since this is a tutorial, we’ll be learning Progressive Web Applications by building a small application to manage your expenses
This Personal Expense Manager app will be relatively simple and provide only 2 basic functions
- To Add new Expenses
- Have a look at the list of expenses
Here’s a glimpse of the final product
Part 1: Installing the required tools for PWA Application
Now that we have learned about the advantages and disadvantages of PWAs over other technologies such as Native Apps and Hybrid Applications, we will need the following tools
-
Visual Studio Code (Code Editor)
This part is completely optional as you can use any favorite IDE of yours. If you don’t know what an IDE is, it’s simply a program/software which makes writing code easier by providing advanced features such as Syntax Highlighting, detecting our errors before we even execute the program, etc. If you haven’t used an IDE before I’d recommend you install Visual Studio Code as that’s what most people prefer and that’s what we’ll be using in this tutorial as well.
-
Any Modern Browser
To test our PWA application, we will need a Modern Browser, especially one that supports PWA. For this tutorial, it’s best to install the Latest Version of Google Chrome even if you use any other browser primarily.
Part 2: Setting Up The PWA App
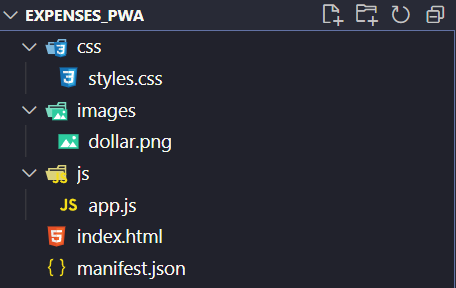
Let’s get started by creating a folder called expenses_pwa and add the following files and folders to it
Understanding The File Structure
If you have worked before with HTML, CSS, and JavaScript websites, you might be familiar with the above structure. Our project folders are essentially divided into 4 parts,
Index.html
This is the main entry point of the application, it consists of the basic layout & structure of our PWA Application
Styles.css
This is the stylesheet of our application, it is responsible for – you guessed it – Styling the UI of the PWA
App.js
Now that we have covered the Structure, and Styling of our application, the only thing left is handling the Logic and interactivity of our app, and that is handled by the JavaScript code that we write in the App.js file
Images
This should be pretty self-explanatory, the images folder contains “images” required for the PWA, to get started put any image related to expenses inside this folder. ( For eg, the dollar.png file )
Manifest.json
Even if you have worked with websites before, this might be something new as Manifest.json is specific only for Progressive Web Applications and not for traditional websites.
This file contains essential information about our PWA such as its name, icon, and other additional information
Setting Up the PWA Project Files
Now that we are familiar with all the files in our project, let’s start by setting them up
Manifest.json
As discussed, manifest.json is responsible for storing additional information about our PWA in JSON format ( hence the extension .json )
To add the basic app details, we add the following JSON inside this file
{
  "name": "Expenses Tracker",
  "short_name": "Expenses",
  "start_url": "index.html",
  "display": "standalone",
  "background_color": "white",
  "theme_color": "violet",
  "orientation": "portrait-primary",
  "icons" :[
    {
      "src": "images/dollar.png",
      "type": "image/png",
      "sizes": "512x512"
    }
  ]
  }
Let’s try to break each property down and understand what it means
- Name – The full name of our PWA
- Short Name – An alternative name used whenever the display size is limited and the full name cannot be displayed
- Start Url – A custom entry point for our PWA, ( by default index.html )
- Display – How the application is “displayed” to the user, possible options include browser: which means a browser instance is opened whenever we launch our PWA or standalone: meaning our PWA can act as a standalone application
- Background & Theme Color – As the name suggests, they represent the Background and the Theme Color of our PWA
- Orientation – The default orientation of the PWA, for our purposes, set it to portrait as most of the mobile applications are Portrait by default
- Icons – This represents the Home Screen Shortcut icon that is displayed when our PWA is added to the Home Screen, let’s set it to the dollar.png image that we downloaded earlier
Index.html
This is what a standard html starting point looks like
<!DOCTYPE html>
<html lang="en">
  <head>
    <meta charset="UTF-8" />
    <meta http-equiv="X-UA-Compatible" content="IE=edge" />
    <meta name="viewport" content="width=device-width, initial-scale=1.0" />
    <title>Expense Tracker</title>
  </head>
  <body>
  </body>
</html>
If you’ve never worked with html before, a simple way to understand the above code would be to break it down into 2 parts
- <head> This contains important metadata information about our web application, such as its title, character encoding set, and a lot more.
The important thing to note is the content inside this tag is not visible to the user
- <body> This contains the visible content of our website, in here we’ll place all of the important elements that make up or PWA
But before doing any of that, we first have to link the CSS, manifest, and the JavaScript to our index.html so that we can use them for our application
To do that, we add the following code
Inside <head> tag
<link rel="stylesheet" href="./css/styles.css" />
 <link rel="manifest" href="manifest.json" />
At the end of <body> tag
<script src="./js/app.js"></script>Tip: As Javascript files tend to be heavier and take a lot of time to load, it’s usually recommended to add them at the end of the <body> tag so that it only loaded after the main content has finished loading giving the user a faster & richer experience
Part 3: Building the PWA App
Working on the HTML of the PWA
Now that we are done with the basic setup of our project files, it’s finally time that we start working on the Personal Expenses App we planned about
A good starting point would be to first work on the App’s Structure inside the index.html file
Looking at the final product, the app structure can be simplified into 3 components
- Main Headings – Headings such as “Personal Expense Tracker” and “Add Expense”
- Input Group – The input form for adding Expenses
- Expenses List – Display all of the Expenses
Let’s now implement these 3 components, by one-by-one using basic HTML
- Main Headings
<div id="heading">Personal Expenses Tracker</div>
   <div class="main">
      <div class="add-expense-heading">Add Expense</div>    </div>
We simply add two basic <div> elements representing the 2 headings we require
Do not worry about the styling of these headings yet as we will take care of it later in the style.css stylesheet
- Input Group
This part also should be pretty simple, we just need to add 2 <input> tags and assign unique ids to them so that we can access later on, the values inside those given <input> elements
 <div id="input-group">
        <input type="text" id="name" placeholder=" Expense Name" />
        <input type="text" id="amt" placeholder="Amnt" />
        <button id="add">Add</button>
      </div>
Also, add an Add Expense button that enables the user to add the expense whenever the button is clicked
Let’s wrap those <input> tags and the button inside another <div> tag to group them together as an input group
- Expenses List
This part simply consists of the List of our expenses and also the Expenses heading to give this section a name
<div class="expenses-list-heading">Expenses</div>
   <div id="expenses"></div>
We are supposed to leave the expenses section empty for now, as this element is meant to be managed by JavaScript as it is responsible for Handling the Logic for when an expense is added
Working on the JavaScript of the PWA
Now that we are done with the basic structure of our application. Let’s start by writing the Logic Handling Code that deals with managing all of the expenses added by the user
Let’s start by writing a function called renderExpenses that takes in the expensesData and renders it inside the <div id= “expenses”> element we created earlier
const renderExpenses = (expensesData) => {
  let elem = document.getElementById("expenses");
  elem.innerHTML = "";
  for (let i = 0; i < expensesData.length; i++) {
    let expense = expensesData[i];
    elem.innerHTML += `
     <div class="expense">
          <div class="expense-name">${expense.name}</div>
          <div class="expense-qty">${expense.qty}$</div>
        </div>
    `;
  }
};
This might be a little daunting at the first sight, but it’s easier if we break it down step-by-step
- Firstly we are accessing the expenses <div> element that we want to render the expenses inside using the document.getElementById(“”) which is a built-in function that javascript provides in browsers
- Then, we store the element inside a variable called elem and reset its contents by setting its innerHTML property to an empty string “
- We then iterate through the expensesData array and create the HTML for our expense elements using JavaScript Template Strings
Note: If you’ve never heard of JavaScript Template Strings, they are essentially helpful if our String needs to be dynamically generated based on certain variables, in our case, we need to dynamically generate the HTML Strings by using the name & qty variables
- After creating this HTML we simply push it inside the innerHTML of the main expenses <div>
Now that we have a function defined that renders any given expensesData let’s work on handling the Add Button
To do that we create another function called addExpenseOnClick() that does exactly what the name says – adds an expense whenever the Add button is clicked
const addExpenseOnClick = () => {
  let name = document.getElementById("name").value;
  let qty = document.getElementById("amt").value;
  document.getElementById("name").value = "";
  document.getElementById("amt").value = "";
  expensesData.push({ name, qty });
  localStorage.setItem("expensesData", JSON.stringify(expensesData));
  renderExpenses(expensesData);

};
Let’s understand the above code by breaking it down into smaller pieces
- We first get the name and amount of the expense from the respective inputs and then, reset their values to empty strings
- After doing that, we push the newly added expense to the expensesData variable that we talked about earlier
- Now that we have updated expensesData, ideally, we should be able to retrieve those updated expenses even after closing the browser, shutting down the computer, etc. This means we have to store the expensesData somewhere permanent
- One built-in solution for this is to use localStorage. We simply store the updated expensesData using the setItem() function that localStorage provides us with
- Then, we render the updated expensesData using the renderExpenses function that we implemented earlier
Now the last step is to ensure that the addExpenseOnClick() function is called whenever the <button> is clicked, to do that add the following code to the HTML of your button
<button id=" add" onclick="addExpenseOnClick()">Add</button>Now you should be able to add/view expenses on your website – but you might notice a serious problem – Our Expenses are gone as soon as we close and re-open the browser
This is not because we are not storing the expenses properly, but because whenever the app initially loads we are not checking the localStorage for expenses that already might be present from our previous instances!
To do that, we have to add the following code
let expensesData = localStorage.getItem("expensesData");
expensesData = JSON.parse(expensesData);
renderExpenses(expensesData);
Here, we are simply using the getItem() function provided by localStorage to get the expensesData from the previous browser/app instance
It is important to pass the expensesData through JSON.parse() because localStorage stores all data in String Format and since expensesData is an array, we have to convert it into the appropriate form using the parse() function that takes in a JSON string
After that, to render our loaded expenses we call the renderExpenses() function on the expensesData loaded from the localStorage
Now the PWA should be perfectly working and functional!
Part 4: Adding Offline Support in the PWA App
Nevertheless, there is no difference between a PWA and a Normal Website Shortcut if our app cannot run Offline
To make sure that our app runs offline, we have to add something called ServiceWorkers to it
Service Workers are functions/pieces of code that run in the background independent of our application, they can be used for a lot of different purposes such as Sending Notifications, Caching in the background, and any other Background Activity
To make our application offline, we need to Register a new Service Worker that will cache all the important content in our web app and store it for later use
To do that we have to create a new file caching_service.js and add the following code inside it
self.addEventListener("install", (e) => {
  caches.open("pwaCache").then((cache) => {
    cache.addAll([
      "./",
      "./index.html",
      "./js/app.js",
      "./css/styles.css",
      "./images/dollar.png",
    ]);
  });
});

self.addEventListener("fetch", (e) => {
  e.respondWith(
    caches. match(e.request).then((resp) => {
      return resp || fetch(e.request);
    })
  );
});
Let’s try to break down the code above and understand it step-by-step
- First, we create a new EventListener that runs as soon as the Service Worker is installed
- For the service worker of this app, the first thing to do would be to use the cache service that the browser provides and add all the files inside our project directory using the addAll() method that the cache provides
- Now to handle fetch() requests of the browser, we add another EventListener that is fired as soon as the browser requests a file/image
- As soon as the browser requests something, the fetch listener for this service worker is called. Inside which, we try to match its presence in the cache, and if the requested file is not present we simply retrieve/fetch the file from the internet
Now your application should have Offline Support
Note: The user still has to have internet access while first running the application so that the service worker is run. From the second launch, the app can function completely offline
Part 5: Adding SQLite Local Database to the PWA App
Javascript’s local storage has its limitations such as speed and storage capacity. A more reliable way to store the data would be to use the SQLite database. This is the way most android applications store their local data.
To use the SQLite database in the PWA Application, we first need to include sql.js library
To do that,
- Go to the official website for cdn.js and search for sql.js library
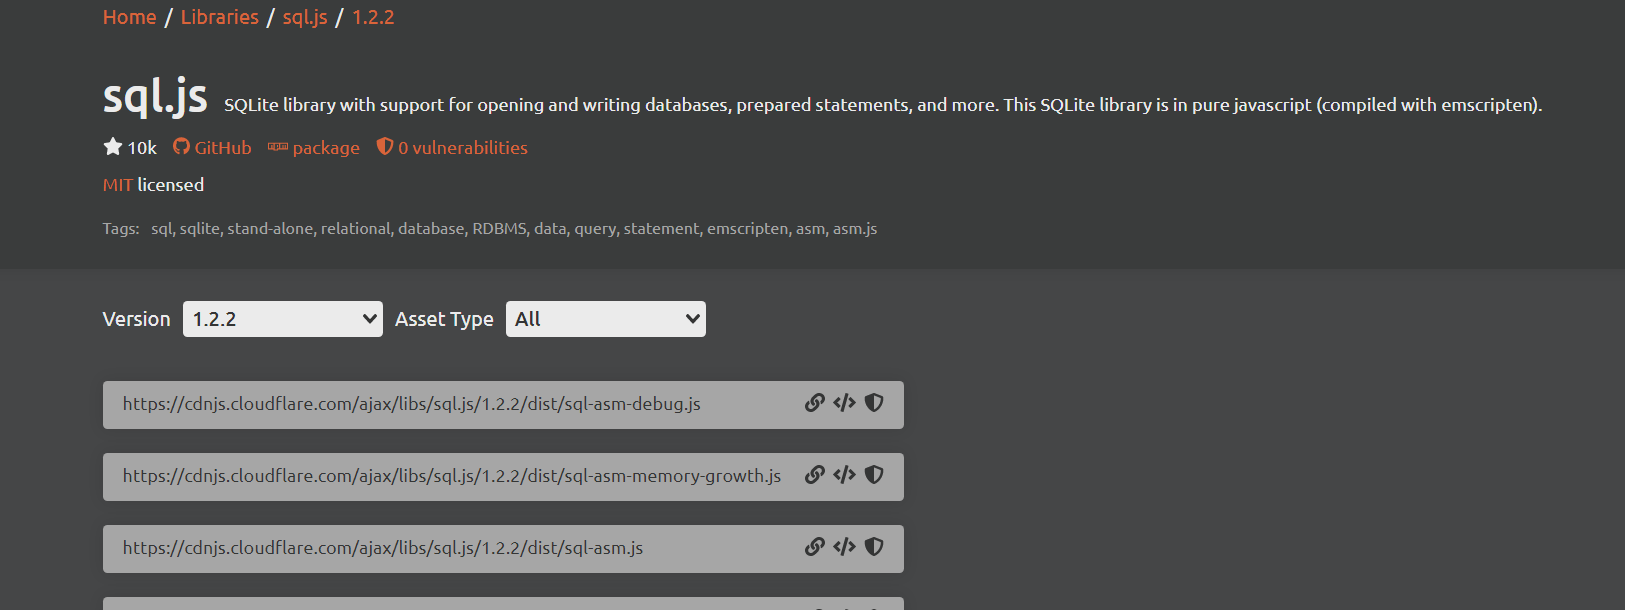
Copy the <script> tag and paste it inside the index.html file of the public/ folder
<script
     src="https://cdnjs.cloudflare.com/ajax/libs/sql.js/1.2.2/dist/sql-asm-debug.js"    integrity="sha512-GjBTiQSixExxJ49g9b2qnJj+KD+1QHZAU1fqNC9mcccmojbU/A40lV7QOKDjYkAE5P2S2upkqasSU15sdsD2uA=="
      crossorigin="anonymous"
      referrerpolicy="no-referrer"
    ></script>
SQL.js also needs a SQL-wasm.wasm file, if you’ve never heard of wasm it’s a WebAssembly binary file. We won’t be getting into a lot of detail about it. However, you can learn more about wasm here
- To download the wasm file, visit the following website: https://www.cdnpkg.com/sql.js/file/sql-wasm.wasm/
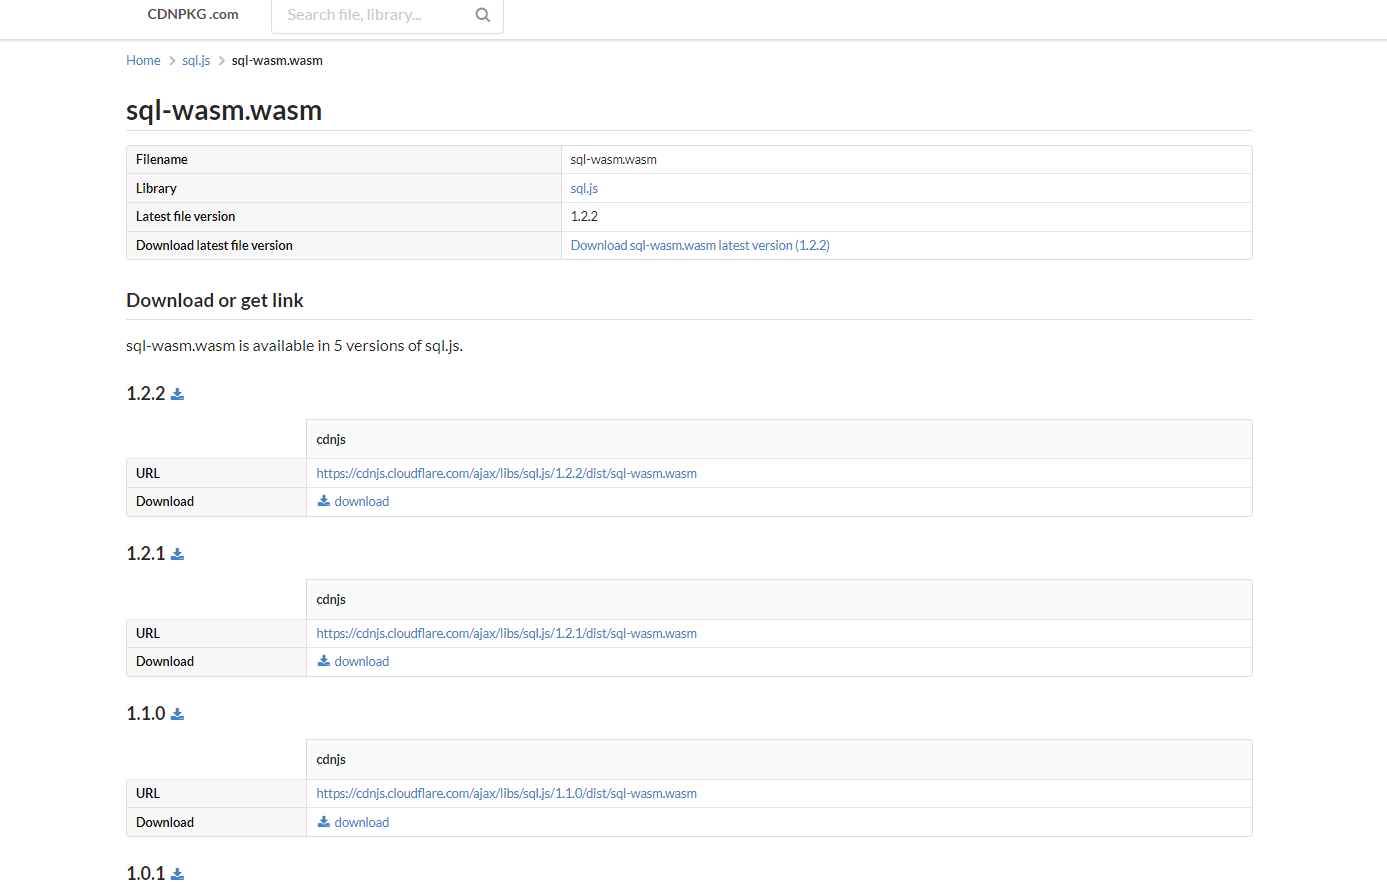
- Download the latest (1.2.2 as of writing this ) version of SQL-wasm.wasm and place it inside the js/ folder
Now that the setup is done and all files are downloaded, we can refactor the previous code so that we use SQLite instead of localStorage
let db;
let renderExpenses;
initSqlJs({}).then(function (SQL) {
  let sqliteString = localStorage.getItem("sqliteDatabase") ?? "";
  let sqliteUint8 = Uint8Array.from(sqliteString, (x) => x.charCodeAt(0));
  if (sqliteUint8.length) {
    db = new SQL.Database(sqliteUint8);
  } else {
    db = new SQL.Database(localStorage.getItem("sqliteDatabase"));

    db.run("CREATE TABLE Expenses (expense, amt);");
  }

  renderExpenses = () => {
    const stmt = db.prepare("SELECT * FROM Expenses");
    let elem = document.getElementById("expenses");
    elem.innerHTML = "";

    while (stmt.step()) {
      const row = stmt.getAsObject();

      elem.innerHTML += `
     <div class="expense">
          <div class="expense-name">${row.expense}</div>
          <div class="expense-qty">${row.amt}$</div>
        </div>

    `;
    }
  };

  renderExpenses();
});
This might be overwhelming at first, but let’s try to understand it step-by-step
- Firstly, we call the initSqlJs function that initializes the SQL database and returns a promise
- We add a .then(callback) function to the initSqlJs method, the code inside .then() is called only when the SQL database is finished initializing
- Inside then() we try to check if localStorage already has the database from the user’s previous visit, if not we create a new database and add a TABLE called Expenses to it.
- This table has 2 columns namely expense and amt
- Inside renderExpenses function, instead of using a for loop to iterate through the expensesData, we now make a query “SELECT * FROM Expenses” to get all of the rows in the Expense table and iterate through them using the step() function inside a while loop
- The remaining part stays the same as before
We still have to modify the clickHandler() function to add the changes to the SQLite database instead of expensesData as we did before
const addExpenseOnClick = () => {
  let name = document.getElementById("name").value;
  let qty = document.getElementById("amt").value;

  db.run("INSERT INTO Expenses VALUES (?,?)", [name, qty]);
  document.getElementById("name").value = "";
  document.getElementById("amt").value = "";

  let sqliteUint8 = db.export();
  let sqliteString = String.fromCharCode.apply(null, sqliteUint8);
  localStorage.setItem("sqliteDatabase", sqliteString);
  renderExpenses();
};
To add a new entry, instead of doing push() to the expensesData as we did before. We now have to use the SQL Query “INSERT INTO Expenses VALUES (?,?)” to insert a new row with name, qty inside it
After updating the database, we have to export it as a String using db.export() and update its value using localStorage.setItem()
Now if you reload, the website should function the same but the difference is, instead of relying on localStorage, we are now using a full-featured SQLite Database
Part 6: Installing & Running the PWA App
Now that we have finished the app, and added Offline Support to it. We can test it out by installing the app on our mobile devices
Installing PWAs works a little differently from installing normal mobile applications.
To install a mobile application, you usually generate an .apk or .ipa file but to install a PWA we simply visit the website for which we want to install the PWA then if the browser supports PWA the user will get the following prompt, letting him know there exists a PWA for the given website and asks the user for installation
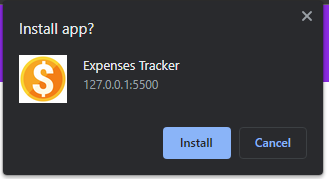
Once the user clicks Install, a new shortcut is added to his home screen that represents the PWA
Conclusion
Congrats on coming this far and building your very own Progressive Web Application. However there is still a lot more to learn, some new things you can try are: Building a PWA using a frontend framework ( React.js, Angular, Vue, etc ) or try accessing the Native Hardware of the mobile phone using PWAs and making it more fun, you can even try to Host these PWAs on a platform like Hostinger, GoDaddy, etc. If you liked this article and learned something new & valuable today, do share the article with your friends!
