Creating a REST API using Node.js, Express and MongoDB – TUTORIAL

Web applications, Android applications, and even devices running on IoT(Internet of things), all of them have one thing in common. That is, they use something called REST API, for people who don’t understand REST API, a simple way to put it would be REST API act as a “middle man” between the data stored and the website that users use. Interestingly, that’s where the term API comes from Application Programming Interface, where Interface means a point where two systems, subjects, organizations, etc. meet and interact.
Now there are multiple ways to create a REST API, you could use Spring on Java, and Flask on Python, but there’s something really special about Node.js, IT’S IN JAVASCRIPT! This means, that both the backend and frontend can be written using the same language, without compromising any performance. Node.js is used to handle thousands of requests per second in some of the biggest companies such as IBM, PayPal, Flickr, etc.

For databases we’ll be using something called MongoDB, if you’ve heard of the traditional MySQL databases, you know how complex those can get when stuff like Joins gets involved, and since it’s a relational database, it’s hard to scale it further when the structure gets complicated. MongoDB simplifies databases and makes them easily scalable by making them in the form of BSON objects ( Similar to JSON (Javascript object notation ) ), and since we’re already working with Javascript, understanding & working with MongoDB should be a piece of cake
Table of Contents
Steps to Create the REST API
The best way to learn something, not just REST API is to “Learn by doing”, a quote that all programmers/developers including myself swear by. But what will we be building? you might ask. One simple idea that will cover almost all of the important topics is to simply build an API that serves the Current temperature for a given city. Let’s start working on it!
Part 1: Setting up the database
As we have already discussed that we’ll be using something called MongoDB, before moving ahead let’s dive deeper into how exactly MongoDB can help us and what are its Advantages and Disadvantages
Advantages and disadvantages of MongoDB
Advantages
- Scalability: When Working on MongoDB, one hardly ever needs to worry about scaling his application, as there’s something called Auto Sharding which means if the database ever gets too large for one server, it’ll automatically be Sharded so that multiple servers can use it without any change in the database
- Indexing: Since MongoDB uses something called BSON ( Similar to JSON ), it has lightning-fast query speeds as it can index fields for near-instant access.
- Easy Setup: MongoDB, when compared to other traditional databases, has a pretty simple setup, and they also provide additional tools such as MongoDB Compass which help to visualize the database better
- Support for Advanced Features: MongoDB, with features such as GridFS, and Replication, increases the type of data that can be made available inside the database by a huge amount
Disadvantages
The disadvantages of MongoDB are very few if none, but they are still important to discuss as they help you in getting to know the weak points of the database you’re working with
- High Memory Usage with so many advanced features such as Indexing the size of the database is sure to be more than a traditional database, however, this should not be a major problem for most of the users as we are constantly exceeding our data storage capacity year-by-year
- Cannot nest more than 100 Levels It’s highly unlikely that there is a structure that requires more than 100 levels of nesting, but hey, it’s still a limitation that other databases don’t seem to have
- Limited Document Size The document size in MongoDB is capped at 16 MB ( we’ll discuss documents in detail, at a later point )
Creating the database
- To create a MongoDB database the first step is to download MongoDB here
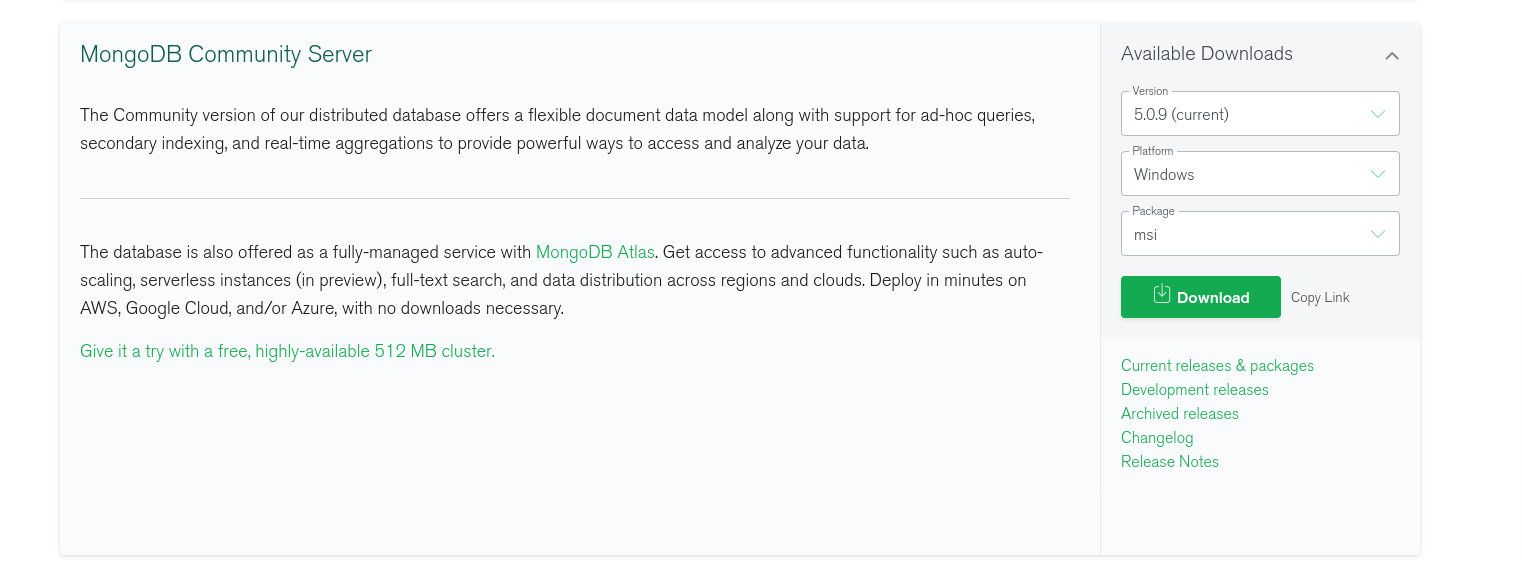
- Select the most current version and your platform (which would most likely be windows) and click on Download
- Install the program, and done! You are now ready to create your database
- Now that the program is installed, the essential files of the MongoDB program are located in the following directory
C:\Program Files\MongoDB\Server\<your mongodb version>\bin- You might see a lot of files, like mongo.exe, mongod.exe, mongos.exe,mongostat.exe, for our purposes the 2 main files are mongo.exe and mongod.exe
- mongod.exe is the main part of our server, it’s responsible for handling data requests, background tasks, managing data access, etc. Formally it’s called the Primary MongoDB Daemon. For us to be able to access the database this service must be running in the background
- mongo.exe is used to access the database and run operations on it using the Command Line, don’t worry about this as we’ll be learning to use an awesome easy-to-use tool to access the database, later in the article
- To start your MongoDB “Server” (do not get confused by the term server, a server is something that has one or more databases, for our purposes the server is simply our computer), click on the mongod.exe file, if you do not get any errors after running mongod.exe that means your database has started and is running in the background.
Tip: Whenever you need to start the database, instead of going to the above-mentioned folder over and over again, you can add it to Environment Variables so that it’s quick to access them whenever you need to start the Mongo Server. To do that, Search for Edit System Environment Variables and then Edit the PATH variable by adding our MongoDB\bin directory to it.
Accessing the database
Now that we have created the server, there is a nice visual program that helps us to get an overview of our server so that we can manage it easily. The best part of this is that MongoDB provides us with an Official tool called MongoDB Compass to visualize our database.
- The installation procedure for this should be pretty simple, you just need to select your platform, download the relevant file and click on it to install the program.
- After installation, it should look something like this:
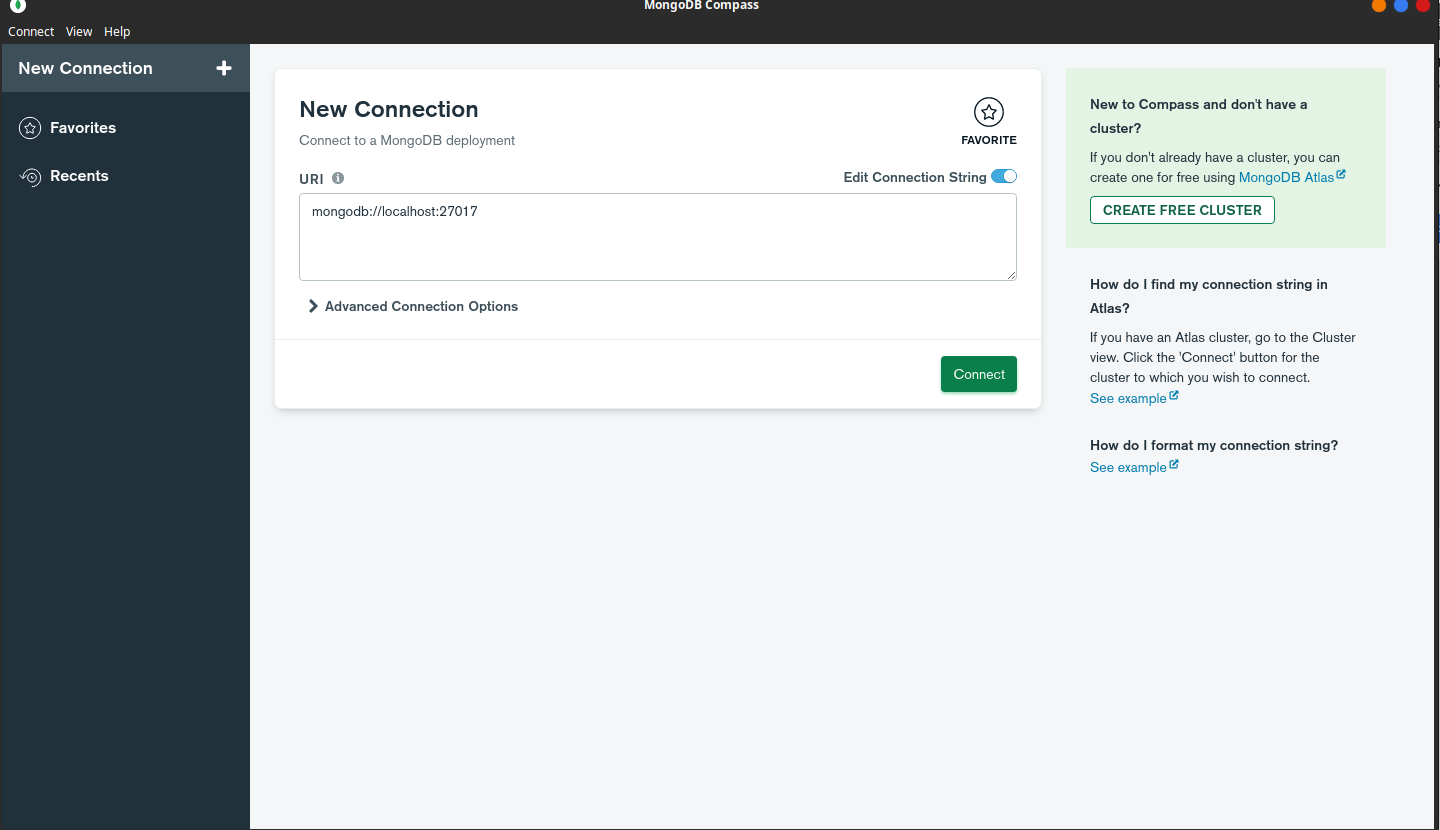
- While creating the server, it has something called MongoDB URI or MongoDB Connection String, which tells us the exact location of the server and how we can connect to it.
- An easy way to think about it would be to compare it with websites and/or files on our computer. Each of them has an address using which we can access them, similarly, our server has an address ( usually starting with MongoDB:// ) to help us connect to it.
- Since we created the server on our computer, by default its URI is mongodb://localhost:27017
- Compass has already loaded the default address for us, so let’s go ahead and click on the Connect button.
- Now you see that our server is loaded, go to the Databases tab to list all of your databases, you’ll see 3 databases by default (admin, config, and local), they are used by MongoDB to store the details of the server, and are not meant to be used by us.
- Go ahead and click on Create Database, to create your database, for our purposes we’ll name the database as “app”.
- It might ask you two things, database name, and collection name, for now, name the database as an app and set the collection name as weather, we’ll get back into collections later on.
Understanding the structure of a MongoDB Server

You might be confused on what’s the difference between a server, database, collection, and all of that, to put it in the simplest way possible:
“There is a MongoDB Server, It has multiple databases, Those databases have multiple collections, and those collections, in turn, have multiple documents”
To understand this structure better, let’s try to fit all of the 4 elements into our weather API
- Server: for us, the server is the one we created when clicking on mongod.exe
- Database: we created the app database, which has all of the data required for the functioning of the application
- Collection: think of them as a table, with multiple columns, and rows. We created a collection called weather which is a table, with columns of city, temperature, and rows representing the data
Weather Collection
| City | Temperature |
| Hyderabad | 22 |
| Chennai | 20 |
Now obviously for our app, the weather table(or collection) is not the only thing we need, we would also maybe need to make another table for all of the users we have an etchat’s why each database allows for us to create multiple tables (or collections)
- Documents: the last and the most basic part of a collection is a document, by now you can already guess what a document is and you would be right, a document is nothing but an entry in the table/collection, for eg. A document for weather collection would be {city: “Hyderabad”, temperature: “22”} don’t focus on the syntax just yet, for now just try to get a grasp of what a document is.
Part 2: What are Node.js & Express?

Now that we are done with the setup of our MongoDB database, we can start working on creating our API. To create an API there are multiple tools and multiple programming languages, Spring in Java, Flask in Python, etc to name a few. Based on the current trends the most popular and the most liked one is to use Node.js with Express
What’s the difference between Node.js & Express?

Before moving ahead we need to understand what Node.js and Express are and what are the differences between them.
- Node.js to put it bluntly is a tool that helps us to create APIs by writing Javascript code
You might have a question now, “But if Node.js Can create APIs why do we even need Express?”.
True, you don’t even need Express to create APIs. You can very well create the whole API using just Node.js, but Express is a framework that simplifies the code that we need to write by a HUGE amount, for your information, Express is not the only framework available for Node.js there are tons of other frameworks too but Express is considered to be the standard and is the most-used framework for Node.js. It’s a very rare scenario to see someone make an API using just Node.js
Note: Since Node.js requires you to write Javascript, we recommend that you have a basic understanding of javascript to be able to grasp the concepts better.
Part 3: Installing Node.js and Express
Before we can start creating the API, we have to install the necessary tools
- An IDE ( Integrated development environment ) is a program where we can write code, it has advanced features such as syntax highlighting, error checking, etc which makes it convenient for developers.
There are many kinds of IDEs available on the market like (Sublime text, Atom, Notepad++, IntelliJ Idea, etc) but for our purposes, we’ll use the most popular/recommended one called Visual Studio Code (which is also my personal favorite)
- Node.js to install Node.js is not a complicated task at all, just visit their website, download the latest stable version (16.16.0 LTS as of writing this article) and just follow the instructions on the installer and you should be good to go.
- Express since express.js is a framework of Node.js there’s no way to “install” it on your computer directly. Whenever installing a framework in a node.js app we have to install it in our project directory for every project in which we want to use Express.js. For now, it is enough that we have our IDE and Node.js installed.
Part 4: Setting up basic files for the project
Since this is your first time setting up a Node.js project, you must understand what’s going on here, as you’ll have almost the same setup for all of your future Node & Express projects.
Steps
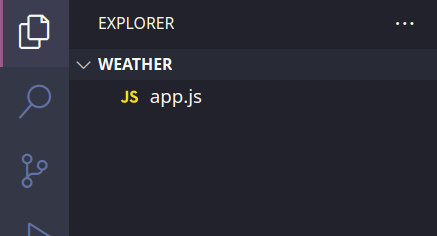
- Create a project folder and add your javascript file which will be the main file (the first and the only file that is run when you execute a Node.js program ), in our case that would be app.js
- For now, it’s just a normal folder with an app.js file, to make it a node project, run
npm init in your terminal, to open your terminal in VS Code using the following command Ctrl + Shift + ~
- You might be greeted with a window like this :
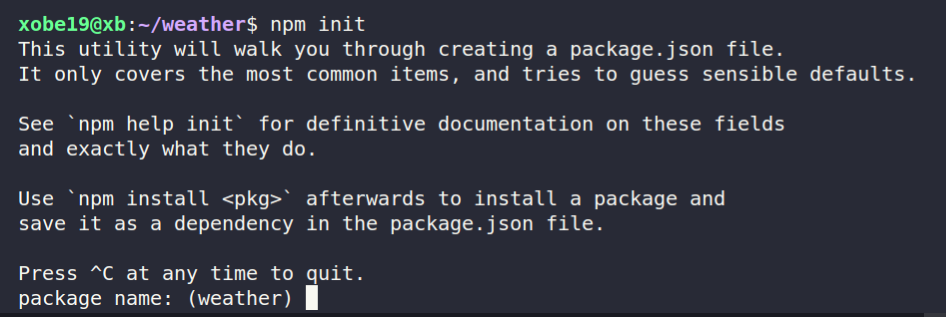
- Now you’ll be asked for details such as package name, etc. Fill those as instructed and your Node.js project is created!
Understanding the components of a Node.js project
You might have noticed that as soon as you created your project a few files appeared, out of them the only thing we care about is package.json, this file consists of all of the details of our project ( including Project Name, Description, Version, the frameworks/packages we installed.. etc )
Installing Express
Now that we have our Node.js project created, it’s time for us to finally install Express.js, to install packages in a node.js project we use something called Nodejs Package Manager or NPM.
The syntax for installing Express.js or any other package available on npm is to simply run the following command in the terminal ( remember you can always access the Visual Studio Code terminal by using the shortcut Ctrl + Shift + ~ )
npm install express
Installing MongoDB for Node.js
For our API to be able to interact with our MongoDB server, Node.js has a package called MongoDB, the installation procedure should be pretty similar to the one of Express.js
npm install mongodbThe installation process should only take a few seconds, and this equips you with all of the tools you need to finally write some code for your API
Part 5: Creating the API
Let’s get started by importing the packages which we installed ( express and MongoDB ) so that we can access them in our app.js
We do so by,
const express = require('express');
const mongodb = require('mongodb');
Here require(‘package-name’) is an inbuilt functionality that allows us to use the packages we installed through npm
Creating an express app is quite easy, simply calling the express() function returns the express app object
The code for the above looks like this:
const app = express();Hosting the API
For allowing access to the API we have to host it somewhere. To be clear, there is NO difference between an API URL and a Normal Website URL. Both are just normal website addresses and can be accessed through the browser or somewhere else
By default whenever you create an express app, it has a default URL of localhost or 127.0.0.1
To host our API we also have to provide something called a PORT NUMBER, this number is not specific just for APIs, each website has a PORT, for eg. most “normal” websites have a port number of 80 or 443, it’s just that whenever we use a browser to access a website without providing a port number, it by default goes to port 443 or 80
Try it now: to visit a website with a port number just add:NUMBER at the end of the URL, for eg. https://google.com:443, should return the same page as https://google.com because 443 is the default port number for most HTTPS websites
For our app, let’s just use the port number 8080, to do that
app.listen(8080, ()=> {
  console.log('app started');
});
Here, app. listen(PORT, callback_fn) takes two arguments, firstly the PORT Number and then the callback function, this function is “run/called-back” as soon as the app is started on port 8080
With this we have successfully started our app at port 8080, Now to start the node.js server, we simply have to run node app.js or node <main-file>.js.
If you see no errors then your API is successfully running on http://localhost:8080
Creating CRUD Operations
Now, if you visit our website URL ( http://localhost:8080 ) you will see the following
This is because our API doesn’t know how to handle requests yet, but hey, what do requests mean? In API terminology requesting is nothing more than just visiting the URL of the API, Let’s look at a few examples of API requests that we’ll be making
- http://localhost:8080/getTemperature?city=Hyderabad
- http://localhost:8080/updateTemperature?city=Hyderabad&newTemp=23
- http://localhost:8080/addCity?city=Kolkata&temp=25
- http://localhost:8080/deleteCity?city=Hyderabad
If you observe closely you might see that after the port number and before the? we have some text starting with a / this is called the Page Route / Page Name This is to let the API know what operation we are performing (for eg, /getTemperature tells the API that we have to perform the operation that gets temperature from our MongoDB database)
Now focusing on the content after the question mark ( ? ), this is used to pass additional data to the API as required, for example when calling the page route /getTemperature we need to know the name of the city for which the temperature is required.
To pass data while visiting a URL we just add data in the following format after the question mark ( ? )
?property1=val1&prop2=val2&prop3=val3….
Now that we are clear on what API routes we will be working on let’s get started on each of them!
Connecting to our MongoDB Server
To work on the routes we have to get and update data from the database, so have to connect to our MongoDB server first, let’s do that as soon as we host the server ( recall that as soon as the app.listen() is finished hosting the server, it calls the callback function ) so that’s the best place to write our connection code.
app.listen(8080, ()=> {
const mongodbUri = 'mongodb://localhost:27017';
const client = new mongodb.MongoClient(mongodbUri);
client.connect().then((server) => {
 db = server.db('app');
});
});
Let’s have a look at what happens inside our app.listen() callback function
- First, we initialise our MongoClient by passing the URI of our database ( recall Accessing the database section )
- Then we call client.connect() as soon as we get the server, we retrieve our ‘app’ database from the server by using db = server.db(‘app’)
- The .then() above is a part of Javascript Promises, to learn more about them you can visit this excellent resource.
/addCity
For each of the API Routes, we will first have a look at the implementation and then try to understand its details
app.get('/addCity', async (req, res) =>  {

  const dataPassed = req.query;
  const city = dataPassed.city;
  const temperature = dataPassed.temp;
 await db.collection('weather').insertOne({'city': city, 'temperature': temperature});
 res.sendStatus(200);

});- Before looking at anything else let’s try to understand what app.get() does, app.get() is a function that takes two parameters, firstly the route name, and then the function to “call-back” when someone visits that route, ( this is similar to an app.listen(), where the callback function is called as soon as the API is hosted on the given port number )
- Let’s now look inside the callback function, firstly we get the city and temperature which the user passed ( by using &property1=value1… format ), a more formal way of saying this is to “get the Query Parameters which user has passed while visiting the URL”
- Inside the callback function, we get two objects, req, and res
- req contains the request data ( such as Query parameters, Browser used to make the request, etc )
- res is used to send data back to the browser/device making the request
- After getting the data ( city and temperature ) we use MongoDB’s insertOne() method to add a document ( a table entry ) into our weather collection ( the table )
- After doing that we let the browser know that everything was successful by sending a status code of 200 OK which means everything went OK, there are many such status codes such as 404, 500, etc you can read more about them here
/getTemperature
app.get('/getTemperature', async (req, res) => {

   const dataPassed = req.query;
  const city = dataPassed.city;
let data =  await db.collection('weather').findOne({'city': city});
 res.json(data);

});- Here also, we first start by getting the Query Parameters ( which is the name of the city )
- Then we use the MongoDB method called .findOne() which finds the document ( table entry ) and returns it
- In this case, we don’t have to send a Status Code of 200 as we only have to send the Temperature of the city asked
- So instead of calling res.sendStatus() as we did last time, this time we send the JSON data, JSON is nothing but a Javascript Object Converted into a string, a sample JSON would look like :
 {"city" : "Hyderabad",
 "temperature": 22 }
/updateTemperature
app.get('/updateTemperature', async (req, res) => {

   const dataPassed = req.query;
  const city = dataPassed.city;
  const newTemp = dataPassed.newTemp;
 await db.collection('weather').updateOne({'city': city},{ $set:{'temperature': newTemp}});
 res.sendStatus(200);

});- Almost everything is similar to the previous functions, but here we use the MongoDB function updateOne(), which takes in two parameters
- The first parameter describes the document ( table entry ) we want to update, in other words, before updating the temperature of a city, MongoDB first has to find the document which has {“city”: city } where the city is the city we passed into the Query Parameters
- The second parameter describes how to update the found documents ( table entries ), here we update them by $set which means to set the “temperature” property in the document which we found.
- Finally after doing that we send a status code of 200 Ok so that we know the request has been carried out successfully
/deleteCity
app.get('/deleteCity', async (req, res) => {

   const dataPassed = req.query;
  const city = dataPassed.city;
 await db.collection('weather').deleteOne({'city': city});
 res.sendStatus(200);

}); - This is probably one of the simplest parts of the API, let’s have a quick run-through of what’s happening here
- As always we first get the Query Parameters passed by the user
- Then we use the MongoDB method deleteOne() which takes only one parameter, which helps MongoDB in finding the table entry which is to be deleted
- Then after the deletion is done, we send the 200 OK status code to show that the deletion has been completed successfully
Conclusion
You’ve finally created your very first RESTful API, you can now use it in your browser, or use advanced tools such as Postman to test your API, I’d also highly encourage you to make an app/website that uses this API that you’ve built, in that way you can see for real how the API you built can be applied in real life situations. If you had fun and learned something new today, please share it with your friends!

