Learning to build a React.js Application from scratch – TUTORIAL

If we have worked on any Websites/WebApps before, we might know that any website is built using 3 essential tools/languages: 1) HTML 2) CSS, and 3) JavaScript. The HTML is responsible for Giving a Basic Structure to the website ( for eg. HTML would consist of all the elements on the page, like input box, button, text, etc ).
The CSS is responsible for Arranging the Elements / Adding Style to the page. If we were to build a Static Page that only had Information ( for eg. an Encyclopedia ). Then we can get away with having just HTML & CSS. But most websites these days like to Enhance the User Experience by adding Interactivity to the app ( for eg. Animations, Transitions, PopUps) and to do all of that we require JavaScript
Now that we have looked at the old-school way of building web applications, it’s time to see how React.js takes a different approach to building web applications
In React.js instead of dividing the Application into HTML, CSS, and JavaScript. The App is divided into multiple manageable parts called Components. These Components can be completely independent and have their Styling, HTML, and their very own JavaScript. There can be thousands of such components, and by combining them, we get a React application. This gives the app a structure and can prevent tons of bugs in the code
Table of Contents
How does React.js Work?

As we discussed, React.js is a frontend framework that divides the application into small manageable parts called Components. Before moving ahead and writing React.js code, it’s important to understand how react.js works internally. This can be helpful if we want to get an in-depth understanding of React.js
React on the Web has 2 parts, the core reacts library and the react-dom library. They both are important and work together. The way that it works is that the Core React library is responsible for creating Components and handling them. Whereas the react-dom is responsible for Rendering these components.
This distinction is important because, let’s say if we want to render the React Application on a Mobile device, instead of changing the entire code, we just have to replace react-dom ( the component renderer for web ) with a component rendering library for mobile devices. And that’s exactly how libraries like react-native work. This is helpful because this allows the scope of React to not be limited just to Web
Understanding the Rendering Flow in React
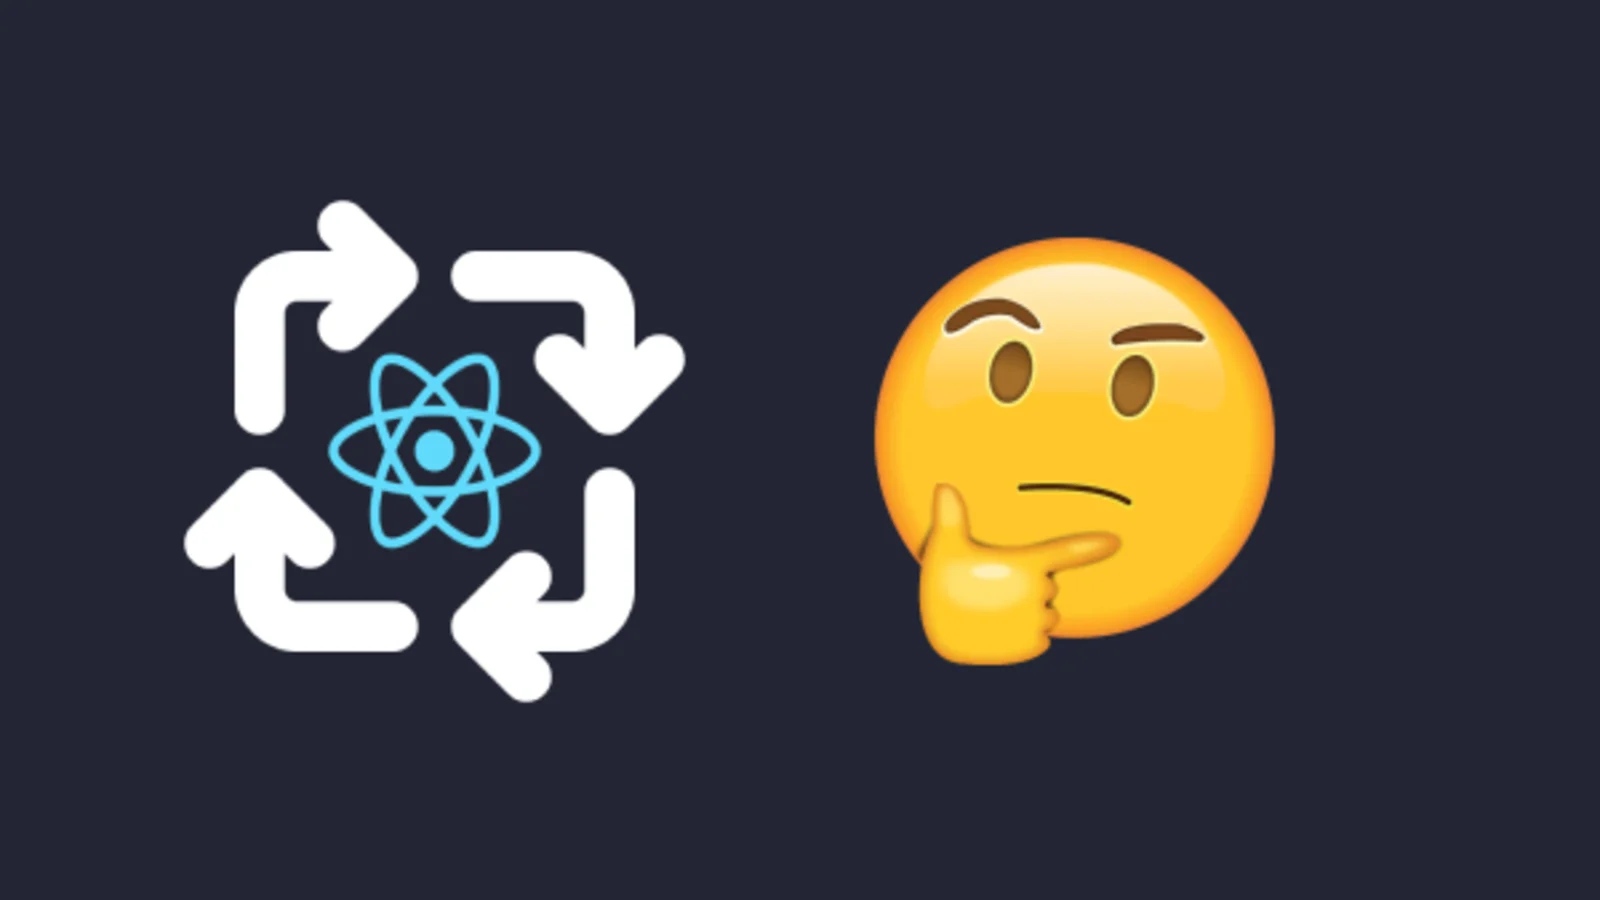
Let’s have a brief walkthrough of how React.js renders a component to understand its workings better
- Firstly, let’s say we write the code for a React Component ( say a button )
- React then processes the component and sends it off to the rendering library ( react-dom or react-native depending on the platform for which we are building )
- In the case of react-dom after receiving the Component it creates a Virtual DOM ( think of it as a tree representation of all the elements ). Then based on that Virtual DOM it renders the HTML onto the web page
- Now one might have questions about the necessity of having an additional Virtual DOM when we could have just directly rendered the element onto the page
- React.js does this for faster rendering and updating of elements, but how does adding an extra step make rendering faster? Let’s discuss that
The Rendering Library of React.js is responsible for constantly updating and rendering new elements on the page. And to make the User Experience good, it has to be extremely fast.
The drawback of rendering the elements directly without having a Virtual DOM is that if we want to update any element we have to re-render almost the entire page as we have no idea of what exactly changed in the page ( React Components can simply ask to be re-rendered without having to provide any details about what changed on the page, don’t worry about it now as we’ll have a look at it later – For now just assume that React.js has no idea about what changed in the page )
Re-rendering the entire page several times can make the User Experience slow & sluggish. Therefore to optimize the rendering, React.js stores a copy of the element tree separately in something called Virtual DOM so that it can calculate what exactly changed in the page and re-render only the modified parts of the page.
Demo of the React Virtual DOM
Here’s a live demo of how VIrtual DOM optimizes rendering

Looking at the page above, it might seem that a lot of work is going on inside the Component Renderer as we are Changing the Number Rapidly
But if we open Inspect Element ( Ctrl + Shift + I on Google Chrome ) and notice the HTML, we will notice that only the Number is being re-rendered ( highlighted in blue ) whereas the remaining elements stay the same.
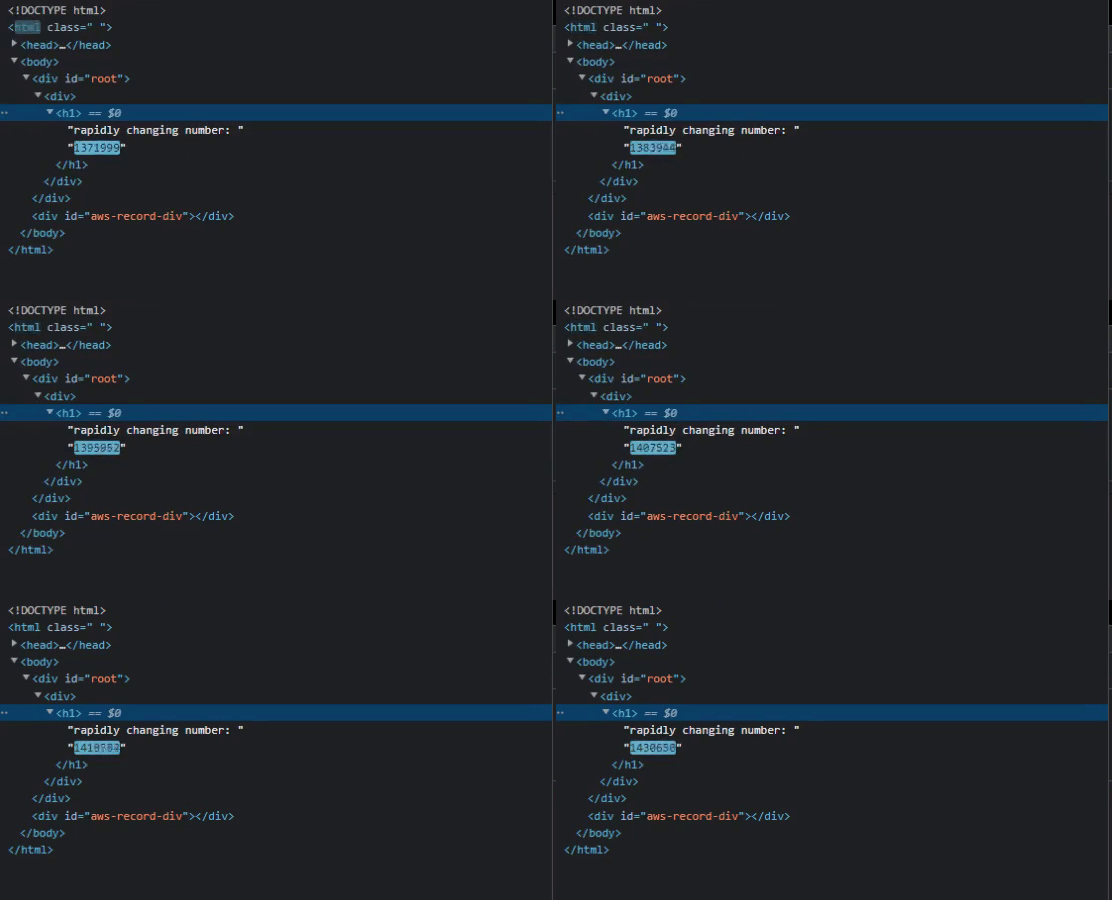
This is because Virtual DOM knows exactly what is modified on the page and re-renders only that part, this allows React to perform renders quickly and more importantly efficiently.
React.js vs Other Frameworks

There are a lot of other frameworks out there, such as Angular, Vue.js, and even Flutter Web. Let’s have a look at how React.js compares to them
- Some of the frameworks here such as Angular are very old, mature, and heavy-weight whereas frameworks like Vue.js & Flutter Web are relatively newer. React.js has a perfect balance of being moderately new but still being mature enough
- React.js is considered to be extremely lightweight & fast as compared to the other framework as it provides only the essential features and allows the user to install additional features ( such as Router for Page Navigation ) whenever required
- Unlike frameworks like Angular. React.js is considered to be beginner friendly and easy-to-learn
All in all, a lot of these frameworks are very similar as they divide the application into Components. So learning one of them ( say React ) will accelerate the speed at which we learn any other component-based framework ( almost all modern frameworks are component-based )
React.js is considered to be a good starting point for developers to enter the component-based framework world. Most of the developers who learn React.js find it very easy to move on to tools such as Flutter, Vue.js, or even Angular as the fundamentals of making an app with components stay the same. So learning any of these frameworks – in my opinion – will never go in vain.
Hopefully, that gave us enough motivation to move on ahead and learn react.js. So let’s get started on the tutorial!!
What will we build in the Tutorial?
Since this is a tutorial, we will be building a small application as we go on to learn the fundamentals of reacting.
It’s always important to build a mini project while learning something new as it keeps us engaged and helps to apply the stuff that we learned instantly!
For this tutorial, we’ll be building a simple Calorie Tracker application that calculates our Calorie Intake for the day.
Here’s a demo of the final application:

Part 1: Installing React.js & Setting up a React Project
There are multiple ways to Create a React.js Project,
- Manually adding react.js javascript files using the <script> tag inside HTML
- Using a Package Manager ( NPM – Node Package Manager or Yarn ) and installing React.js as a package
The majority of users go with the second method as it provides us with additional features such as Code Minification, and Compression and allows us to explore React.js in its entirety
Installing React.js Using Node Package Manager – NPM
For this tutorial, we’ll be installing React as a Package using NPM or Node Package Manager
To install Node & NPM
- Visit the official website of Node.js: https://nodejs.org/en/
- Download the latest version of Node.js ( 16.16.0 LTS ) as of writing this article
- Follow the on-screen instructions for installing and done!
We should now have NPM & Node.js installed
To create any React.js project we use the following command
npx create-react-app <app name>Where <app name> is the app name & folder name where the project will reside in

After creating the project, open it in Visual Studio Code or Any Other IDE of our choice ( If we don’t know what an IDE is, to put it simply, it’s a Code Editor – just like a text editor for eg. Notepad but with Advanced Features such as Syntax Highlighting, Error Detection and a lot more! )
Understanding the File Structure of a React.js Project
On opening the App Name folder we should see a file structure similar to the one below
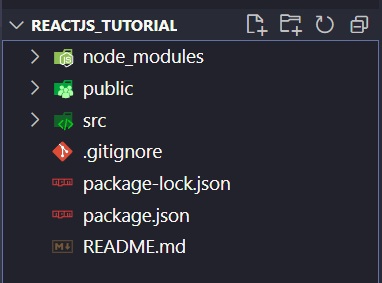
Do not worry about it, as we’ll discuss all the files present, in a step-by-step order
Node_modules Folder:
This folder contains all of the files related to Node Package Manager that we used for installing the application, we don’t need to know a lot about this while working on the React.js application as we rarely even open it in the first place
Public Folder:
This contains all of the Static Content ( Images, Video, Audio, etc ) for the website. If we want to insert an Image to our website, we can simply copy it into the public folder and then use it wherever required
Src Folder:
As the name suggests, this folder contains the Source Code for the React.js application, it mainly consists of
- Component file ( each component is mostly stored in a JavaScript file, for eg: App.js )
- Stylesheet: React.js by default provides us with an index.css file that contains the global styling for the entire page, ( we can also use Component based styling where we create a new CSS file for every single component that we make )
Package.json & Package-lock.json
They are also NPM Specific files, they contain information about packages installed using NPM, they also store the Version Numbers of the packages ( React, React dom, etc ) that are currently being used in the package. For the most part, we won’t be interacting with these files in the tutorial
Running & Testing a React.js Project
After understanding the files & folders that make up a React.js project, it’s time for us to Run the React.js application on the browser
To run a React.js application on the browser, we execute the following command
npm run startThis should open a new browser tab and show a Demo React Application
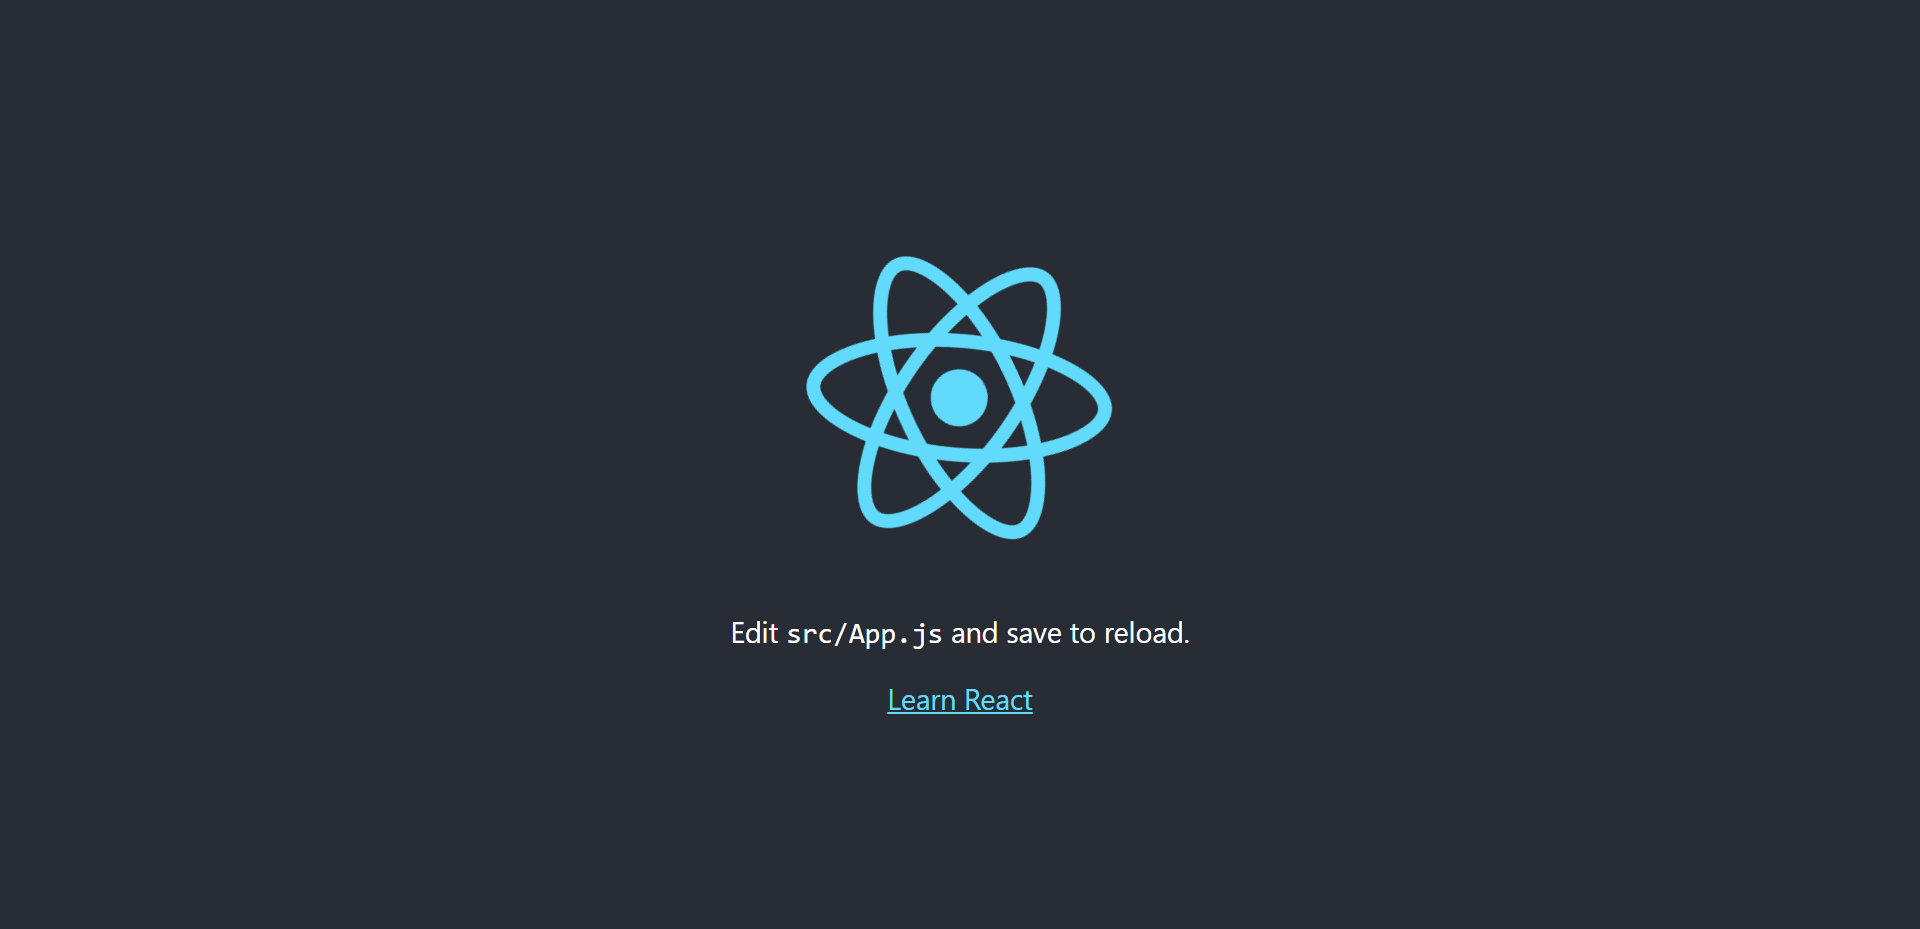
One might be surprised that the React Application is already showing some content even though we didn’t code anything.
This is because React.js by default creates one App.js component that displays a Help Message in case users don’t understand where to code.
To verify this, can open app.js, and there we will see the HTML corresponding to the page we just saw
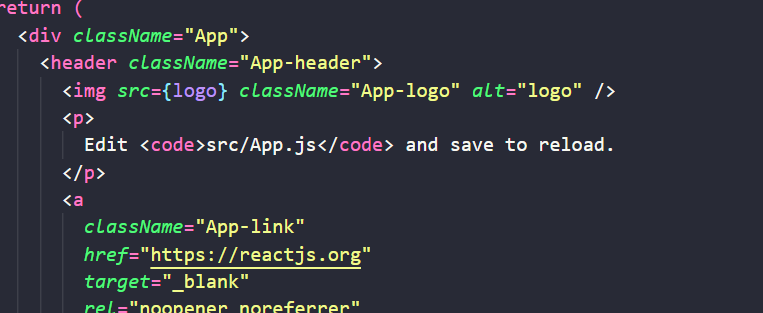
Since the main focus here is learning, we would advise clearing the App.js file so that we can build the App from scratch to get a deeper understanding
Part 2: Creating our first React Component
Looking at the final product, we can try to guess the Components that make up the React Application we’re trying to build
Hint: There are three components
Hopefully, we took our time and tried to analyze the final website to come up with a list of the Components required
- The Added Items Component
- The Add Item Component
- A Root Component that holds these 2 components together ( React.js can have only one root component, which is App.js by default )
Let’s first start by building the Root component, and then we’ll move over to building Added Items and the Add Item component
After clearing the code in the App.js file, it should look something like this
function App() {

  return (
  <div> </div>
  );
}

export default App;
There are quite a lot of things we can observe & learn from this code
- The first observation we might make is that Components are Simple JavaScript Functions. Earlier React Components used to be made of Javascript Classes but in recent versions React has started to support Functional Components with Hooks and since then, most people prefer using Components as JavaScript functions
- The next weird thing to observe would be that we are using <div> tag ( which is HTML ) inside JavaScript. How could this be possible? One might ask. This is because what we are seeing is not exactly HTML, it’s something called JSX ( or JavaScript XML ) JavaScript XML has a syntax almost similar to HTML which compiles the HTML to React.js code while running the app
- JSX is almost similar to HTML because it has few variations in certain keywords such as ( class= “class1” in HTML would be written as className=”class1” in JSX ) This has to be done because the JavaScript Interpreter can confuse HTML class with the JavaScript class keyword used for declaring classes
After making the functional component ( preferably one component per file ) we export it using export default Component_Name;
This export is done so that Other Files can import the component using the import keyword
Now it’s finally time to add some HTML ( or JSX ) to the final application
  <div className="main">
      <div className="header">
        <div className="header-text">Daily Calorie Tracker</div>
      </div>
      <div className="content">
        <ItemsList></ItemsList>
        <AddItem></AddItem>
      </div>
   </div>
The HTML above should be pretty standard, let’s have a brief walkthrough
- Firstly, we create a header section ( Orange colored section in the final product ) inside which we add the App Title
- Then, we create a section called “content” which has the remaining two components: 1) ItemsList and 2) AddItem
- Another cool part of React.js is that we can simply include other components as HTML Tags by specifying their name
- The only catch while Including other components as HTML Tags is that the Component Name should start with a capital letter. This is so that React can distinguish between inbuilt HTML Tags and user-created React.js Components
Part 3: Adding more Components to the React.js Application
Now that we have the Root Component setup, it’s time for us to move on and create the remaining two components, ItemsList and AddItem
We can obviously create the component function in the same App.js file, but this would make the code hard to read and the app would also lose its structure. That’s why most React developers store one component per file and put all of the components in a separate component folder inside the src/ folder
Let’s now create a components folder which will have 2 files for the 2 required components

Now it’s time to open these files and write the code for the components
AddItem Component
Looking at the final product, it’s pretty clear that the Add Item section consists of four parts
- The Add Item Heading
- Input Section for the Food Item Name
- Input Section for Amount of Calories
- A Button to Add the Food Item
export default function AddItem() {

  return (
    <div className="add-item">
      <div className="add-item-title">Add Item!</div>
      <input
        className="item-name-input"
        placeholder="Item Name"
      ></input>
      <input
        className="calories-input"></input>
      <button>
        Add Item!
      </button>
    </div>
  );
}
All of the described four sections can be implemented using <div>’s and <input> tags using simple HTML as shown above. Do not worry about adding interactivity ( Button Clicks, input handling, etc as we’ll work on that part later )
Similarly, we can make the Items List component using the following code
export default function ItemsList() {
   return (
    <div className="items-container">
      <div className="items-title">Added Items:</div>
      <div className="items-list"></div>
</div>

  );
}
In the above code as well, we won’t be focusing yet on displaying the items list just yet. For now let’s make sure that the components have basic structure ( Headings, etc )
Part 4: Understanding React.js Props, State, and Hooks
Before working further on the components, we have to understand three important fundamentals of React
- Props
- State
- Hooks
React.js Props
Props in reacting can be understood as Additional Data being passed to the Component to customize it. They can also be called Properties of a Component
Since React.js components are functions. Props can be received by adding a simple properties/props parameter while declaring a component
For eg,
function ButtonComponent ( props ) {

return (
<h1> the color of the button is : {props.color} </h1>
);

}
Here the button component can receive the supplied props by simply adding a props parameter to the Component Function
Later on, if we require to display a prop on the page, we simply wrap it with curly brackets {} inside the JSX
Now let’s have a look at How to Give/Pass Props to a React Component
In React.js Components, passing props is similar to passing attributes ( such as href, src, id, class ) to HTML element
For eg, to pass the color prop to the ButtonComponent declared above, we write the following JSX code
<ButtonComponent color="blue"> </ButtonComponent>React.js State
We know that props are the properties of Components ( Such as color, content, style, etc ) that are passed by the parent element onto the child.
These props received by parent elements CAN NOT be modified by the child elements themselves ( meaning that an element cannot modify the props it has received )
Now, what about properties of the Component that we do need to modify ( such as text on an input box or a list of items on a page ).
To do that, we have another solution called the State of the Component.
The State of the Component consists mostly of properties that can be modified and on modification will re-render the Components
Let’s now have a look at How to Use State in React.js
To create a new state property, we use the following syntax
let [backgroundColor, setBackgroundColor] = useState("blue")A call to the useState() function, returns us two things
- The property variable – stores the current state
- A setProperty function – provides us with the ability to change that property by passing the new value
In this case, we are adding a new state property to the component called backgroundColor, we can use this anywhere inside the component, and if we decide to change it, we can simply pass in the new value ( say setBackgroundColor(“red”)
Doing so will automatically re-render the component with the new value of backgroundColor
React.js Hooks

Hooks are a relatively new concept in React.js. They were introduced to provide additional functionality to function-based components ( Recall that React had class-based components initially )
Hooks provide a way to “hook” in the features that class-based components used to have. These features include State, Effects, etc
Hooks can only be used in function-based components and nowhere else. React also allows us to create custom hooks. They also provide a few built-in hooks such as useState(), useEffect(), and a lot more.
Part 5: Adding Functionality to React Components
Now that we have learned a lot more about Props, State, and hooks. It’s time for us to implement them in the Components to make the App Interactive
Let’s first start working on the App.js ( the root component )
import { useState } from "react";

import AddItem from "./components/AddItem";
import ItemsList from "./components/ItemsList";
function App() {
  let [items, setItems] = useState([]);
  return (
    <div className="main">
      <div className="header">
        <div className="header-text">Daily Calorie Tracker</div>
      </div>
      <div className="content">
        <ItemsList items={items}></ItemsList>
        <AddItem
          callback={(name, calories) => {
            let newItems = [...items];
            newItems.push({ name, calories });
            setItems(newItems);
          }}
        ></AddItem>
      </div>
    </div>
  );
}- One observable modification that we have made is to add a new state property called items
- This property will contain a list or array of all the user added food items
- Think about where we might need these newly created items state property
- Firstly, the ItemsList component needs the items array to display it in neat order, therefore, we pass the items array as a prop to the ItemsList component
- Then, inside the AddItem component, we pass a callback function as a prop
- This callback function is called as soon as the user clicks on the Add Item button inside the AddItem Component
- If we take a closer look at the callback function, we will see that we are creating a new array – a copy of the item’s array and pushing the newly added item inside the array. After which we call the setItems() method to change the state to the newly created array.
- Doing so will re-render the ItemsList component which will now contain the newly added item
Now let’s have a look at the AddItem component
import { useState } from "react";
export default function AddItem(props) {
  let callback = props.callback;
  let [itemName, setItemName] = useState("");
  let [calories, setCalories] = useState("");
  return (
    <div className="add-item">
      <div className="add-item-title">Add Item!</div>
      <input
        className="item-name-input"
        value={itemName}
        placeholder="Item Name"
        onChange={(e) => setItemName(e.target.value)}
      ></input>
      <input
        className="calories-input"
        value={calories}
        onChange={(e) => setCalories(e.target.value * 1)}
        placeholder="Calories"
      ></input>
      <button
        onClick={() => {
          setItemName("");
          setCalories("");
          callback(itemName, calories);
        }}
      >
        Add Item!
      </button>
    </div>
  );
}- Firstly, we extract the callback from props by using props.callback
- Then, we declare 2 new state variables, called itemName and calories
- These state variables are linked to the input tags in a way that whatever value is inside the input the same value is inside these variables – at any given point in time
- To achieve that, we add an onChange event listener that is called when the value inside input is changed. This means, as soon as onChange is called ( the input value is changed ) The State variables also update accordingly using the setItemName() & setCalories() methods
- The only thing left now is to handle the Button Click which is done by adding an onClick listener that is called on a user click
- Inside this onClick listener, we firstly empty the item name & calories fields, and then, we call the callback function which will take care of updating the items array and re-rendering the UI to reflect the newly inserted food item
Let’s now move on to adding functionality to the Final Component – ItemsList
export default function ItemsList(props) {
  const items = props.items;
  const calSum = props.items.reduce(
    (a, b) => {
      return { calories: a.calories + b.calories };
    },
    {
      calories: 0,
    }
  );

  return (
    <div className="items-container">
      <div className="items-title">Added Items:</div>
      <div className="items-list">
        {items.map((e) => {
          return (
            <div className="item" key={e.name}>
              <div className="item-name">{e.name}</div>
              <div className="item-calories">{e.calories} Cal</div>
            </div>
          );
        })}
      </div>

      { (
        <>
          <div className="underline"></div>
          <div className="item">
            <div className="item-name">Total</div>
            <div className="item-calories">{calSum.calories} Cal</div>
          </div>
        </>
      )
      }
    </div>
  );
}
This component is the largest of them all and has a little more complex implementation when compared to the other two components
But do not worry as we will be breaking it down into simple, step-by-step instructions
- The first thing to notice is that this component has no “state”. It simply takes in the prop provided by the parent component ( items array provided by root app.js component ) and displays it
- These types of components are called stateless components
- Let’s start by extracting the required data from the props
- Firstly, we get the items to array from props.items.
- Since we have to display total calories, we also need another variable calSum to store the sum of Calories. This can be calculated using a for loop or by using JavaScript’s Array.reduce() method
- After getting the items array and the sum of calories we render these elements using JavaScript’s Array.map() method which maps the element in an array to an HTML div element
- After displaying all of the food items we display the total using calSum variable ( recall that we can display JavaScript variable values on the web page by wrapping them in curly braces {} )
And that’s it! The coding part is now done! To try out the application on the browser simply run the npm run start command we discussed earlier
Part 6: Adding CSS to the React.js Application
The website looks complete now, but it still doesn’t look as good/finished as the final product. That’s because we didn’t style it by adding CSS
Covering styling with CSS is not the main scope of this article, but still to get the same result, as shown above, one can add the following CSS code to the index.css file inside the src/ folder
* {
  margin: 0;
  padding: 0;
  font-family: "Segoe UI", Tahoma, Geneva, Verdana, sans-serif;
}
.main {
  min-height: 100vh;
}
.header {
  background-color: orange;
  height: 7.5vh;
  display: flex;
  justify-content: center;
  align-items: center;
  font-size: 30px;
  color: white;
  font-weight: bold;
}

.content {
  display: flex;
  justify-content: space-around;
}

.items-container {
  display: flex;
  flex-direction: column;
  margin: 40px;
}
.items-title {
  font-weight: 700;
  font-size: 25px;
}
.items-list {
  display: flex;
  flex-direction: column;
  margin-top: 20px;
}
.item {
  display: flex;
  justify-content: space-between;
}
.item-name {
  min-width: 300px;
  font-size: 20px;
}
.item-calories {
  font-size: 20px;
  font-weight: lighter;
}
.underline {
  height: 2px;
  width: 100%;
  background-color: grey;
  margin: 10px 0px;
}

.add-item {
  display: flex;
  flex-direction: column;
  margin: 40px;
  align-items: center;
}
.add-item-title {
  font-size: 25px;
  font-weight: 700;
  margin-bottom: 30px;
}
input {
  width: 300px;
  height: 35px;
  margin-bottom: 10px;
  padding-left: 10px;
  border: 1px solid grey;
  border-radius: 10px;
}

button {
  height: 35px;
  width: 310px;
  color: white;
  font-size: 20px;
  background-color: orange;
  border: 1px solid transparent;
  border-radius: 10px;
}
Part 7: Exporting the React Application to Plain HTML/CSS/JavaScript
If we want to host the website on a server, let’s say GoDaddy or Hostinger. We first have to compile/export it in a standard HTML/CSS/Javascript format
To do that, we run the following command inside the project folder
npm run buildAfter compilation, you should get the following message
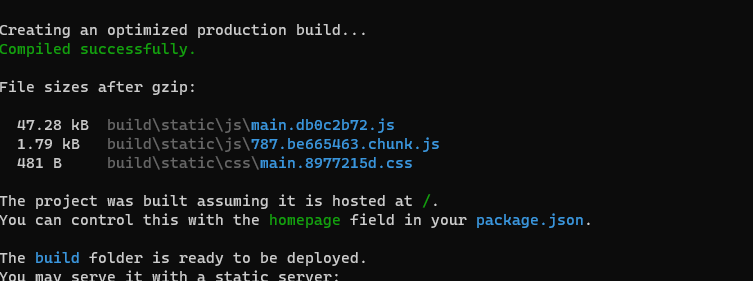
This should contain all of the html/CSS/javascript files required to host the website on any server that we like
Another cool thing to notice would be that if we have opened any of these folders that we might see code that looks something like this
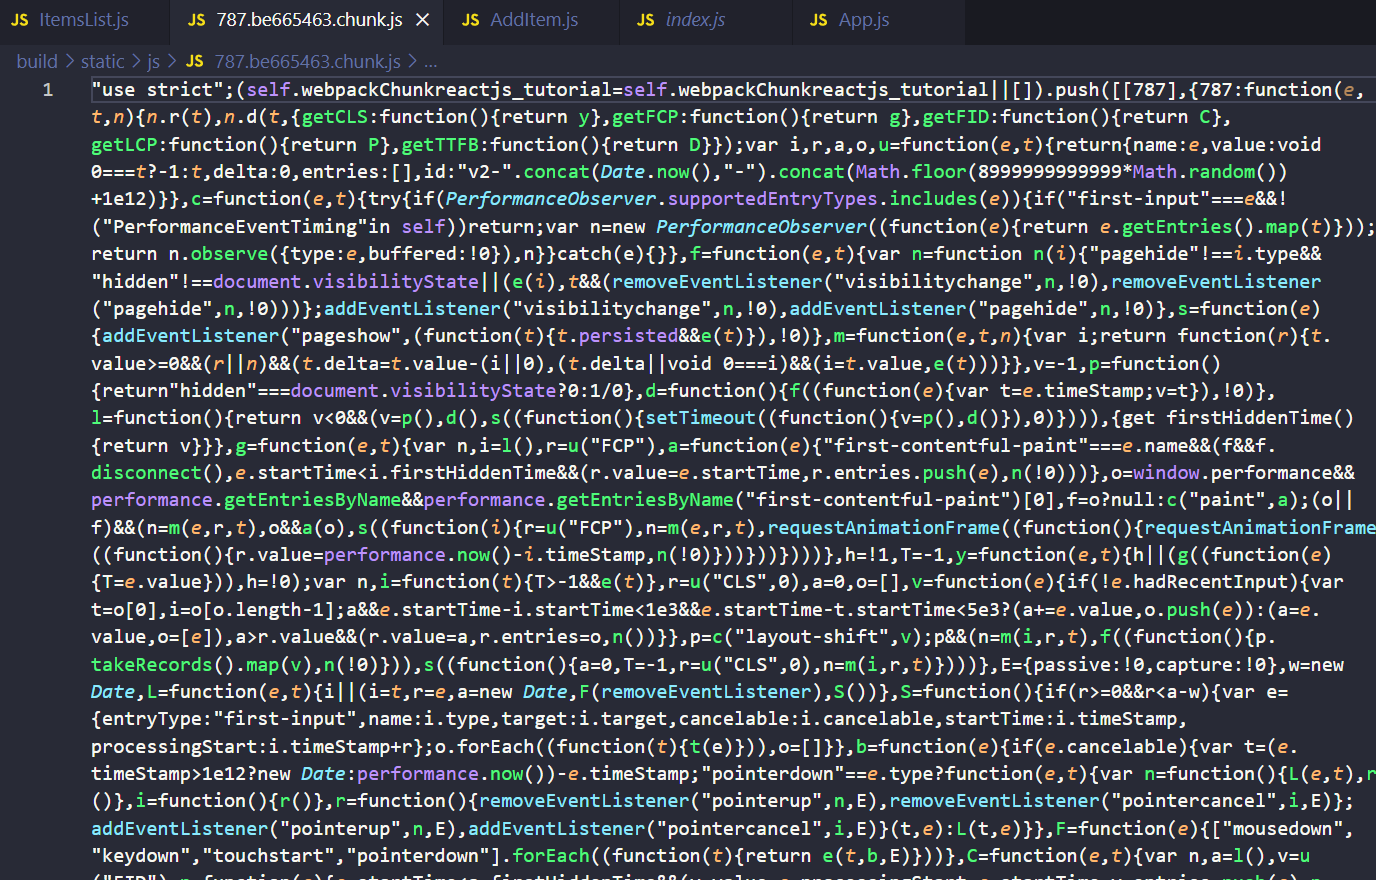
This compiled code looks like gibberish for now, but let’s understand why it’s done this way
- Spaces are removed & Variable Names are changed to shorten/minify the website size so that it loads faster
- The compiled code is now hard to read/understand preventing any unnecessary attacks/hacks on the website
Conclusion
Congrats on coming this far and finishing our first react application! Try to explore more of react.js by visiting their documentation. We can start by reading up more about a newly introduced concept – hooks in react.js or if we want, we can even explore other modern frontend frameworks as they all share similarities with react.js. Hopefully, we have learned today and can appreciate React.js for speeding up the development process. If you liked the article, do share it with friends!
