Building Cross-Platform Apps with React Native – TUTORIAL
Let’s say you want to build a Mobile Application for some purpose. Now you also want to make sure that the app has a good amount of reach so you decide to make it available for Multiple Platforms ( say iOS and Android ). And to create individual apps for individual platforms, you need to hire 2 separate teams!
Doing this can have the following disadvantages
- It tends to get more costly as more people work on it.
- Features may not be in sync between the platforms ( for eg, some features might work better on iOS than on Android and vice versa )
- It is very time-consuming, as a lot of Time is being spent in getting all the teams on the same page whereas, this time could be utilized while working on the actual product
To circumvent this, Facebook created React Native, which is a multi-platform library that works with React.js to build Fast & Native – Like Mobile applications in a fraction of time.
The best part about this is that React Native can also be integrated into the Already Existing Android / iOS project. Meaning you can use Platform Native Code ( Java / Kotlin / Swift ) & React Native both at the same time to get the best of both worlds.
And all of this is accomplished without any significant performance impact when compared to complete-native android apps.
Table of Contents
React Native vs Other Frameworks
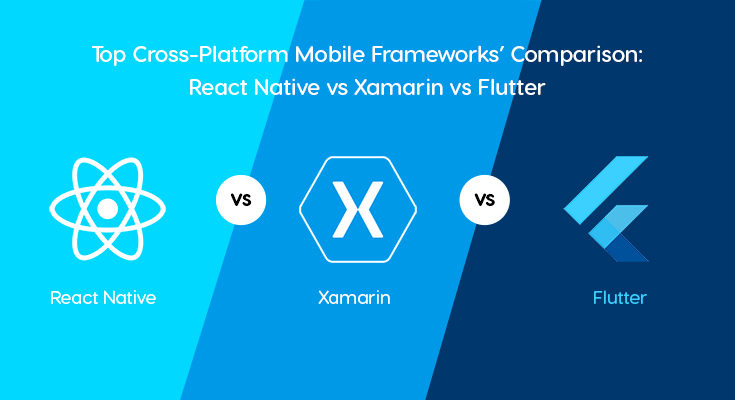
Now obviously Facebook wasn’t the only company that had the idea to build a framework for cross-platform Mobile Applications. There are a lot of other Hybrid App Development frameworks on the market, such as Ionic, PhoneGap/Cordova, Xamarin, and Flutter. But there are a few things that make React Native stand out
-
Compilation into Native Components
Unlike other Hybrid App frameworks, React Native compiles the React components into Native iOS/Android components. This allows faster performance, which is almost as fast as it would be if the app was built natively
Whereas frameworks like Cordova and Ionic use Android WebView and simply render the HTML Website as an android app. This makes the app feel a little more sluggish & slow as the app is a browser bundled with the website
-
Uses JavaScript
Frameworks such as Flutter introduce new languages ( Dart ) just to use their SDK to build cross-platform apps. Whereas React Native supports JavaScript that is widely used all over the world in Servers, Front-ends, and a lot more!
-
Easier for React.js Developers
Since React Native is based on an existing web framework React.js, it requires very little or no training for the existing React.js developers to pick up React Native.
What will we build in the Tutorial?
Since this is a tutorial, we will build a Sample Application as we learn more about React Native.
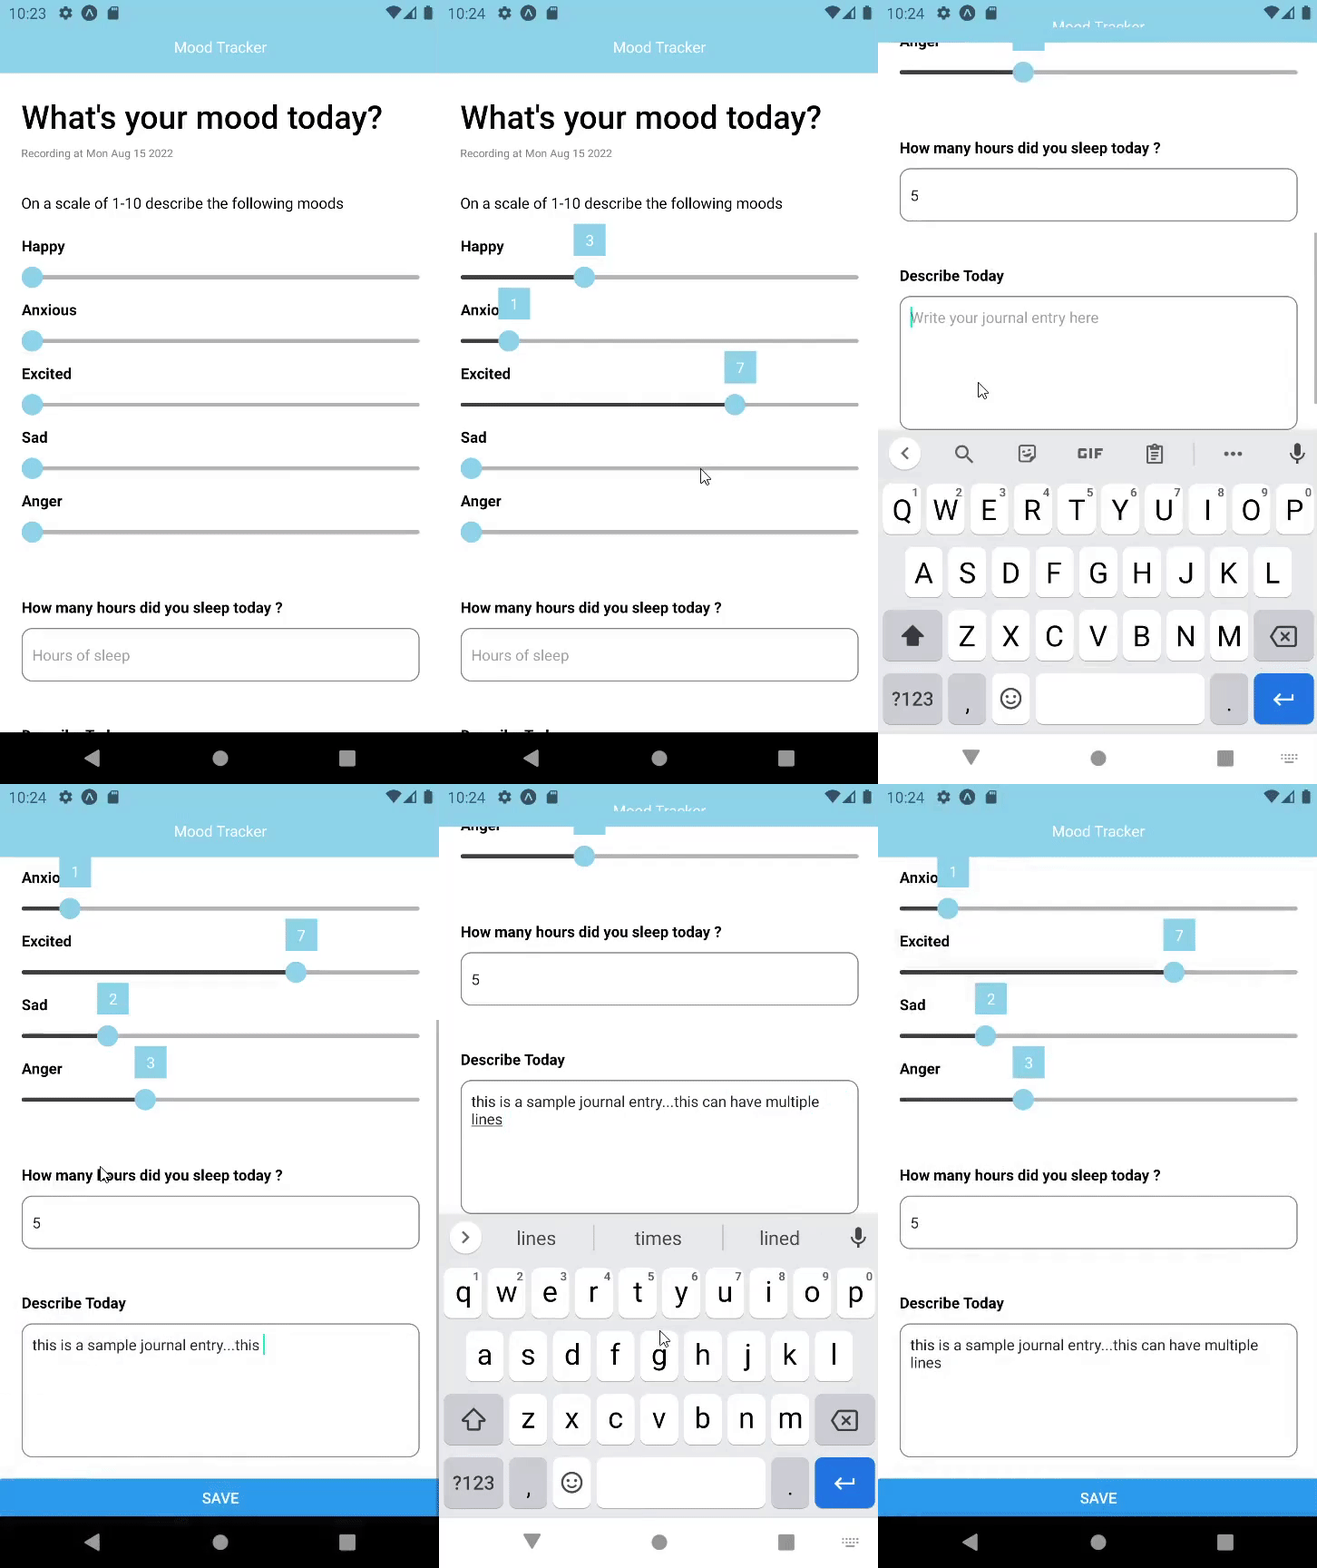
The best way to learn any framework is to build an app, that has loads of components ( Buttons, Text Inputs, Sliders, Headings, etc ). That is why we will be working on a Mood Tracker App that asks the user to fill out details about their mood, this way we’ll cover almost all the Core Concepts of React Native.
Here’s a demonstration of the final application
Part 1: Understanding How React Native Works
Before moving on to writing the code for the React Native Application, it is important to understand how React Native works under the hood.
A React Native application is built by using two parts:
- The Core React.js Library
- The React Native Rendering library ( react-native )
Similarly, a React Web Application also has two parts
- The Core React.js Library
- The Browser DOM rendering library ( react-dom )
The above segregation is done so that between React.js Web and React Native, only the Rendering Library is changed. The core part of React.js stays the same ( Components, props, Hooks, etc all are common in both web and mobile worlds )
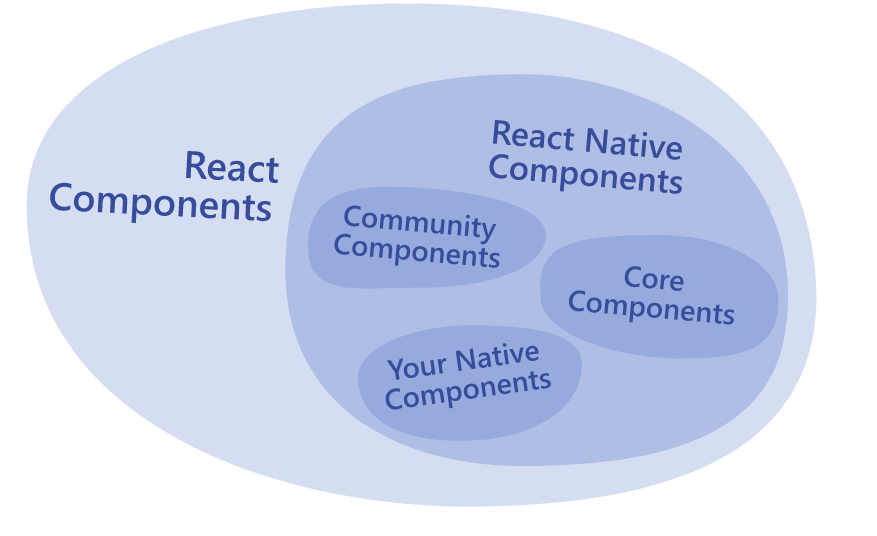
Let’s now have a look at how exactly rendering works in react-native
In Android & iOS Development, the app is divided into components called Views. There are two kinds of views:
- Ones that display content ( TextView, ImageView, ButtonView, etc )
- Ones that Align Content ( ScrollView, ColumnView, TableView, etc )
What React Native does here is that it makes JavaScript implementations of these Native Components. For example, React Native has its own pre-built JavaScript <Image> component, that is derived from / made from the native Android <ImageView> component.
And while building the app, it automatically compiles these javascript components into Native Android / iOS components.
From this, you can see that React Native is just adding a Layer of JavaScript Components to make things easier, but in the end, all of them get compiled to Native Components in the Native Language ( Java, Kotlin, Swift ). And that’s what makes React Native apps fast & performant.
If you look at their documentation, you’ll find a list of react native components and the Android / iOS Views that they get compiled to.
| REACT NATIVE UI COMPONENT | ANDROID VIEW | IOS VIEW | WEB ANALOG | DESCRIPTION |
| <View> | <ViewGroup> | <UIView> | A non-scrolling <div> | A container that supports layout with flexbox, style, some touch handling, and accessibility controls |
| <Text> | <TextView> | <UITextView> | <p> | Displays, styles, and nests strings of text and even handles touch events |
| <Image> | <ImageView> | <UIImageView> | <img> | Displays different types of images |
| <ScrollView> | <ScrollView> | <UIScrollView> | <div> | A generic scrolling container that can contain multiple components and views |
| <TextInput> | <EditText> | <UITextField> | <input type=”text”> | Allows the user to enter text |
Note: This is not an exhaustive list of all react-native components. There are tons of them to explore here at https://reactnative.dev/docs/components-and-apis
And the best part about this is, that React Native allows you to create your Native Component in Java/Kotlin/Swift, etc, and then use it as a JavaScript React Native Component. This allows for building a more feature-rich and advanced application than many other frameworks on the market.
Part 2: Setting up the Developing Environment for React Native
Now that we have understood the basic working of React Native, it’s time to install the essential tools required to create a React Native application
Package Manager ( NPM or Yarn )

It is completely possible to build a React Native application without using a Package manager. But almost everyone uses a Package manager such as Yarn or NPM ( Node Package Manager ) for their project as it keeps them away from the hassle of managing all of the installed packages/plugins manually.
For this tutorial, we’ll be installing NPM as it is more popular and considered to be beginner-friendly
To install NPM & Node.js
- Visit their official website https://nodejs.org
- Download the Latest Stable Version of Node.js ( 16.16.0 LTS ) as of writing this article
- Follow the on-screen instructions to install Node.js on your computer
React Native

There are two ways to install React Native on your computer
- Using Expo ( If you want to build the app entirety in React Native from Scratch )
- Using React Native CLI ( If you already have an Android App and want to add additional react native code )
We will be going with Expo as we are building a new react native app from scratch.
To install the expo using NPM ( The package manager that we downloaded earlier ), we run the following command
npm install -g expo-cliThe -g flag in the command specifies that this package should be installed globally which means we can then use the expo to create React Native apps anywhere on the computer.
Android Studio

To build android apps, the most used and the “standard” tool according to a lot of people is Android Studio.
Android Studio is the most complete development platform for Android Apps. It has an integrated IDE (with IntelliSense), Android SDK Manager, the ability to manage/create Virtual Devices ( or Android Emulators ), and a lot more advanced features that make android app development a piece of cake.
- To install Android Studio, visit their official website, https://developer.android.com/studio
- Click on the Download Android Studio button and wait for the installer to finish downloading
- Once the installer is downloaded, open it and choose all the default options that Android Studio provides
Android Emulator
To test the Android Application, even if you can transfer the app and install it on your phone every single time. You will sooner or later realize that it is a tedious process and takes away valuable time that could have been spent working on the actual application. Do not worry as there is a solution for it, and it’s called Emulators.
Emulator is a software that is designed to run Another Operating System on our device. Android Studio by default provides us with the required tools to create and run an Android Virtual Device / Android Emulator
To Create an Android Virtual Device ( AVD ), simply go to the home of Android Studio and select Virtual Device Manager
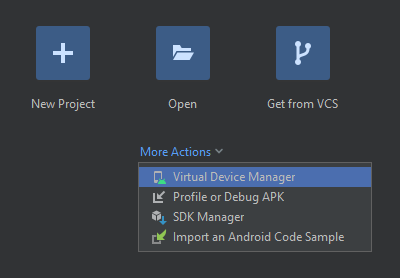
Then, click on Create Device and you should see a bunch of options as shown below
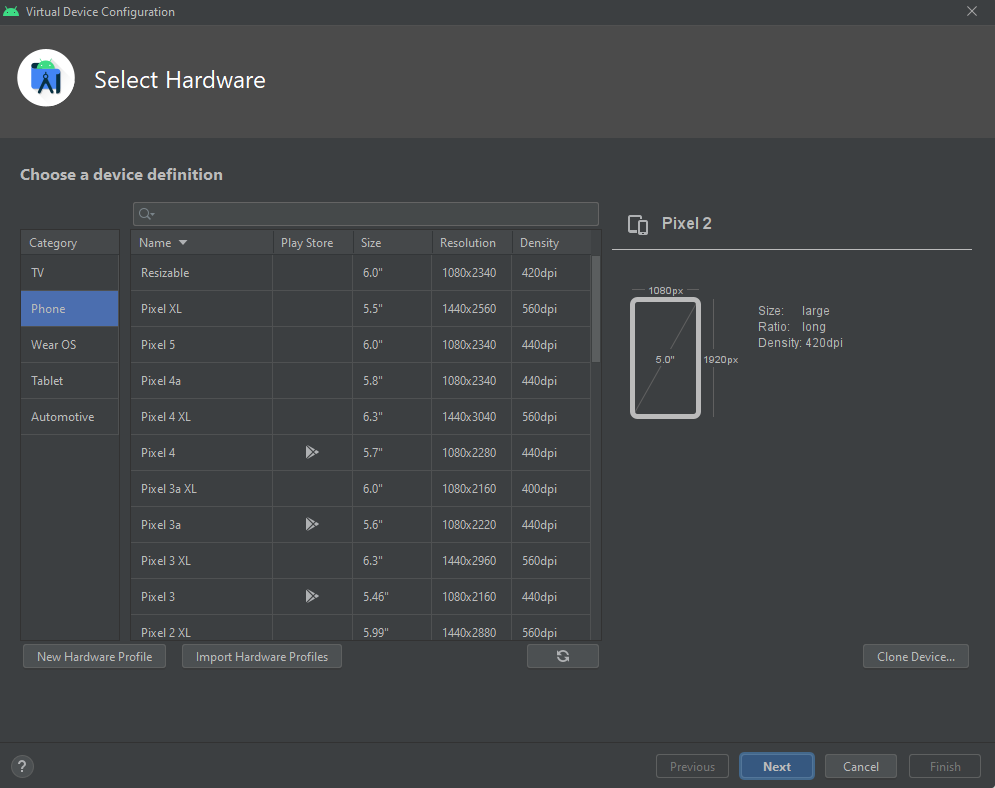
Select the type of Device ( Phone, Tablet, Android TV, Android Watch ) you want to emulate and after selecting the configuration your Virtual Device should be created. To test it simply click on Run and wait for the device to boot
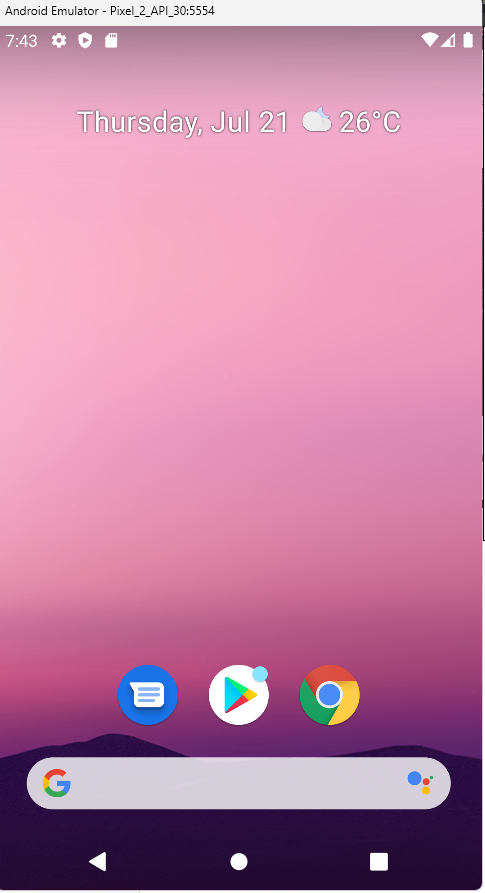
Congrats! Your android emulator is now installed and working!
Part 3: Creating a new React Native Project
Now that you have all of the essential tools set up, it’s time to Create a New React Native Project. Try to give this section your full attention, as this is what you’ll be doing for almost any new react native project.
To create a new React Native Project, you run the following command
expo init <App Name>In our case, the command would be
expo init MoodCheckerAppRunning the above command will create a new React Native project, inside the folder MoodCheckerApp
You might then be asked for a Starter Template as shown below
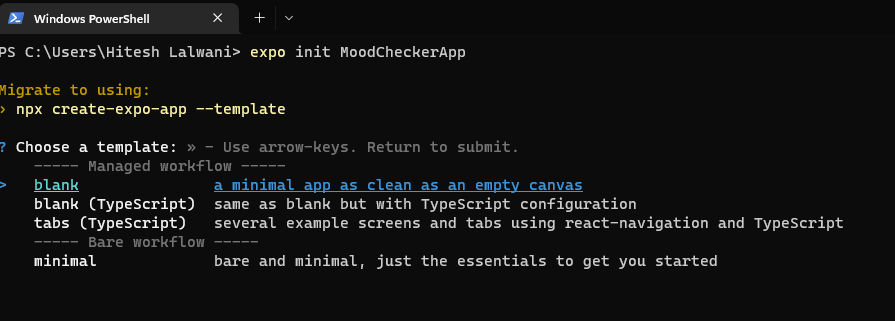
Since the main goal of this tutorial is to Learn React Native from Scratch, we’ll be going ahead with the blank template
Within a few minutes, the newly created folder should be filled with new files & folders like the ones shown below
Understanding the File Structure of a React Native Project
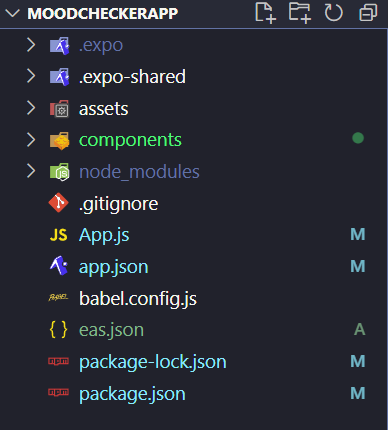
We can very well go ahead and start writing the code inside the App.js file and complete the React Native App. But a good developer always understands all the various files & folders inside the project as all of them play an important role.
And that’s exactly what we’ll be doing, breaking down all of the files & folders above, and trying to understand the purpose of each of them
The .expo & .expo-shared folder
The “.expo” folder is created when an Expo project is started using the “npm run” command.
It is not intended to be managed/modified by the user, as it mostly contains internal information for the framework to work correctly
The Assets Folder
Almost every framework has an assets folder. This contains all of the assets such as Images, Audio Files, Video, App Icons, etc.
The Components Folder ( Optional )
This is not something that expo / react native creates automatically, but most developers prefer to create a components folder that has all of the React Components this helps in avoiding confusion as all of the components are in a single folder.
The Node_modules folder
is not specific to React Native / Expo, this folder is managed by NPM ( the package manager that we used for installing React Native ). Just like the .expo folder, this is also not meant to be modified by the user as it contains all of the installed packages and is managed entirely by NPM
App.js
This is where the Root Component of the App is placed. Most of the React Native Applications have only a Single Root Component, and the remaining other components are simply children to it
App.json
This contains essential data about the app, such as the App Name, App Icon, Company Name, App Version, Package Name.. and a lot more. We’ll be using this file in the later sections while Exporting the App to various app stores
Package.json & Package-lock.json
These files are Specific to NPM and they contain the List of Packages installed using NPM & their Versions. We rarely use it if we want to downgrade/upgrade the version of some installed NPM Package.
Running The App on Emulator
Now that we have understood the file structure of a React Native Project, let’s try running the app on the installed Android Emulator.
To run the React Native App on Emulator, we run the following command
npm run android The first run should take a while depending on your computer, and if everything goes alright you should see the following on the terminal
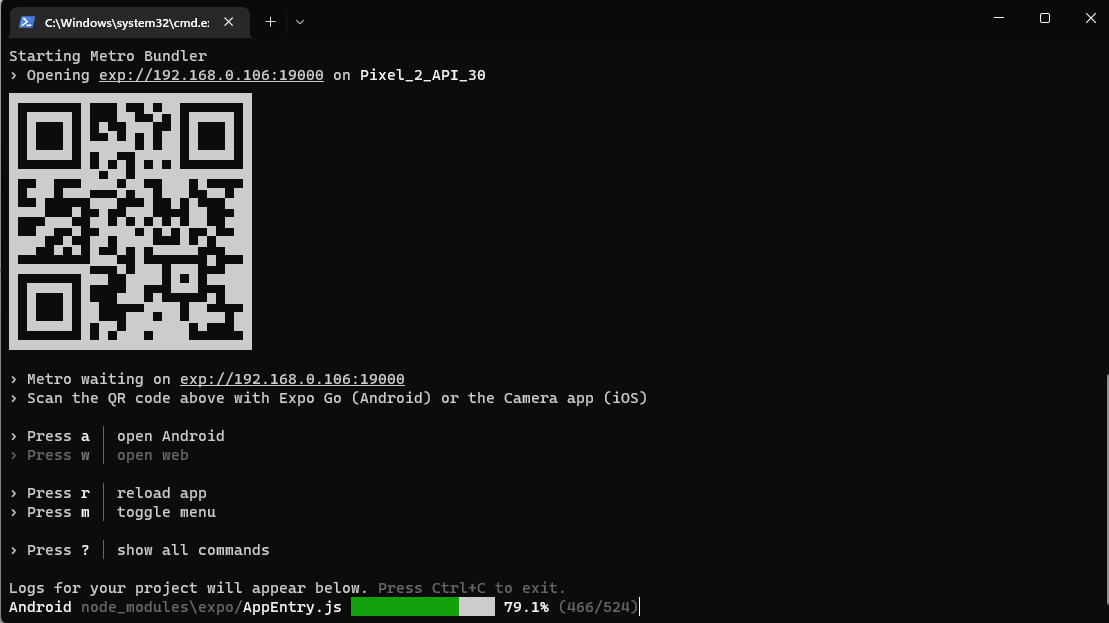
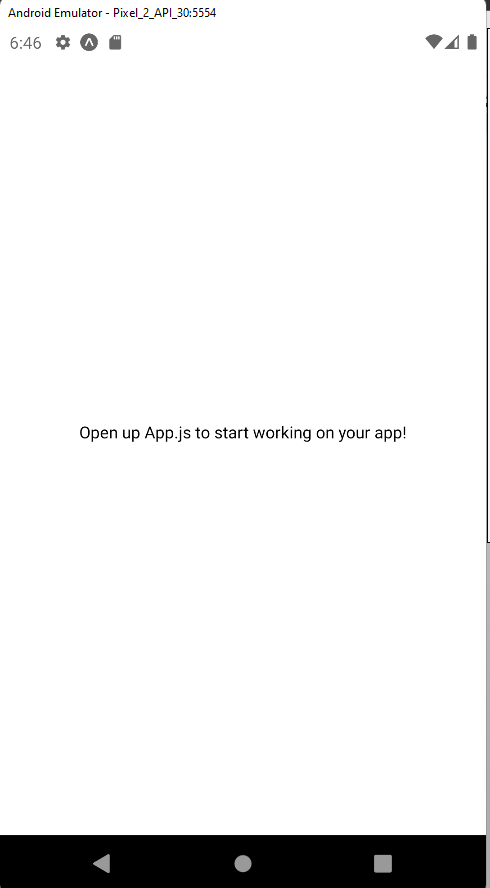
And the Android Emulator should show the following output, which means that all of the tools are installed & configured correctly.
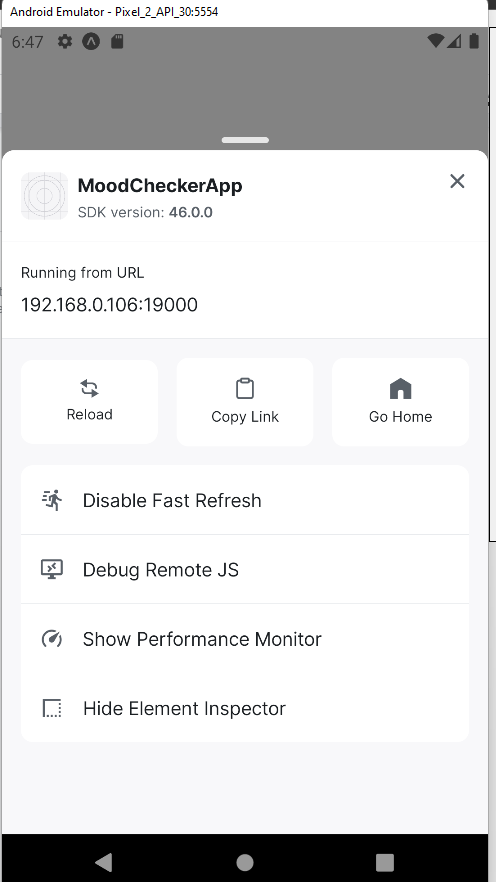
Another cool thing about Expo React Native is that the debugger provides you with some exciting Developer Tools such as Performance Monitor & Element Inspector ( equivalent to Google Chrome’s Inspect element )
To get access to these developer tools, you simply hit Ctrl + M on the Android Emulator you’re working on
Part 4: Working on the Main Screen of React Native Project
It’s finally time to Write Some Code!
As discussed, the Root Component of any React Native Application is located inside the App.js file, so let’s start by opening app.js
Inside App.js you might already see some pre-written code, clear up all of that as we’ll be starting from scratch using the following code
export default function App() {
 return <View> </View>
}- The above code simply creates a new App Component and returns an empty <View> element
- If you have a little bit of web development experience, an <View> in React Native can be thought of as an <div> in HTML. Meaning that a View is simply a Container to hold & align its children
Let’s start by adding a few Headings & Titles to the app, by using the following code
  <View style={{ flex: 1 }}>
      <View
        style={{
          flex: 1,
          backgroundColor: "skyblue",
          justifyContent: "flex-end",
          alignItems: "center",
        }}
      >
        <Text style={{ color: "white", padding: 15 }}>Mood Tracker</Text>
      </View>
      <View style={{ flex: 9 }}>

 <ScrollView>
          <Text
            style={{
              paddingHorizontal: 20,
              fontWeight: "600",
              fontSize: 30,
              paddingTop: 20,
              paddingBottom: 7,
            }}
          >
            What's your mood today?
          </Text>

        </ScrollView>


      </View>
</View>- Unlike React.js or any other frameworks, in React Native, all the elements have an inline styling Meaning that instead of having a separate stylesheet, each element has an individual style by using the style prop
- The style prop is almost completely similar to CSS, the only difference is that instead of breaking the words using –, the property names are camelCased ( for eg, background-color in CSS becomes backgroundColor in React Native )
- Another thing to note is that by default all React Native Container Elements are Flex Containers having a value of display: flex;
Let’s now discuss what we’re trying to accomplish using the code above,
- Firstly we create a Root View and divide it into 2 children with a 1:9 ratio ( one for the app heading bar and the rest for the app content )
- Then, inside the App Bar Container, we add a heading Mood Tracker using <TextView>
- Inside the Content Container ( the one which has 9 parts of space ), we use a <ScrollView>
- This is required as a prevention measure on smaller devices so that if the container gets too big for the device, the user can scroll down to see additional content instead of it being completely cut off from the screen
- Inside the <ScrollView> we add another heading “What’s your mood today?” using <TextView>
<Text
         style={{
          paddingHorizontal: 20,
         color: "grey",
          fontSize: 10,
            }}
          >
            Recording at {new Date().toDateString()}
     </Text>
      <Text
         style={{
           paddingHorizontal: 20,
           paddingTop: 30,
          fontWeight: "lighter",
            }}
          >
            On a scale of 1-10 describe the following moods
          </Text>
In the code above, we add another two subheadings,
- The first subheading displays the current date by using the Date() object provided in JavaScript ( note that just like in React.js we can wrap javascript code in curly brackets {} while working with React Native )
- The second subheading, asks the user to describe his mood in a range of 0-10
Now, for the next part, to describe moods, we’ll need an Input Slider since React Native doesn’t have a fully functional Input Slider by default, let’s download one from the Package manager we installed – NPM
For this project, we’ll be using the react-native-slider package. To install it on your React Native Project, run the following command
npm install @miblanchard/react-native-sliderTo keep things clean and structured, we’ll create a new file InputSlider.js inside the components folder and create the Input Slider component there
import { Slider } from "@miblanchard/react-native-slider";
import { useState } from "react";
import { View, Text } from "react-native";


function AboveThumbComponent({ value }) {
  if (value != 0) {
    return (
      <View
        style={{
          width: 30,
          height: 30,
          backgroundColor: "skyblue",
          justifyContent: "center",
          alignItems: "center",
        }}
      >
        <Text style={{ color: "white" }}>{value}</Text>
      </View>
    );
  }
}

export default function InputSlider() {
  let [value, setValue] = useState(0);
  return (
    <Slider
      value={value}
      onValueChange={(newVal) => setValue(newVal[0])}
      step={1}
      minimumValue={0}
      maximumValue={10}
      renderAboveThumbComponent={() => {
        return <AboveThumbComponent value={value} />;
      }}

      thumbTintColor={"skyblue"}
    ></Slider>
  );
}
The above code should be pretty simple to understand once we break it down into smaller steps
- Firstly, we create a State Property for the InputSlider Component called value, this represents the current value on the slider ( between 0 and 10 )
- Then, we simply add an import statement, to import the Slider from the NPM Package that we installed earlier
- Now, we use the <Slider> component that we imported and add some additional configuration to it
- The Slider component that we imported is given the following configuration
- Minimum & Maximum – The minimum and maximum values on the Slider ( 0 to 10 )
- Step – Since we want the Mood Ratings to be integers, we’ll put the Step Value as 1
- If you want to show the current value above the Slider Thumb, you can create a New AboveThumbComponent that simply contains a <TextView> to display the current value of the slider ( completely optional )
- To make the slider aligned with the app color theme, we also set the thumbTintColor of SkyBlue
Now, let’s use the InputSlider component inside App.js
          <View
            style={{
              padding: 20,
            }}
          >
            <Text style={{ fontWeight: "bold" }}>Happy</Text>
            <InputSlider></InputSlider>
            <Text style={{ fontWeight: "bold" }}>Anxious</Text>
            <InputSlider></InputSlider>
            <Text style={{ fontWeight: "bold" }}>Excited</Text>
            <InputSlider></InputSlider>
            <Text style={{ fontWeight: "bold" }}>Sad</Text>
            <InputSlider></InputSlider>
            <Text style={{ fontWeight: "bold" }}>Anger</Text>
            <InputSlider></InputSlider>
          </View>
As discussed, the above code will create 5 sections, representing 5 moods and each of them will have an <InputSlider> attached to them
Now let’s focus on adding Input Fields to the app
  <View style={{ padding: 20 }}>
            <Text style={{ fontWeight: "bold" }}>
              How many hours did you sleep today ?{" "}
            </Text>
            <TextInput
              keyboardType="numeric"
              style={{
                borderColor: "grey",
                borderWidth: 1,
                borderRadius: 10,
                marginTop: 10,
                padding: 10,
              }}
              placeholder={`Hours of sleep`}
            ></TextInput>
          </View>
          <View style={{ padding: 20 }}>
            <Text style={{ fontWeight: "bold" }}>Describe Today</Text>
            <TextInput
              multiline={true}
              style={{
                borderColor: "grey",
                borderWidth: 1,
                borderRadius: 10,
                marginTop: 10,
                padding: 10,
                height: 125,
              }}
              textAlignVertical="top"
              placeholder={`Write your journal entry here `}
            ></TextInput>
</View>- To add a new input field to the app, we use the <TextInput> component which provides us with many options to configure the input field as per our requirement
- For the first input field, since we are asking Number of hours of sleep the answer will be a number. Therefore we can request for the Numeric Keypad to be displayed instead of the full QWERTY keyboard
- Similarly, for the last input field, since the Journal Entry can be a full paragraph, we need to use a Multi-Line input box, to do that, we simply set multiline={true} while declaring the <TextInput>
- Another cool feature is that you can display Hint Text / Placeholder text when the user hasn’t typed anything yet. This Placeholder text can be a Help Message to guide the user about the purpose of this InputField
- This can be accomplished by setting the placeholder prop provided by the <TextInput> component provided by React Native
Now, to end the application, let’s add the final component – Button
          <Button
            style={{ backgroundColor: "skyblue" }}
            title="Save"
            onPress={() => {
              Alert.alert(
                "Yay!",
                "Your mood entry has been saved successfully"
              );
            }}
          ></Button>
Buttons in React Native are fairly simple and easy to use, they take only 2 main props
- Title: This represents the text that is to be displayed on the Button
- onPress: Similar to the onClick callback in Web Development, this function is executed on a Button Click
- For our purposes, we simply show an Alert Popup saying that the Mood Entry has been saved successfully
And that’s it! The app should be completely functional now. Before moving on to the next section, it’s recommended to try it out on the Android Emulator to see if everything works as expected
Part 5: Exporting the React Native App for publishing
Hopefully, you are satisfied with the final product that you saw on the Android Emulator.
The next step is to Publish your app on mobile app stores such as Play Store or Apple App Store for better reach to the public.
To do that, we first need to export the app using the following procedure
- Depending on the platform you want to export it for ( iOS or Android ) run the command below
eas build --platform android/iosIf you are getting an error while executing the code above, you need to first install the expo globally on NPM and also create a new expo account
To do that, we run the following command
npm install -g eas-cli( for installing eas globally )
Then, we create a new expo.dev account by visiting their official website https://expo.dev
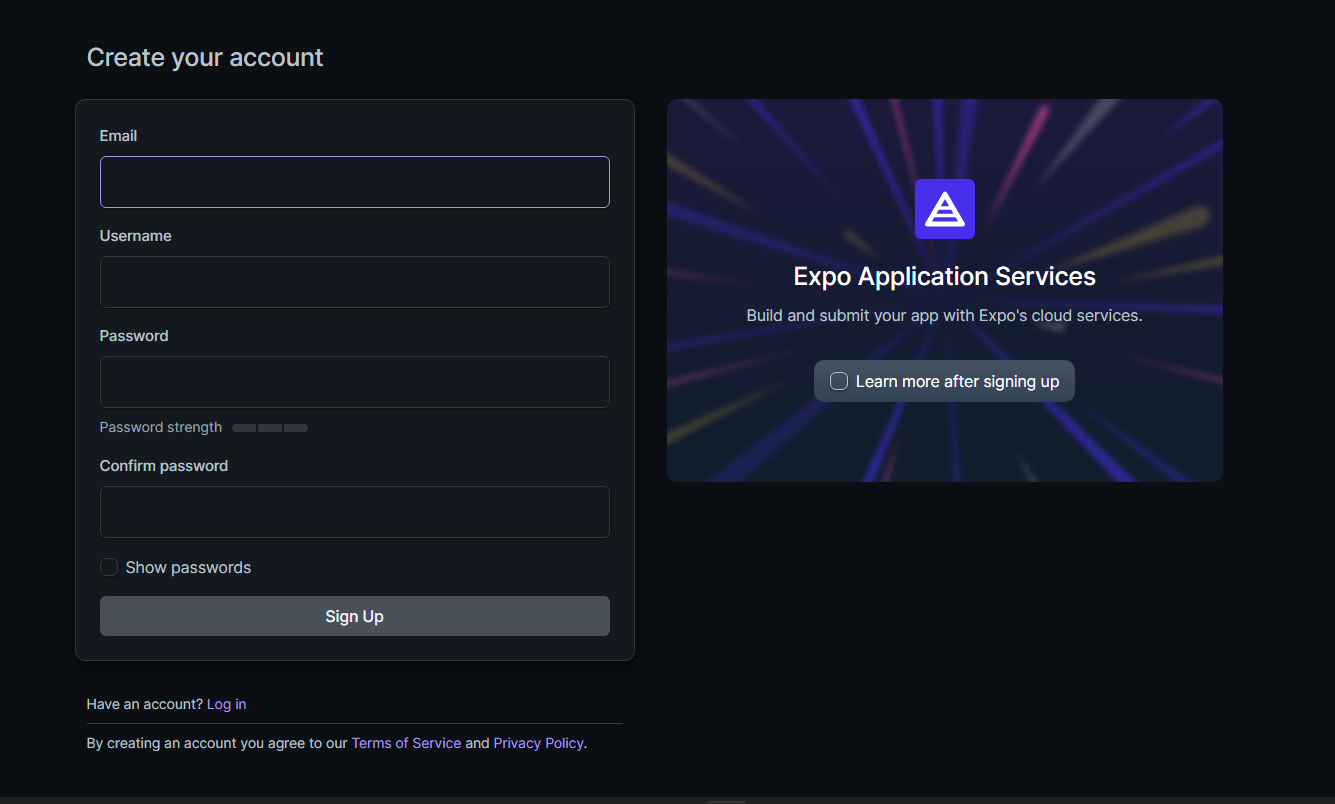
If everything went alright and you filled the credentials correctly, the build files should be exported and you should receive a link as shown below


On visiting the shown link, you will get an option to download the export as shown

Now, you can simply download this file and Upload it to the Play Store / App Store without any hassle!
Conclusion
Congratulations on coming this far on a long journey to learn about React Native. Hopefully, After building a fully-fledged cross-platform app simply using JavaScript, you’re able to appreciate the work React Native is doing behind the scenes. If you are excited about learning more, you can check out their documentation to get to know about other things that React Native has to offer. If you liked this article and learned something valuable today, do share it with your friends!
