Easily Integrating Salesforce and Slack – TUTORIAL

Combining the power of a Business Messaging App like Slack with a Customer Relationship Management Tool ( Salesforce ) can allow you to do a lot more interesting stuff than you imagined. If you’ve worked in a company/organization that uses Slack, you know how easy and effective it can be for making communication and sharing data among teams. And since a lot of people are already actively using slack. It makes sense to Add Integrations to Other Services ( For instance, Salesforce ) and essentially bring all of the stuff to one place.
To give you an idea of how useful this integration is – Here’s a demo of using the Salesforce + Slack Integration in a real Slack Channel
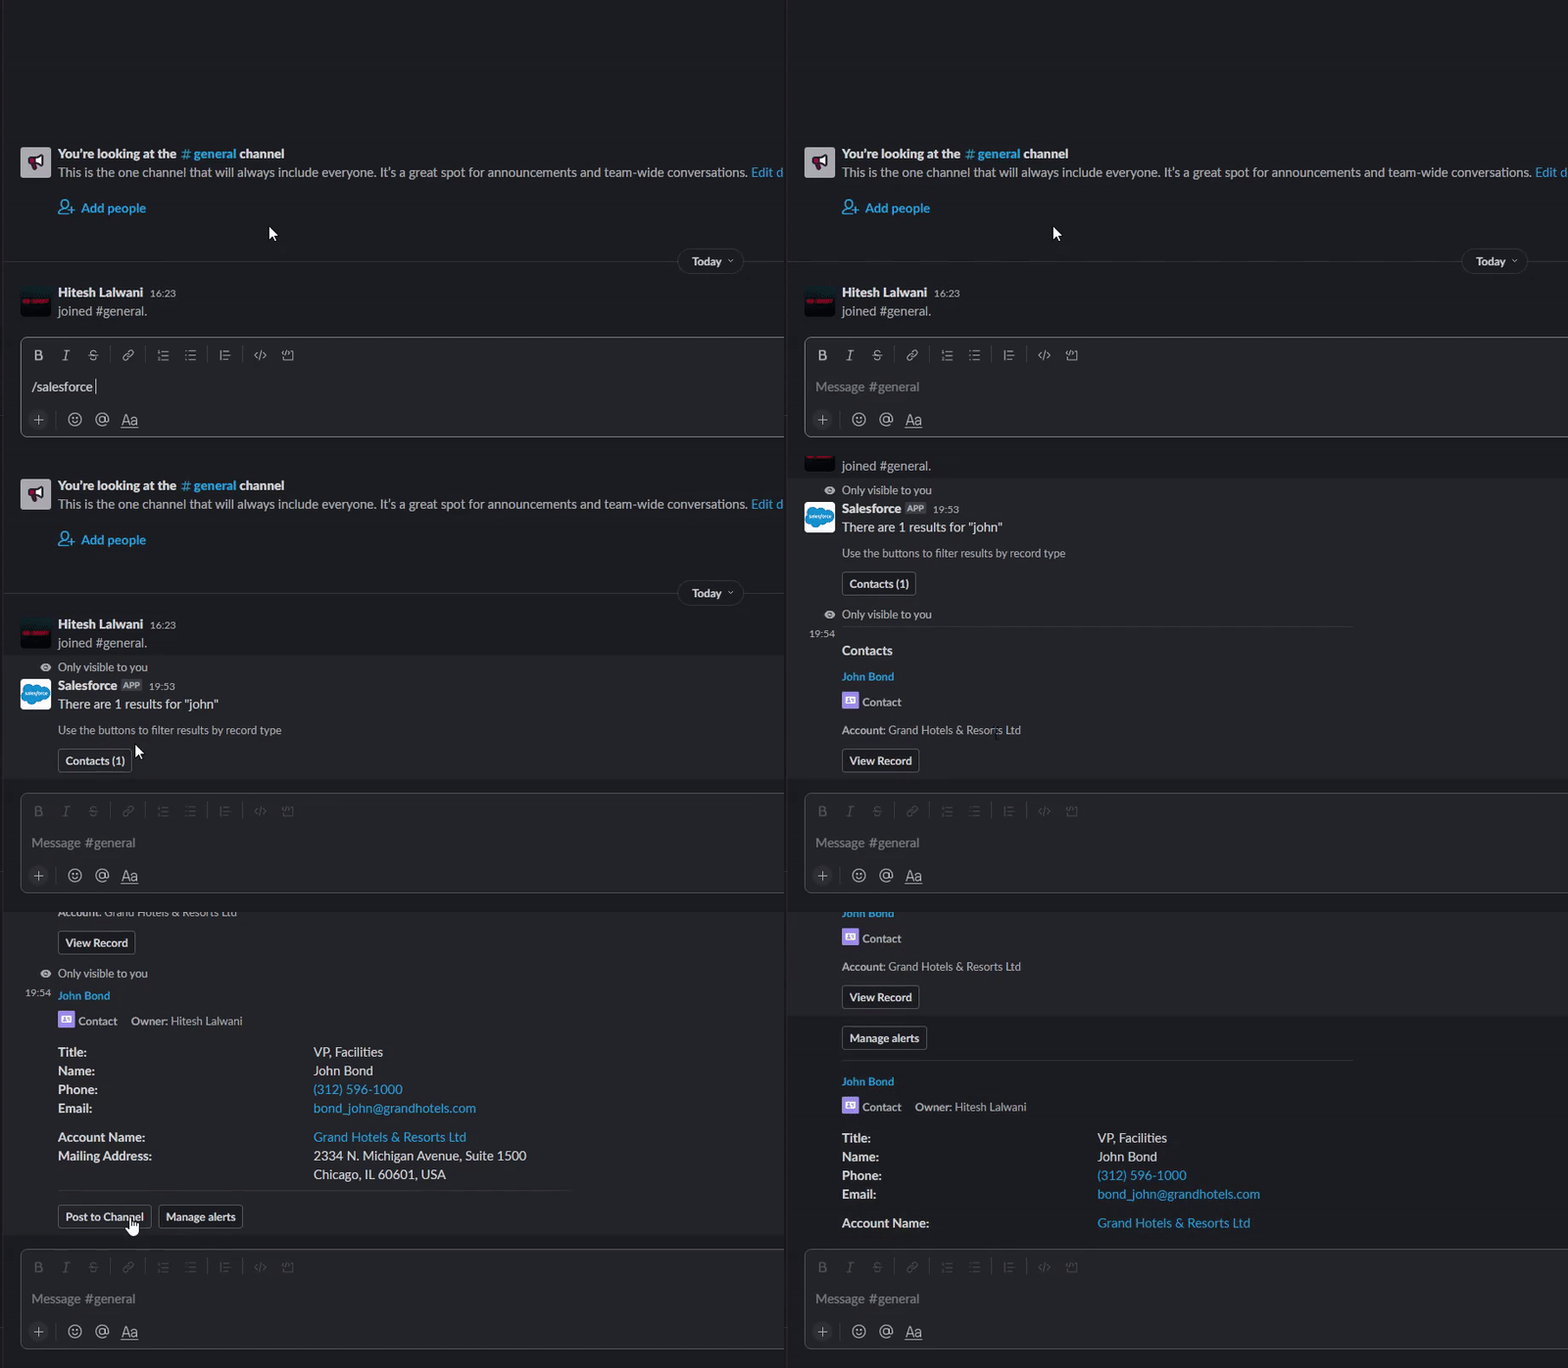
In the above demo, we Shared The Contact Details of a Salesforce Contact without even opening Salesforce – not even once. And the whole process took less than 20 seconds!
Whereas normally, you’d have to
1) Open Salesforce
2) Login
3) Lookup the Contact
4) Copy and Send The Details
And not to mention how the integration neatly formats the Contact Information with proper spacing & even generates clickable links for things such as Phone Numbers & Emails.
Hopefully, that got you excited enough to try out Salesforce + Slack Integration and explore all of the wonderful features that it has to offer. And do not worry, as the whole process will barely take half an hour and it’s an investment worth spending time on.
Note: There are tons of tools available in the market that allow you to Instantly Connect Salesforce & Slack, but the problem is that these tools ( Zapier, IFTTT, etc ) usually require a premium membership for doing something that could be achieved for free! However, this option might make sense for you if you need to add even more things to the table and money is not the main concern for your organization.
Table of Contents
Creating a Test Slack Channel to Test the Integration
Before actually using the Salesforce + Slack integration throughout the Slack Workspace, it’s a good idea to create a private channel to test the functionality and then delete it when you’re ready to use it everywhere
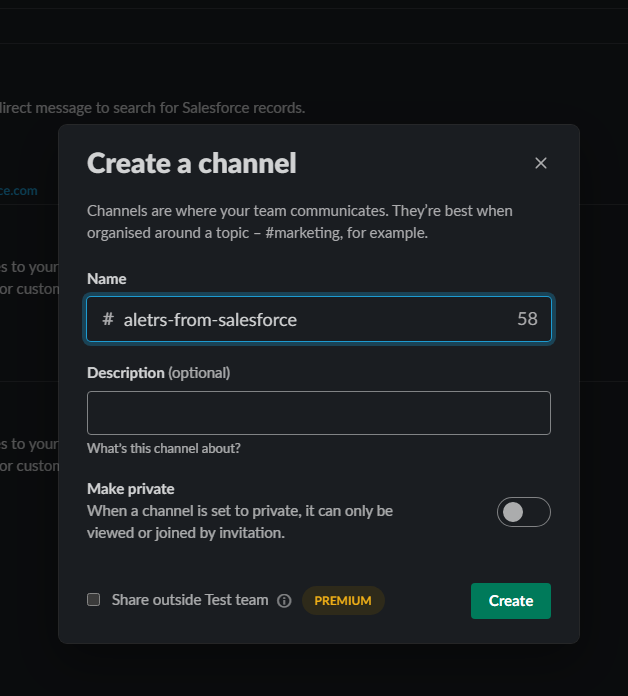
For this tutorial, we’ll be creating a test channel called alerts-from-salesforce, and since this is a test channel we don’t need to worry about the current workflow being disrupted for others
Installing Salesforce Plugin for Slack
- On the top left of the Slack Workspace, you can find an Apps section that opens up a wide catalog of Apps/Tools that you can integrate into your Slack Workspace
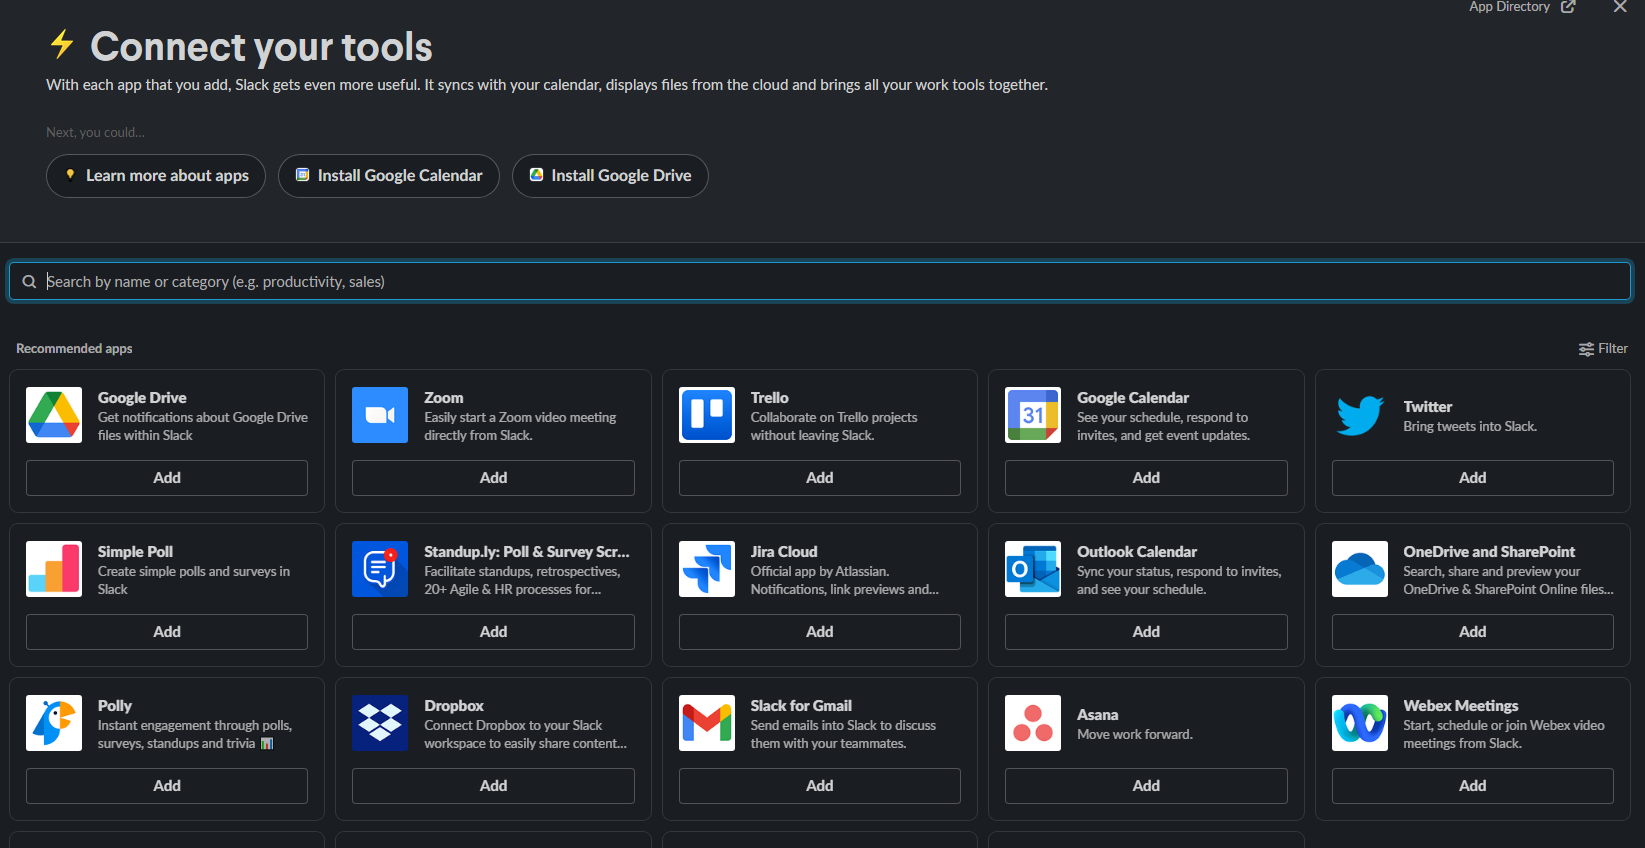
- Search for the Salesforce App and Add the first option that comes up

- Doing so should open up the following window clearly showing the three steps for integrating Salesforce into Slack
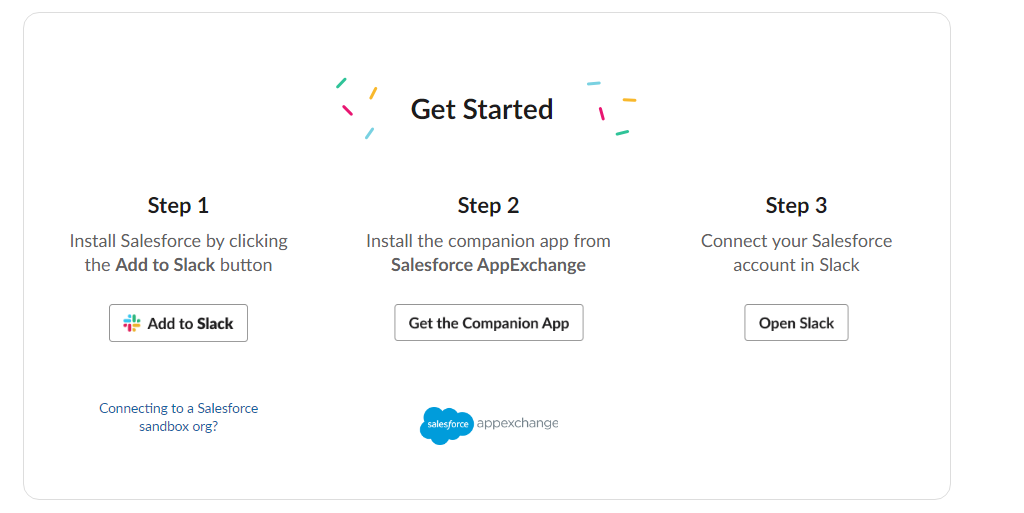
- Do not worry about all the three steps just yet, as we’ll be discussing them later on, for now just click on Add To Slack Button and allow any Permission Prompts that might pop up
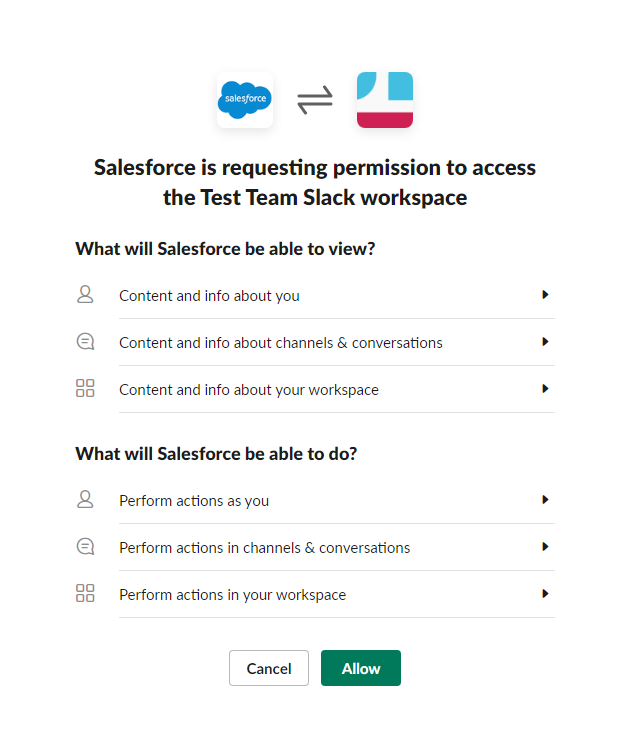
And that’s it! The one-way integration between Salesforce and Slack is now complete. You can now access the Search Functionality ( the one shown in the demo ) by simply using the /salesforce [search term] command in any channel throughout the Slack Workspace
By default, the Slack Search for Salesforce only finds records in the following 6 objects
- Accounts
- Opportunities
- Leads
- Contacts
- Cases
- Tasks
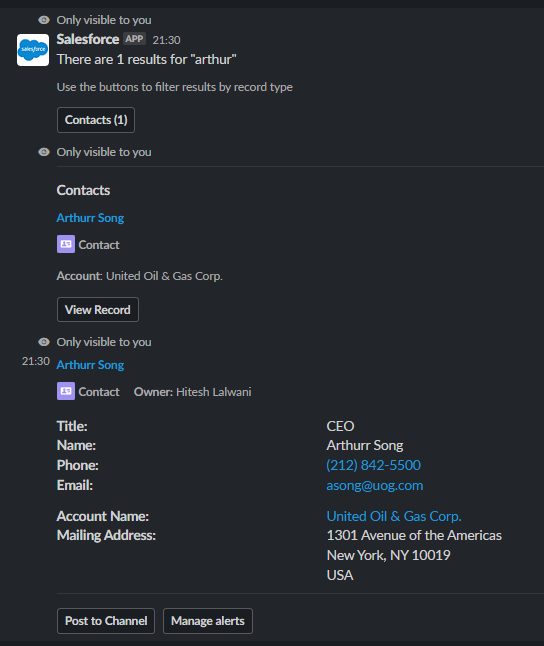
Try to search something like a Contact / Account and you should receive a message only visible to you allowing you to have a look at the search results and choose the appropriate one before posting it to the channel
One way Integration vs Two Way Integration – Salesforce + Slack
The one-way connection that we just established between Slack & Salesforce is pretty limited due to the following reasons
- Allows only one-way data transfer between Salesforce and Slack
- This only allows features such as Search to work and that too without support for custom salesforce objects ( by default it only supports one of the 6 standard objects – Such as Contacts, Accounts, etc )
- Salesforce + Slack integration also supports Message Alerts for critical situations such as Modifying a Record / Deleting a Record for a specified Salesforce Object and this is simply not possible with one-way integration
To overcome that, we have to make the integration two-way – meaning that after installing Salesforce Plugin on Slack, we have to install the Slack Plugin on Salesforce
To do that,
- Open the Salesforce Dashboard and click on the App Launcher to be presented with a menu as shown below
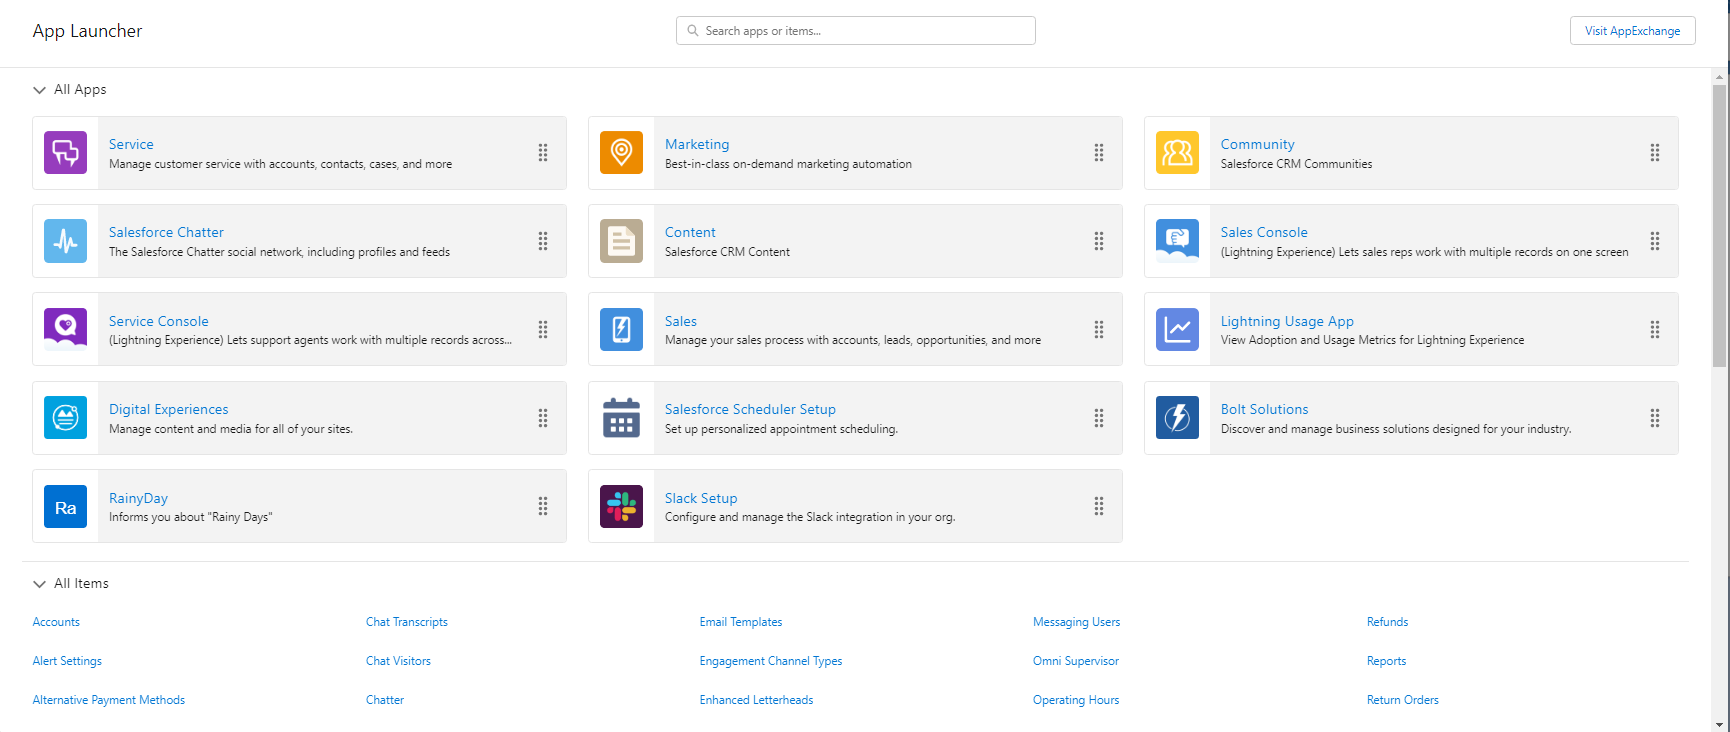
- On the Top Right corner, you’ll find an App Exchange Button – This is basically like an App Store but for Salesforce Apps.
- Search for Slack and click on the Install Button – To install the Slack Plugin on your Salesforce Domain
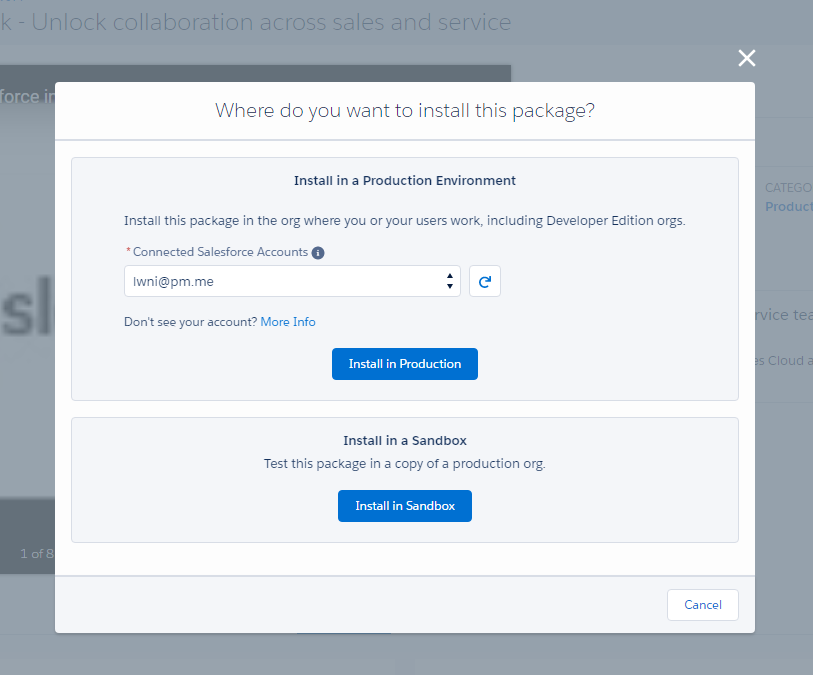
- Depending on how critical your organization is, choose between Installing in Production or Installing in A Sandbox Environment. Since this is an educational tutorial, I’ll be going ahead with Installing the Slack Plugin on Production
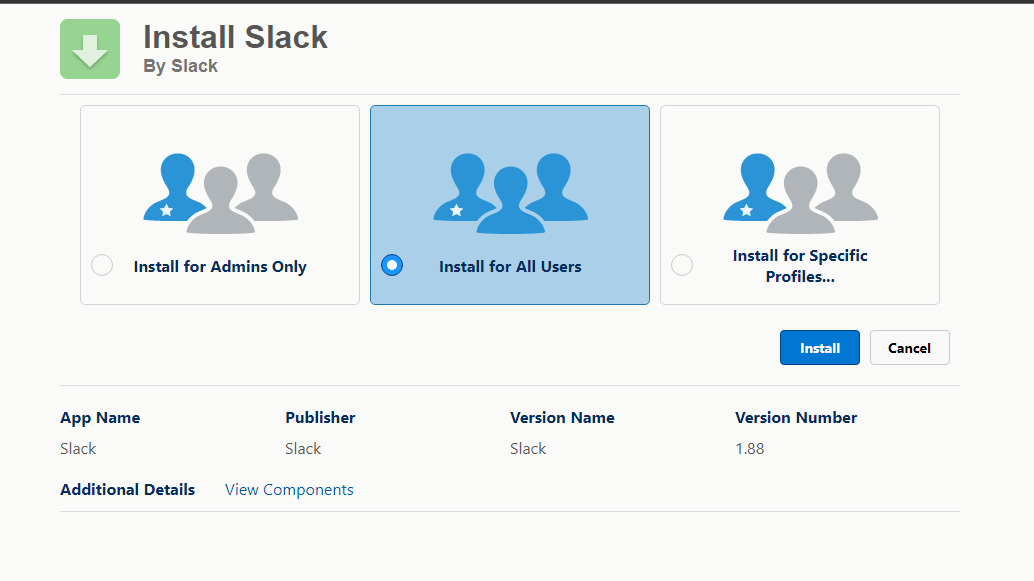
- The last option might be particularly useful if you’re planning to integrate slack for specific groups at your organization – such as Administrators or Sales Department depending on your needs choose the appropriate option and hit Install
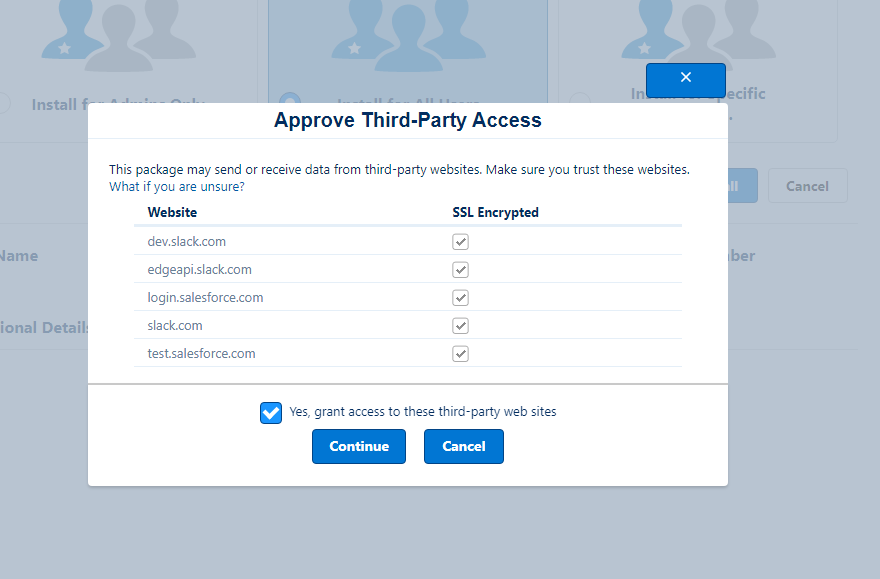
- Approve any Third Party Access Permissions and within a few minutes, you should be good to go!
Note:
A Few people might get the following Timeout error when trying to install Slack – but there is usually no need to worry about it as sometimes the process takes a little longer than expected and you should be notified with an email containing the Installation Confirmation

Setting up the Salesforce Slack Plugin
After installing the Slack Plugin – The Salesforce Dashboard should now have an option called Slack Setup and as you guessed this is the tool we’ll be using for setting up the connection between Salesforce and Slack
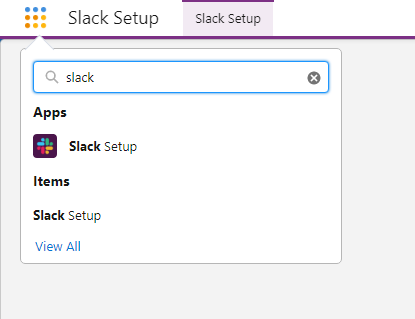
For now, click on the Slack Setup Option and you should see the following screen
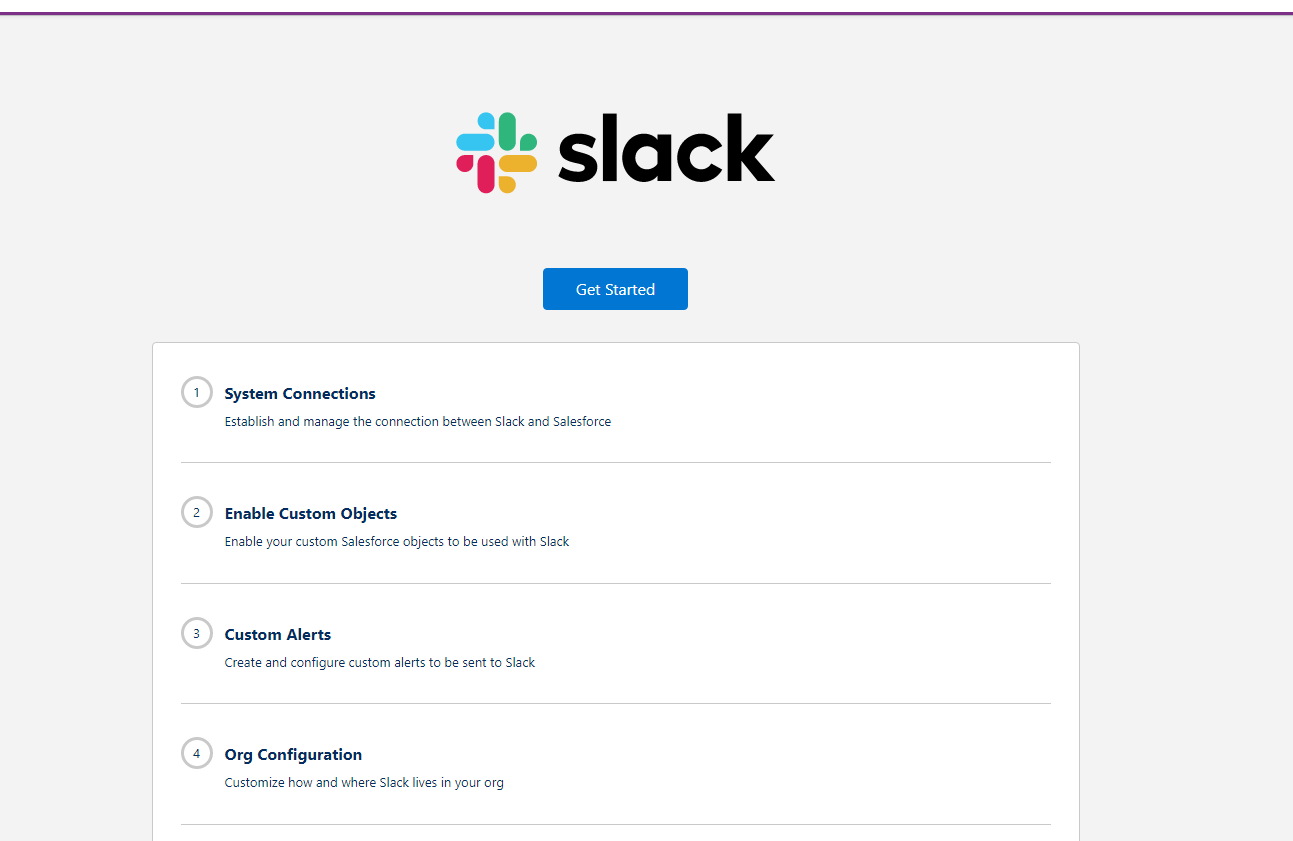
System Connections
This part is essential for Salesforce to have access to your Slack workspace & Channels so that it has enough permissions to automatically send alerts
To add a new System Connection, simply click on the Authorize Button and login to your slack account and you should be good to go

Enable Custom Objects
As discussed, a two-way connection would allow the integration to be able to use Custom Salesforce Objects. For demonstration purposes, we will be Enabling a Custom City Object.
The Custom City Object is a sample object that stores a list of the Cities and the current Rain Status for these cities.
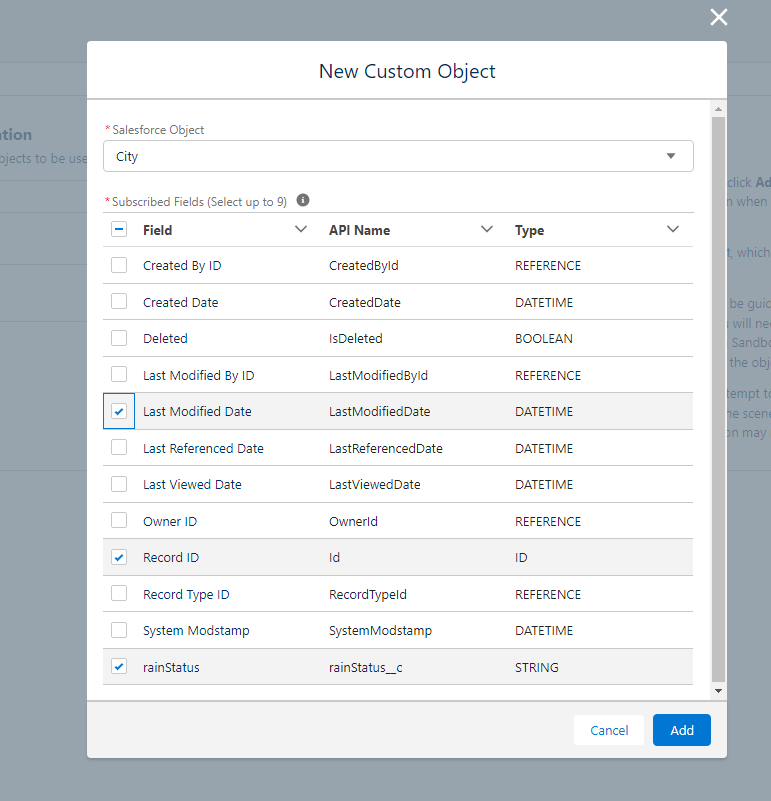
To keep things simple, we’ll only be importing three fields from the Salesforce Custom Object as we do not need most of the fields such as System Mod Stamp or Owner ID when sending the City Info on a Slack Channel
Click on Add and then Activate the Custom Object to finish the procedure
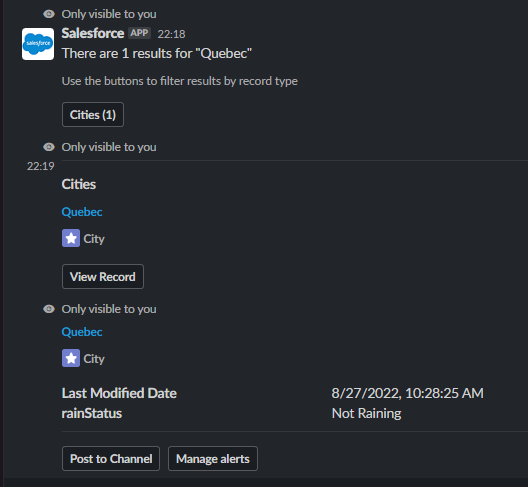
To test things out, simply run the /salesforce Quebec command inside a Slack Chat to see if Salesforce can find the result inside the Custom Object
If everything went alright, you should see the following message from Salesforce showing the correct search result
Custom Alerts
As discussed, Custom Alerts is the Highlighting Feature of this Two-way integration between Salesforce and Slack as they help in getting instant messages/notifications on the Slack Channel as soon as something Critical ( such as deletion of a record/modification of a record ) happens
For this tutorial, we’ll be setting up a Contact Name Changed alert that will alert us as soon as the First Name of a Salesforce Contact has been modified

To create a new Custom Alert
- Fill in the Alert Details such as Alert Name and the Object for which the alerts are being sent
- There are two types of alerts – Object Level Alerts and Record Level Alerts to explain the distinction between them, an Object Level Alert notifies you whenever the First Name of ANY CONTACT is changed, whereas a Record Level Alert gives you an option of choosing High Priority Contacts and allows you to only receive alerts for those selected records.
After choosing the appropriate option, click on the Next button and choose the First Name field along with the Changed Operator indicating that this alert will be fired as soon as there is a Change in the First Name Field

The last step in this process is to Choose a Message Destination for these alerts. This is where the Test Channel that we created earlier comes into the picture
Since we are testing the alert system and we don’t want to interrupt other people using the Slack Workspace, we will be redirecting the Salesforce Alerts to the alerts-from-salesforce Slack channel
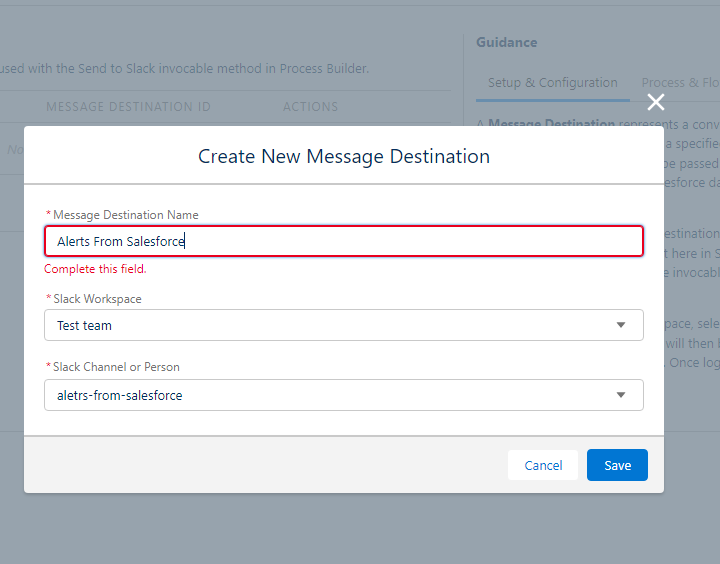
After creating the alert inside Salesforce, there’s still a little more setup required on Slack to make the Alerts functional
- Open the Salesforce App inside your Slack Workspace and click on Add A Bulk Alert

- Select the channel on which you want the alerts to be received
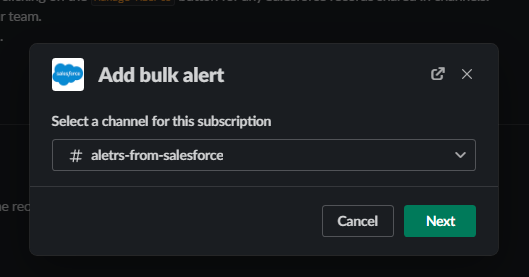
- Select the object for which you want the alerts – Contact Object in our scenario
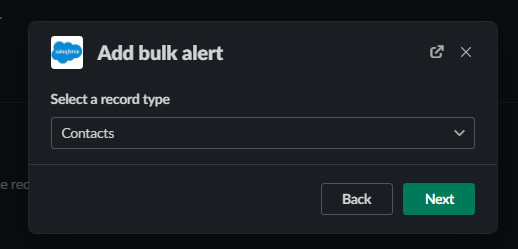
- This is where the Contact Name Changed alert that we created just now in salesforce shows up

- Select the Contact Name Change alert and click on Save!
Testing the Salesforce Alerts for Slack
Let’s try by changing the contact name of a person in the Salesforce Dashboard as shown below
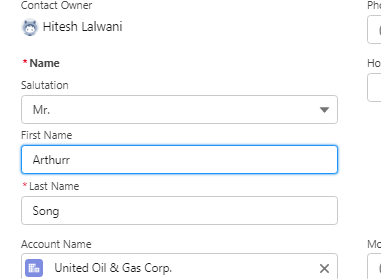
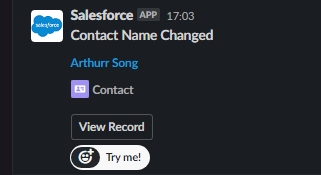
Here we simply add the letter r to the contact name Arthur and if everything went okay, you should instantly receive a Slack message in the specified channel indicating the Contact Name Change
Conclusion

Congratulations on coming this far and taking the time to integrate the two most powerful productivity tools – Salesforce and Slack. This step will surely streamline your workflow and will pay dividends while working with multiple clients. There are quite a lot of unexplored but awesome features such as Automation between the Salesforce and Slack platforms, a good next step would be to try them out and see how they fit your organization. If you liked this article and learned something new today, do share it with your friends
